How to Transfer a Site to AWS
Transfer a website from its existing server to AWS (Amazon Web Services).
Operating Spaces
Step 1 - Upload Backup to the new AWS Server
- Download most recent backup of the site.
- Go to the new AWS server.
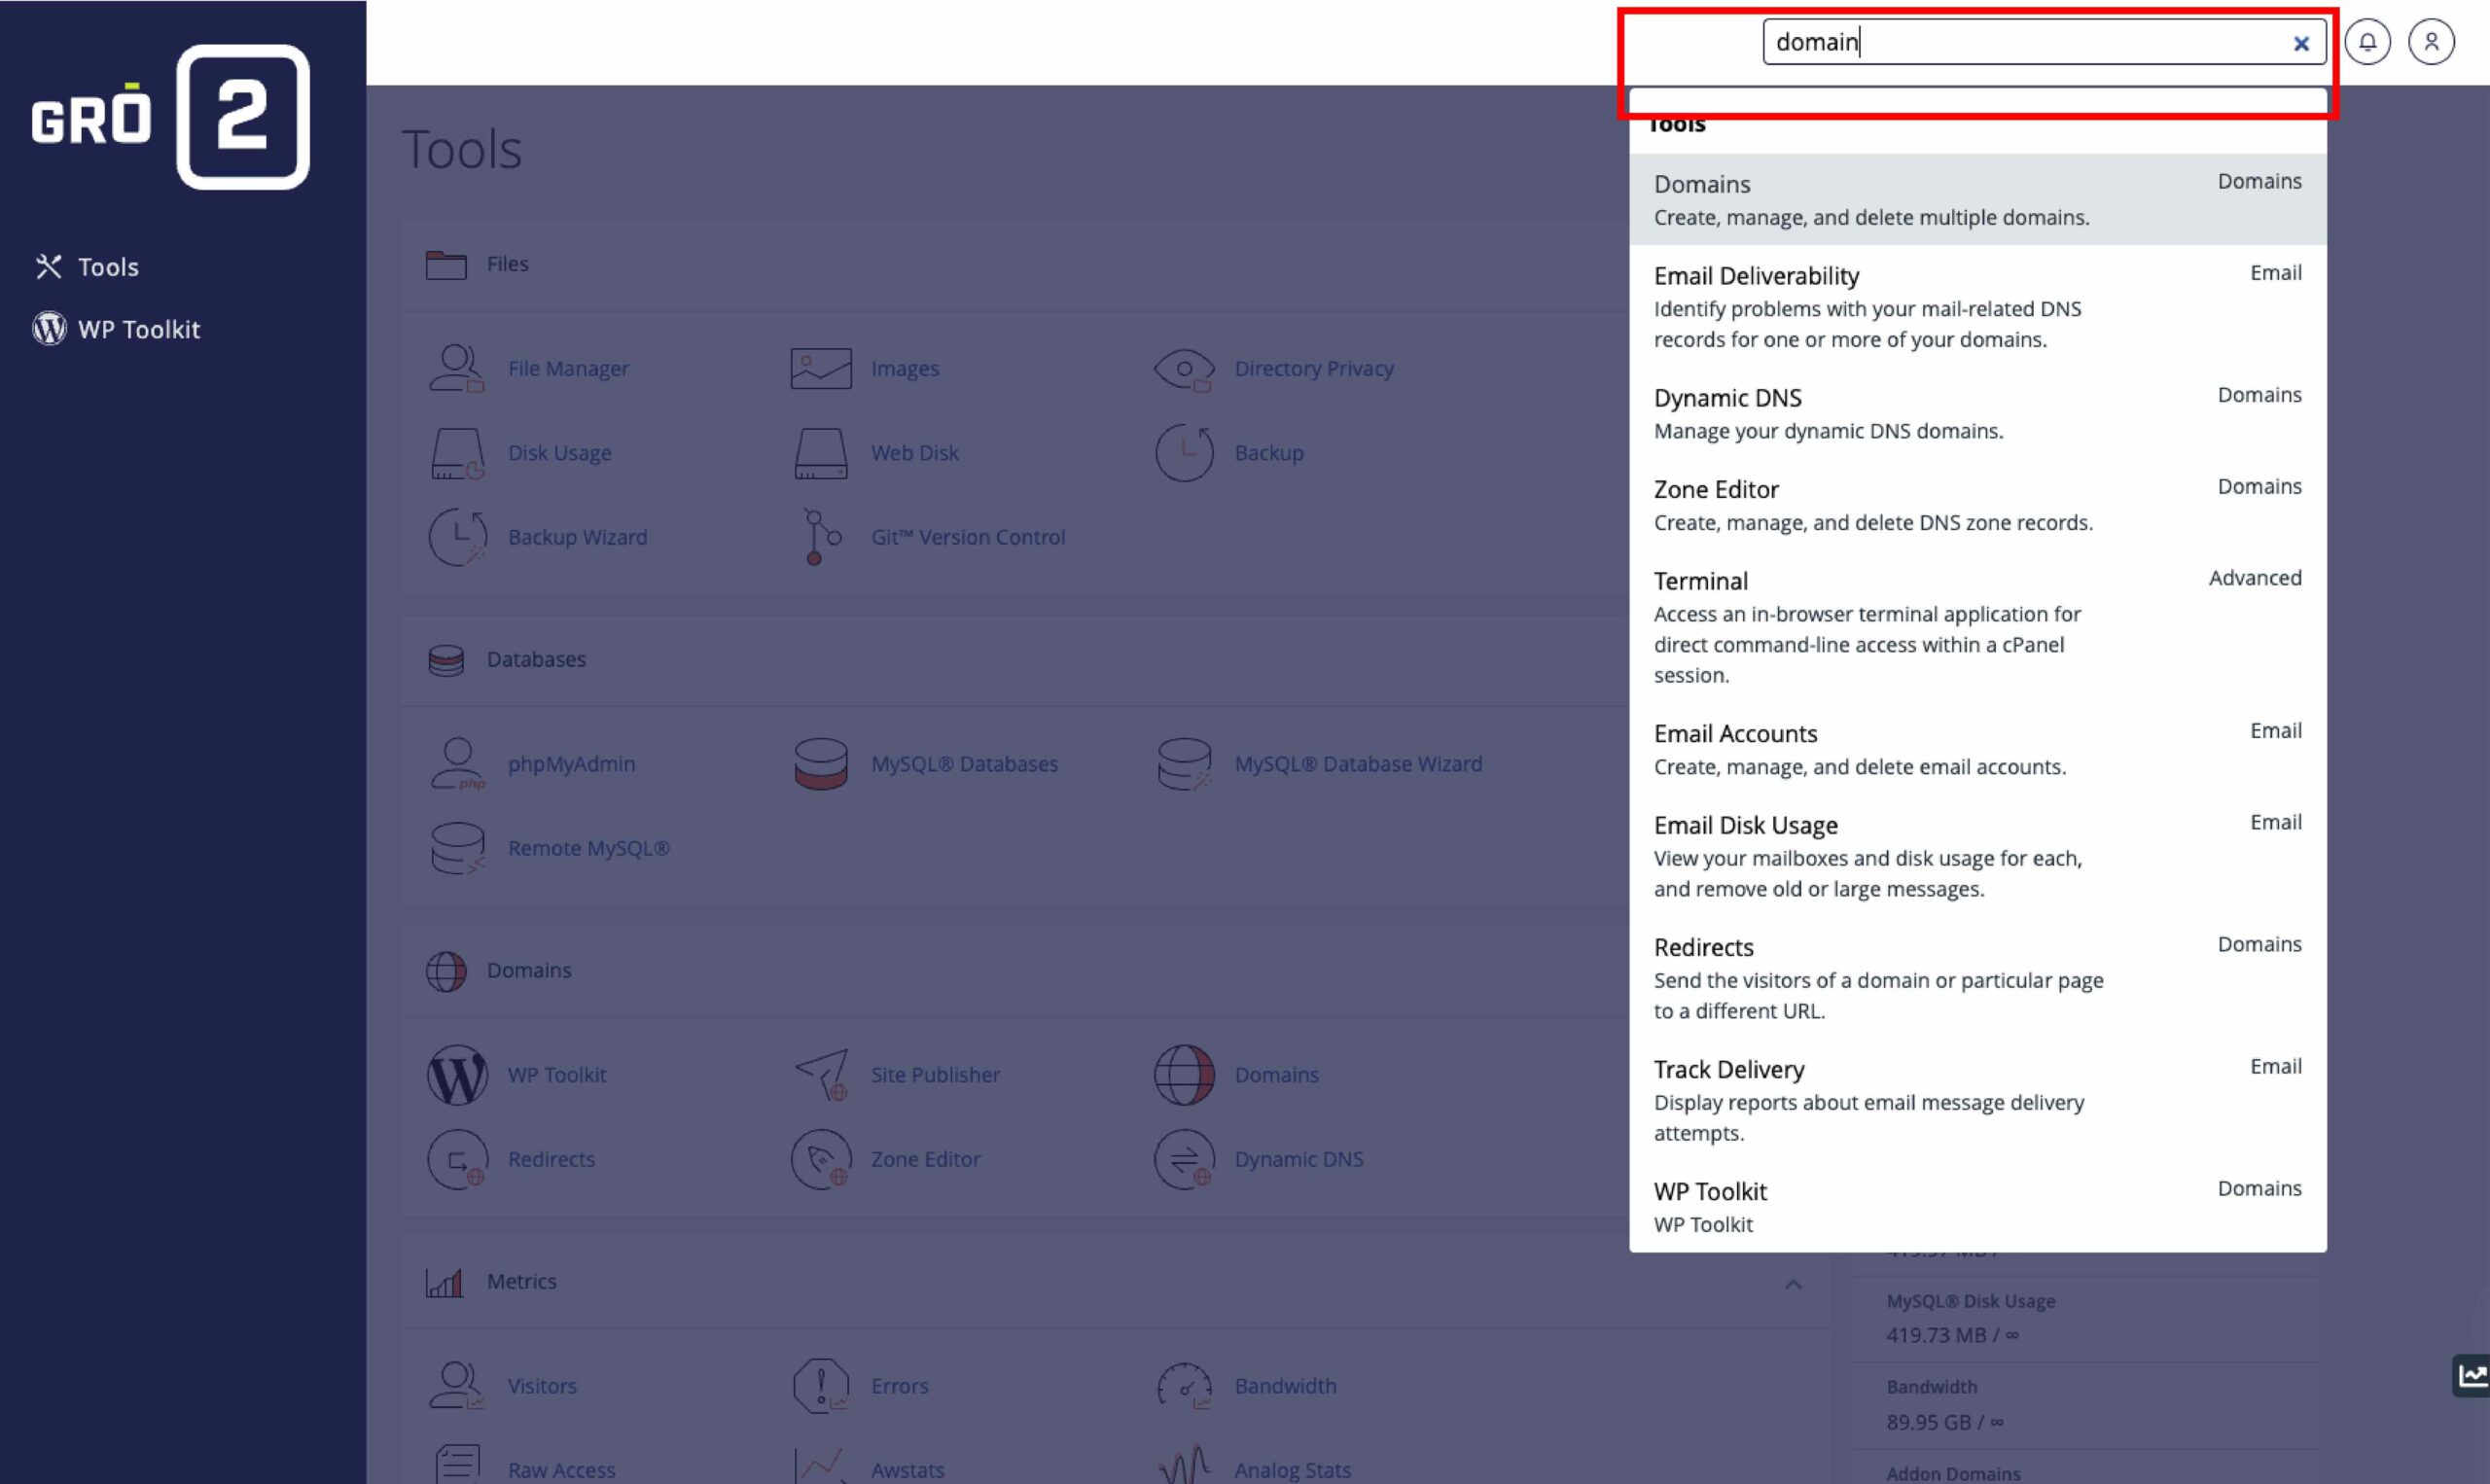
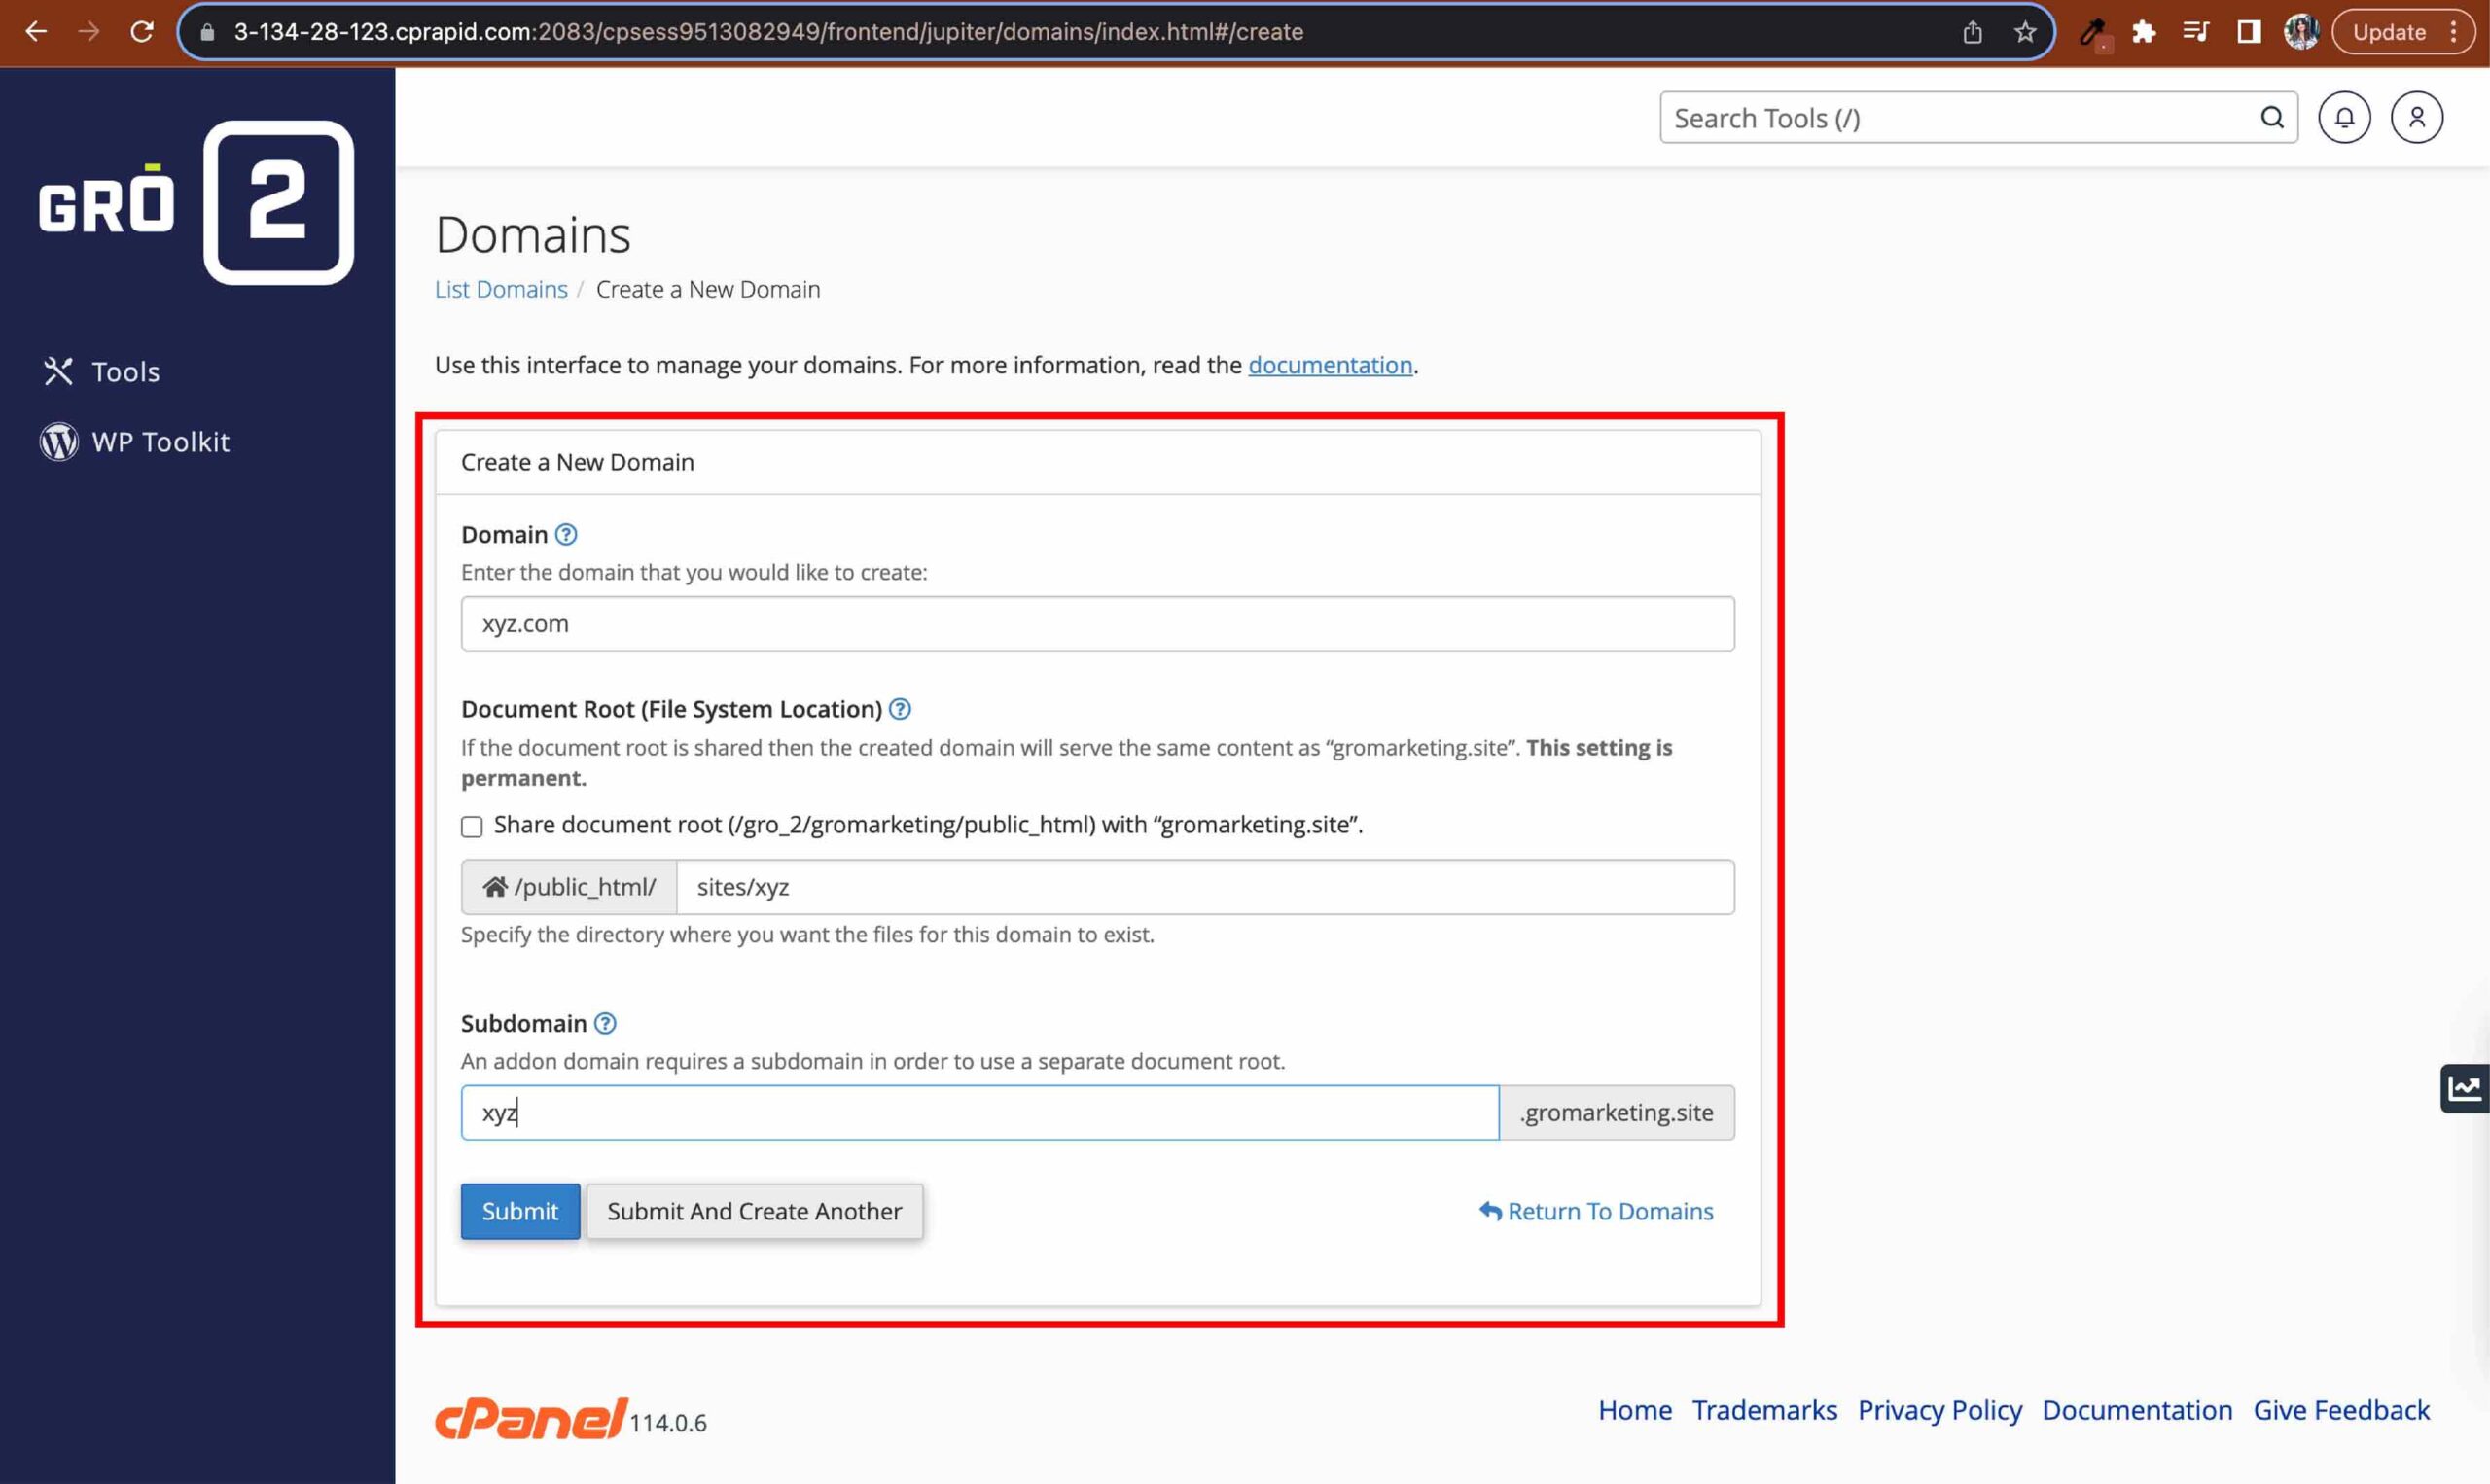
- Go to "Domains" and add a new domain.
- Uncheck “Share document root…”
- Add “sites/“ after “/public_html/“ - remove “.com”
- Submit
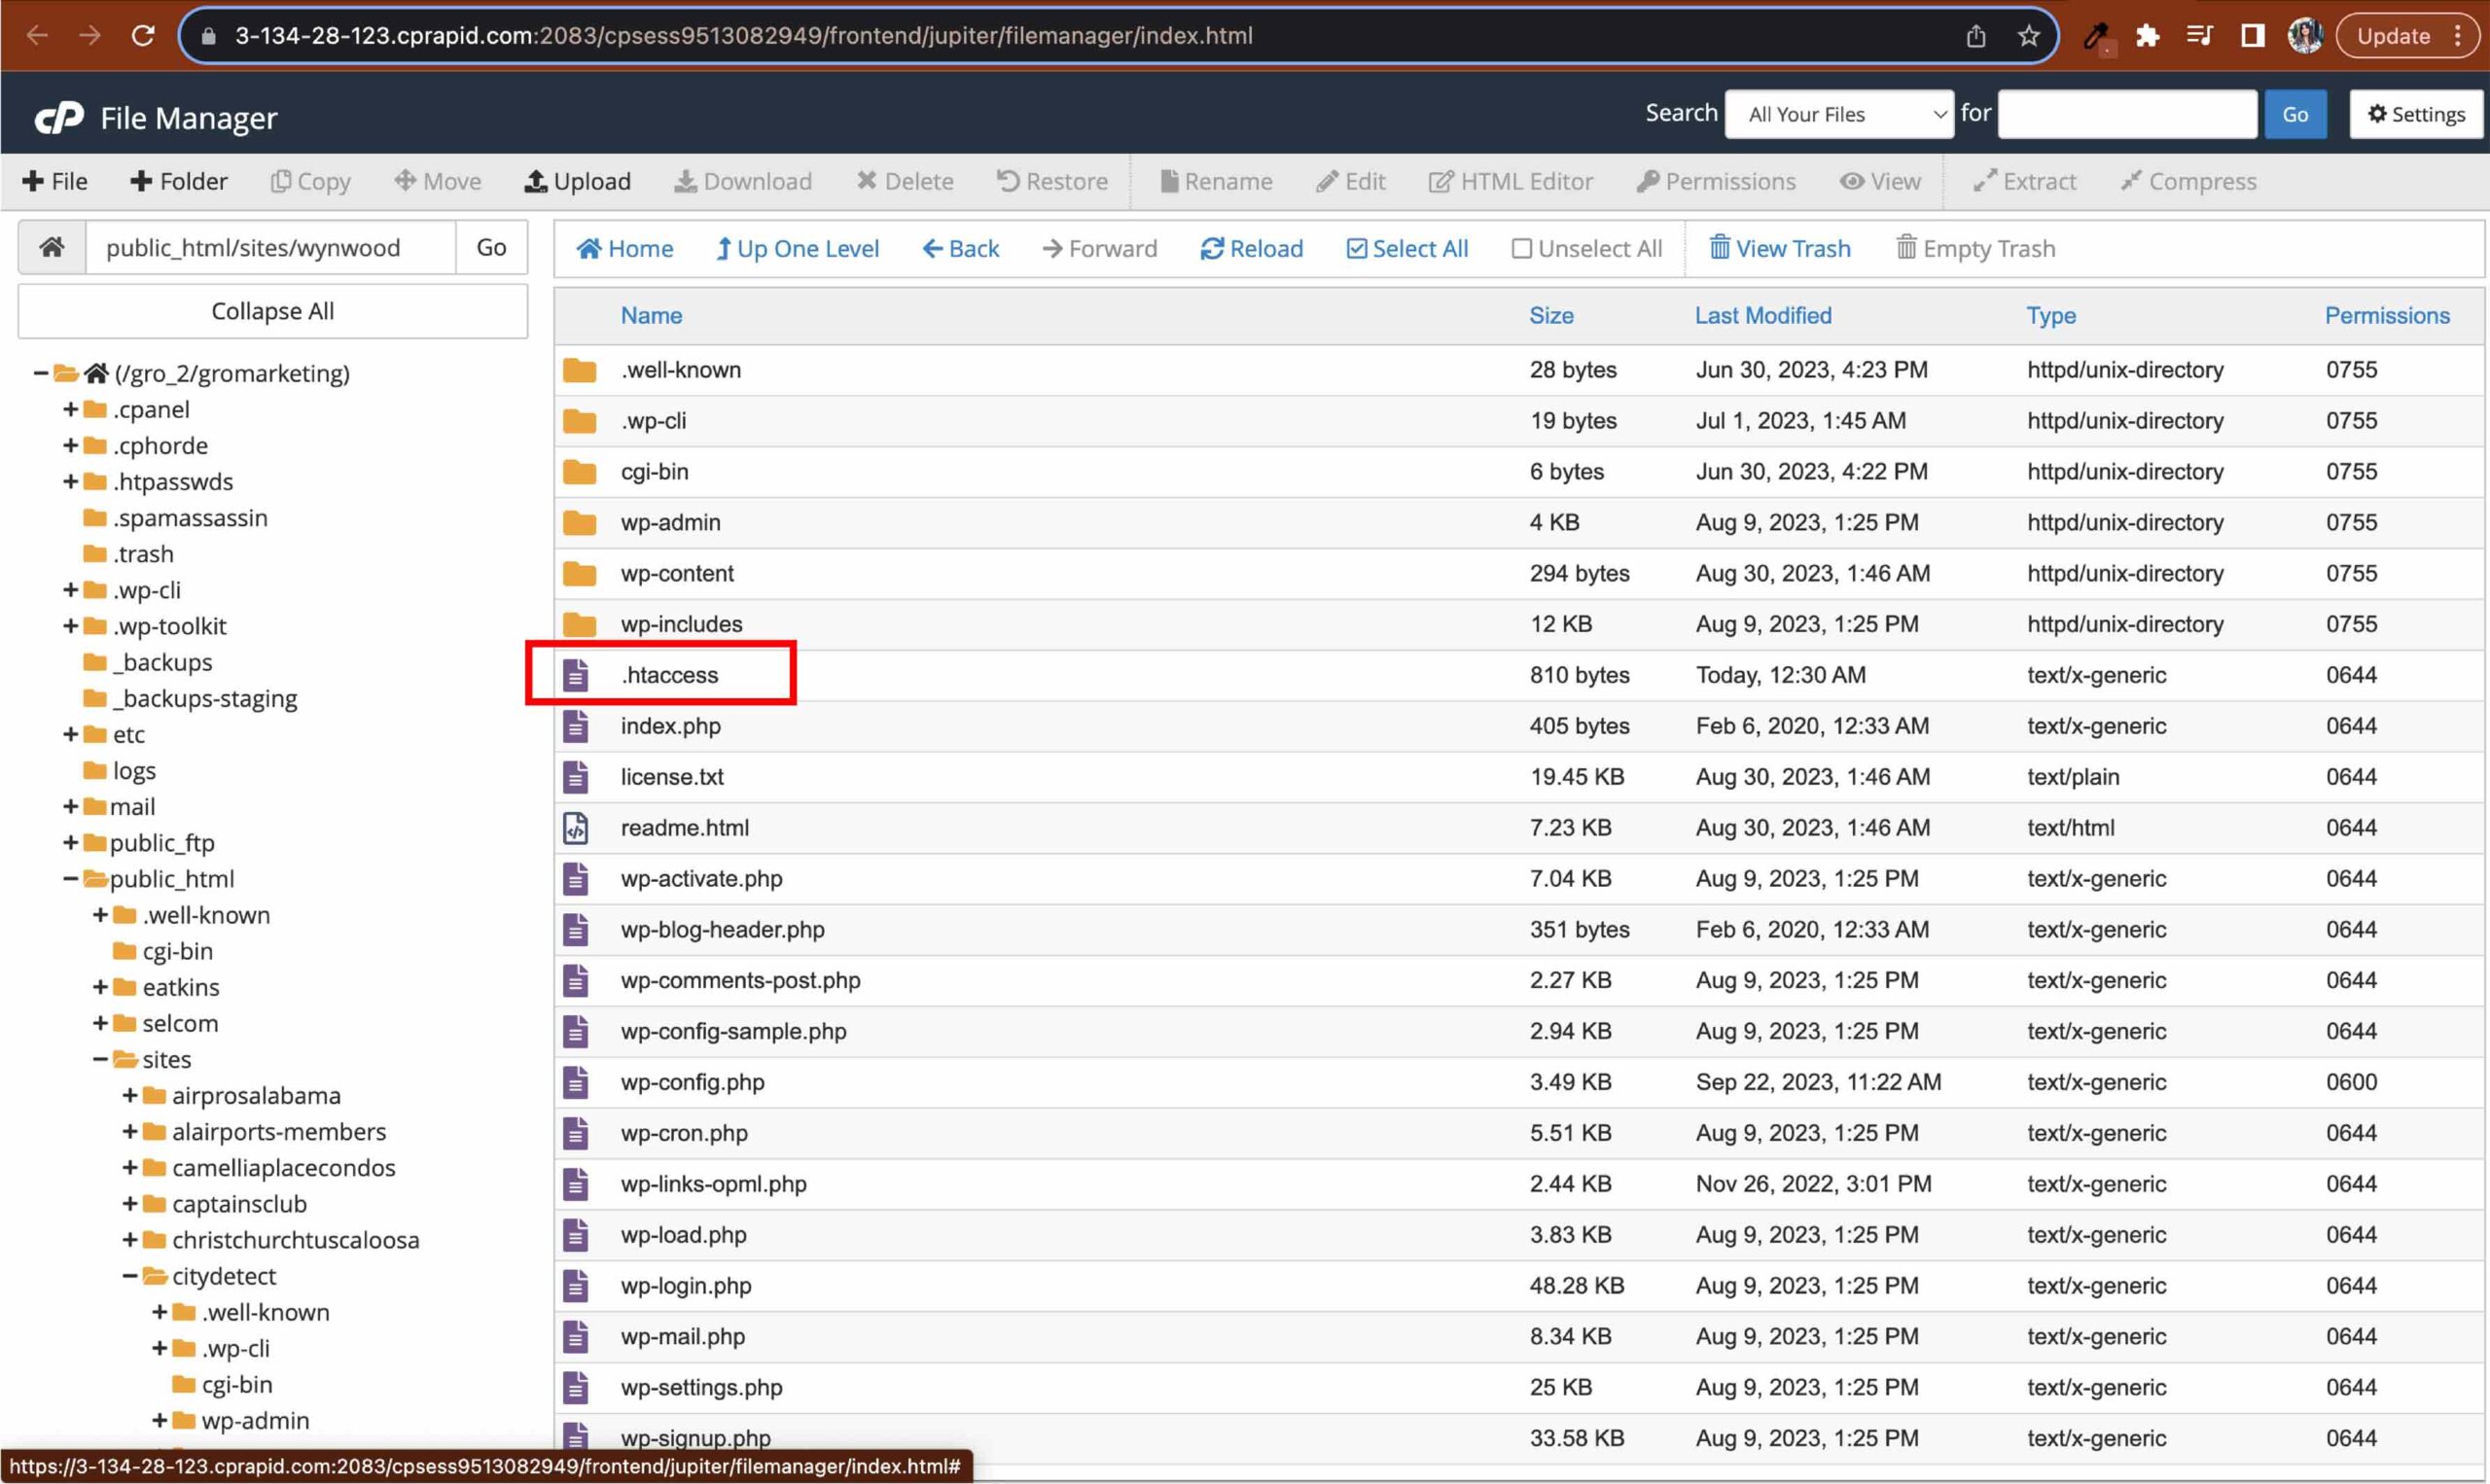
- Confirm new domain in File Manager.
- Remove .htaccess file under new domain folder in File Manager.
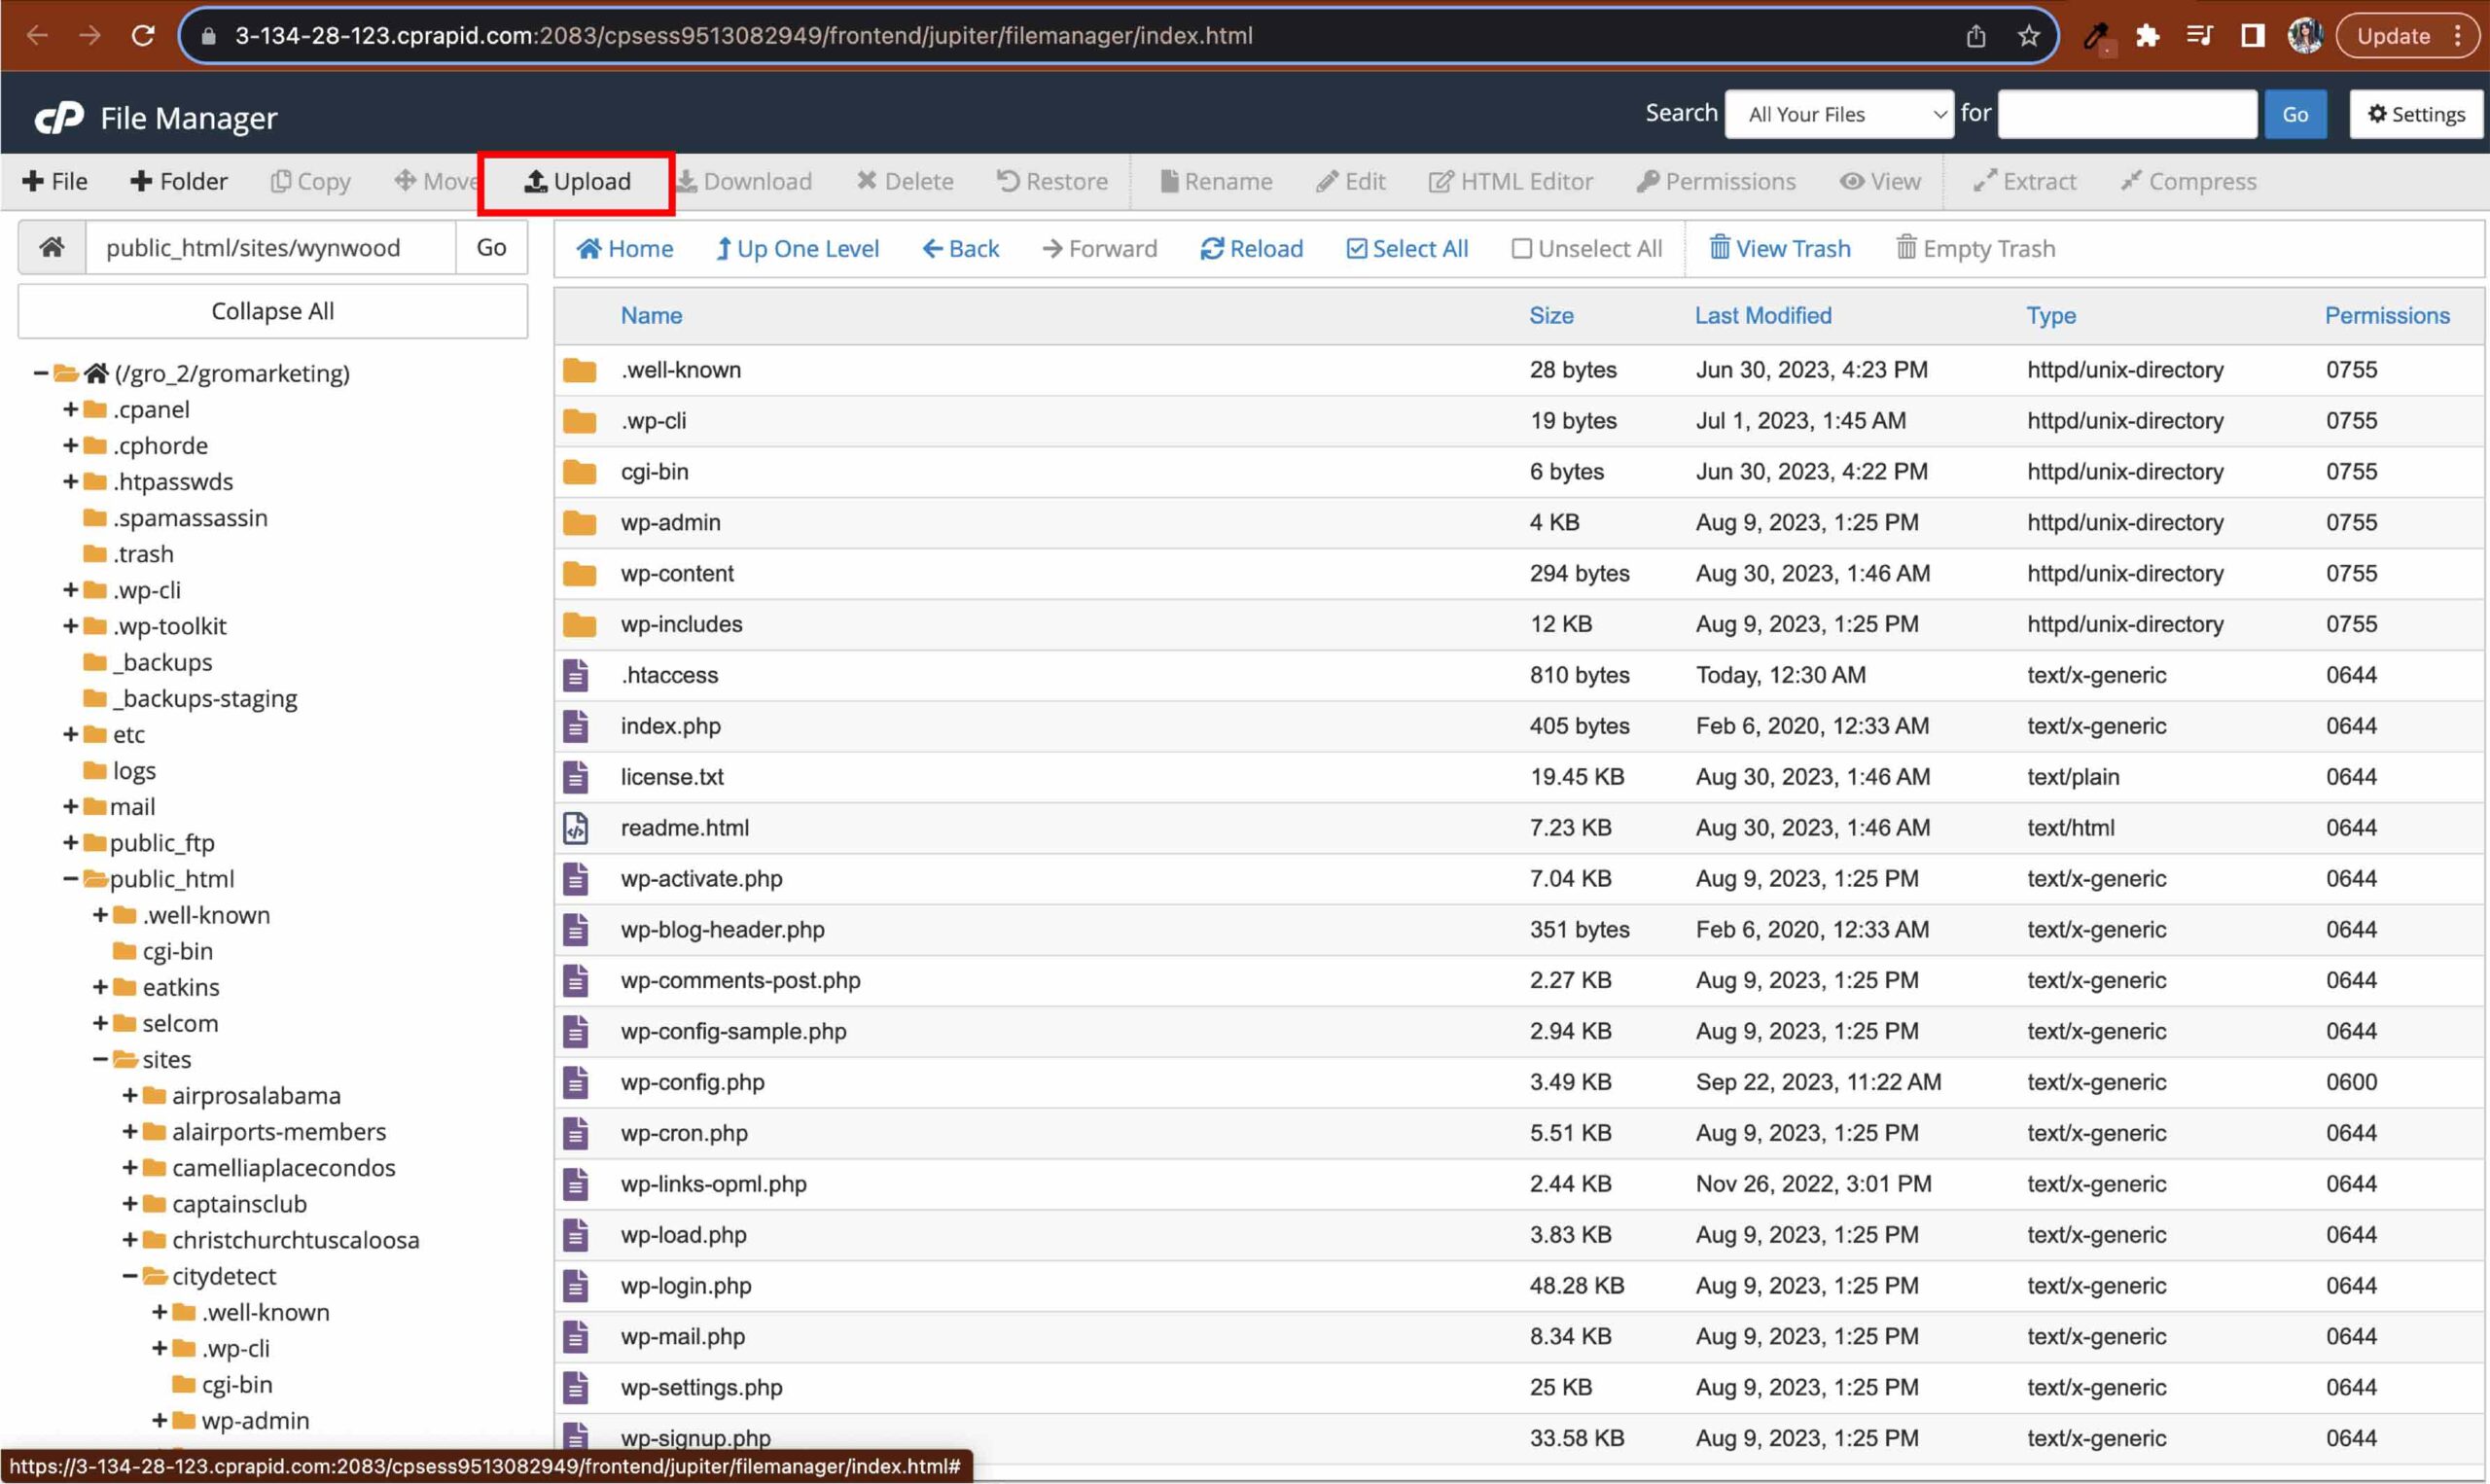
- Upload ZIP file to File Manager (the downloaded backup of site from first step).
Step 2 - MySQL® Database Wizard
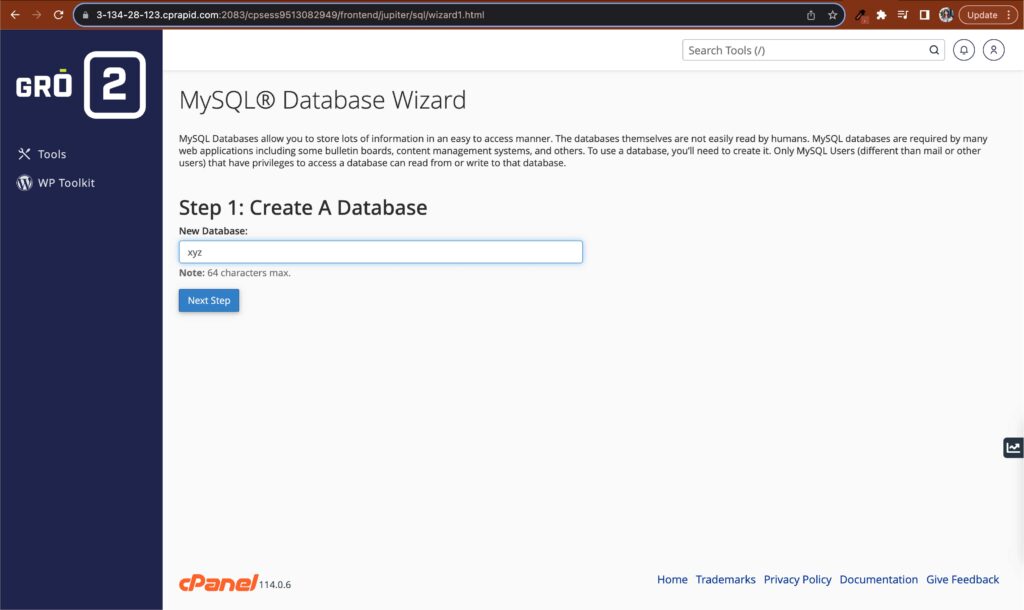
- In CPanel, go to MySQL® Database Wizard to create a new database.
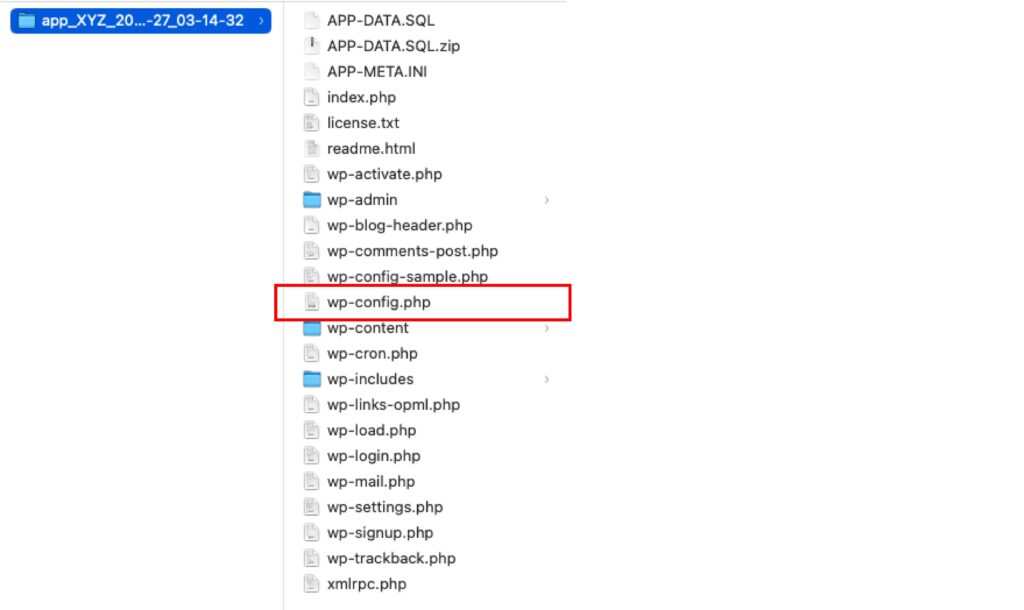
- Open wp-config from backup folder in a separate window.
- Copy and paste the database name, username, and passwords from the wp-confiq file to the database setup.
- Follow the steps and select all privileges.
- Select “Make Changes”
Note:
In any .php file, when a line starts with // or there's something between /* */, it's just a way of commenting in your code, meaning it's invisible to the server.
Step 3 - Final Steps
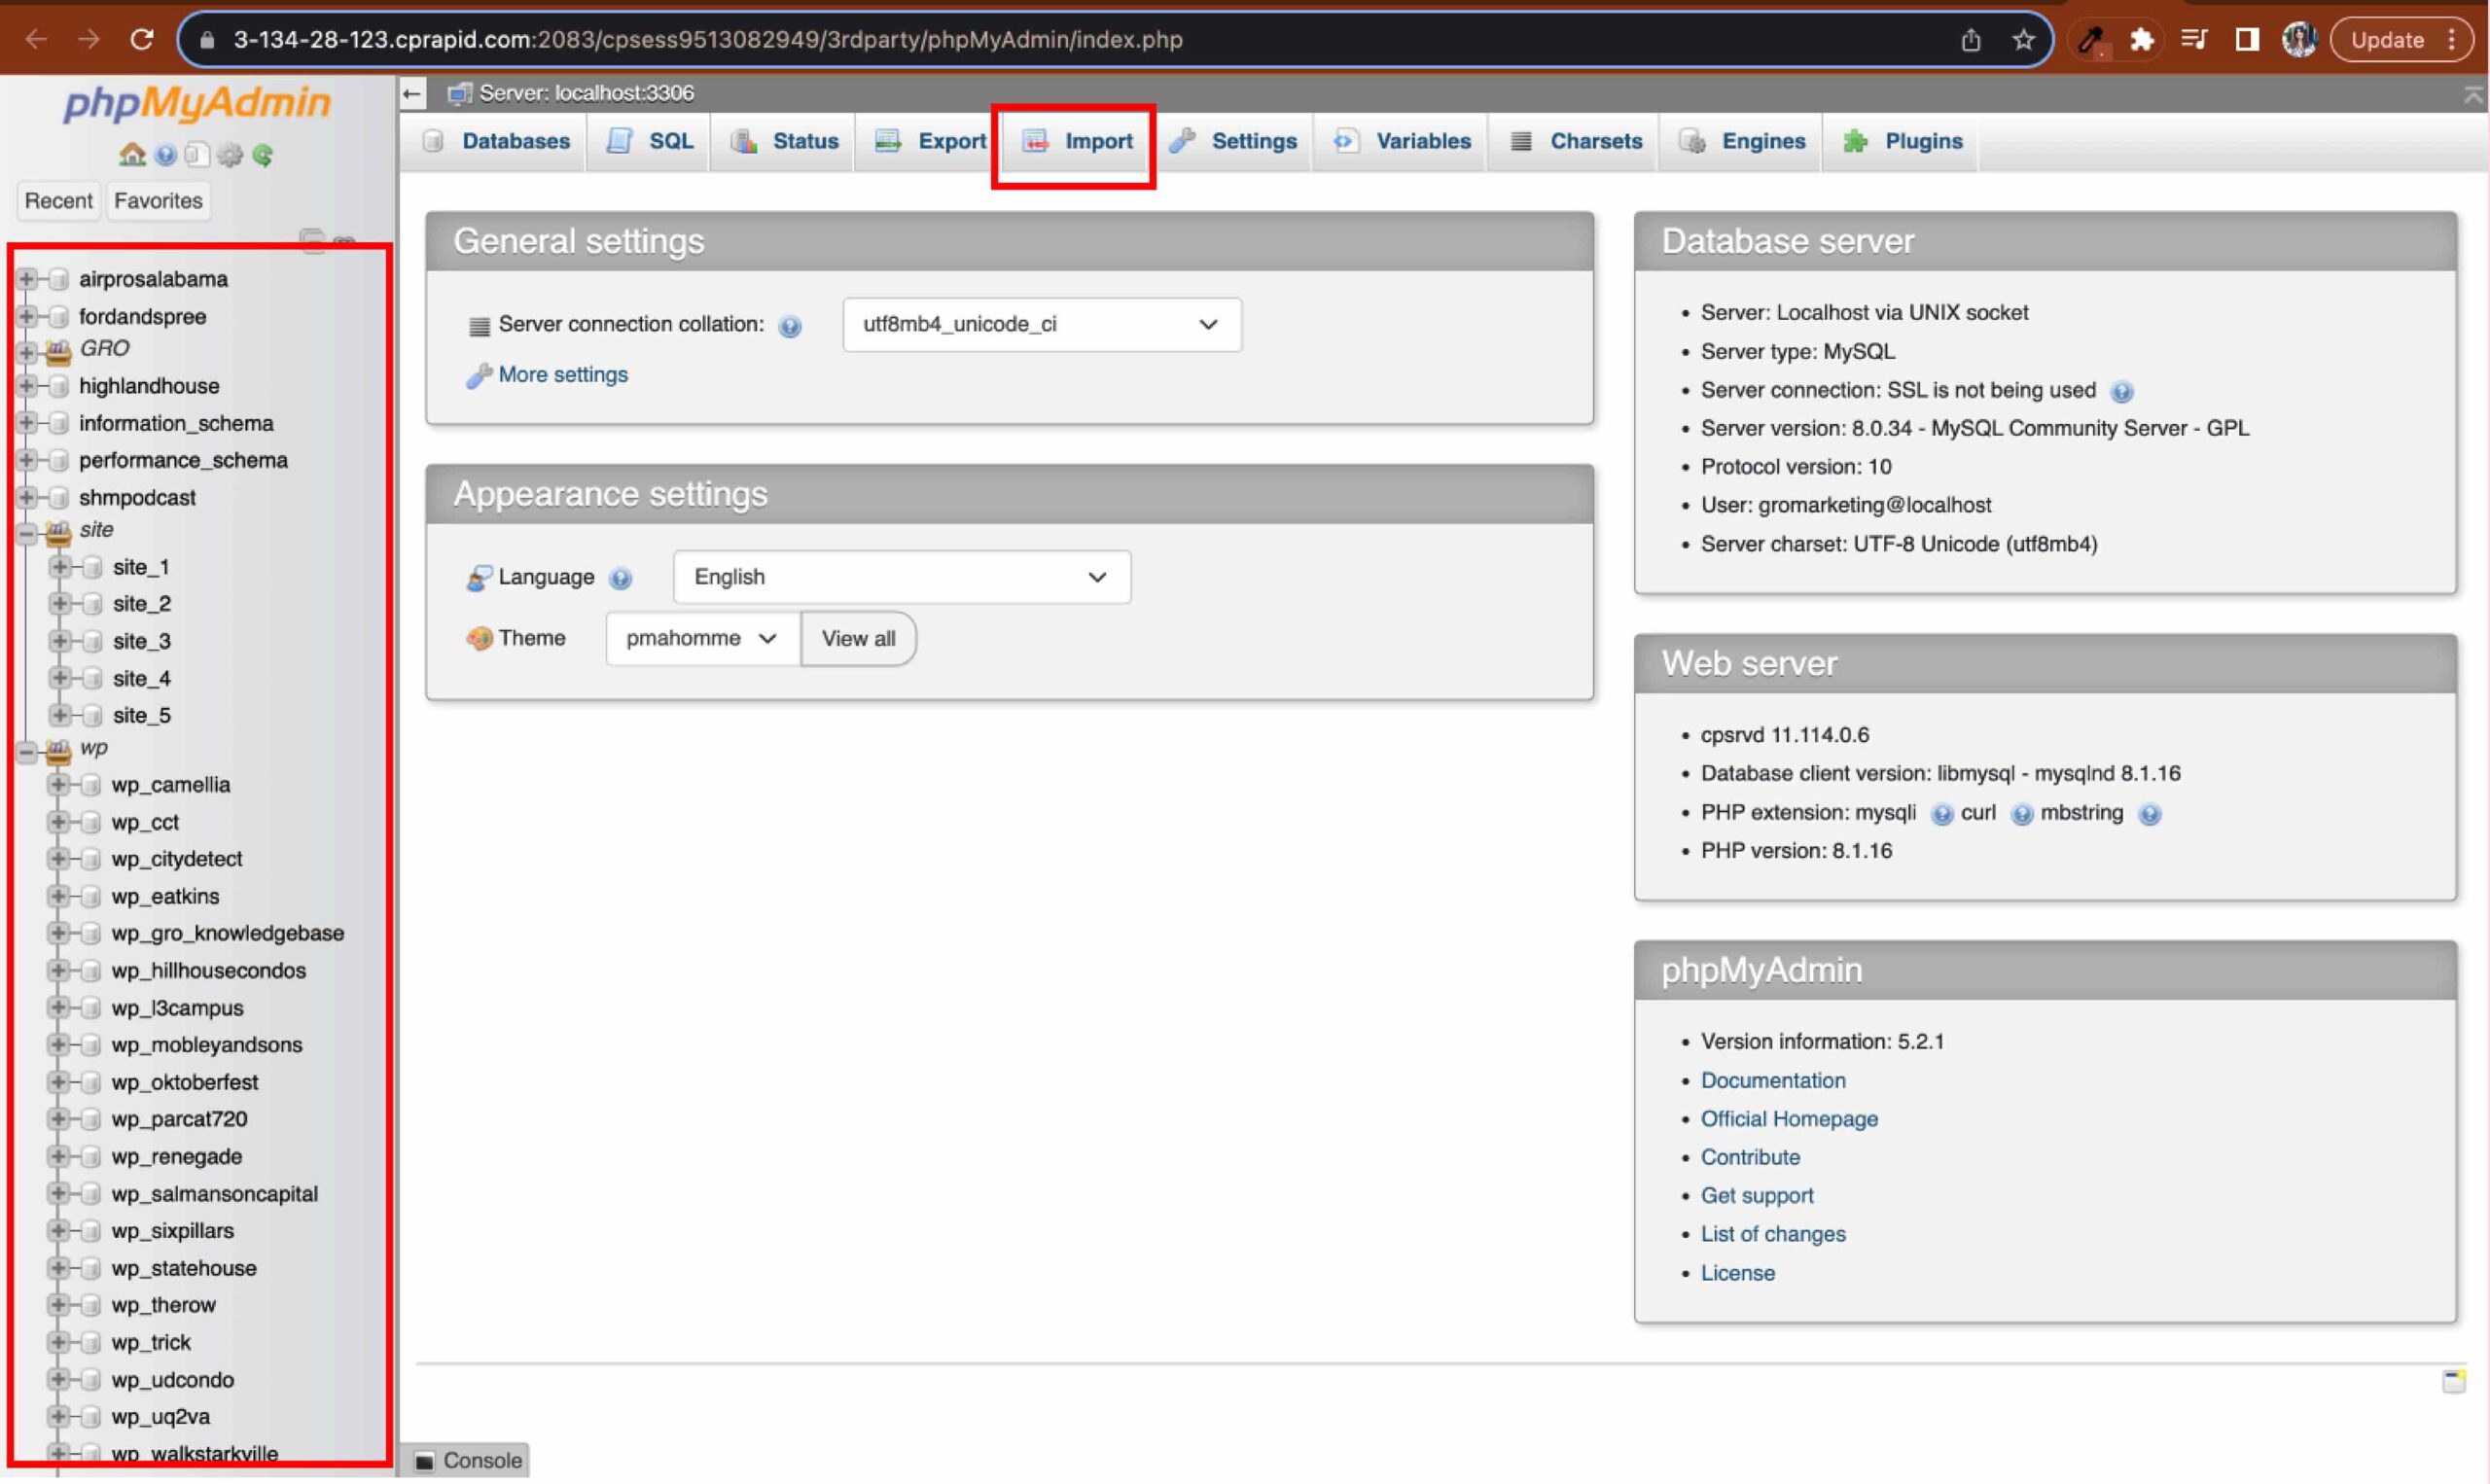
- Confirm the site is located in PHP MyAdmin in CPanel.
- Compress the SQL file from the site backup folder. (APP-DATA.SQL)
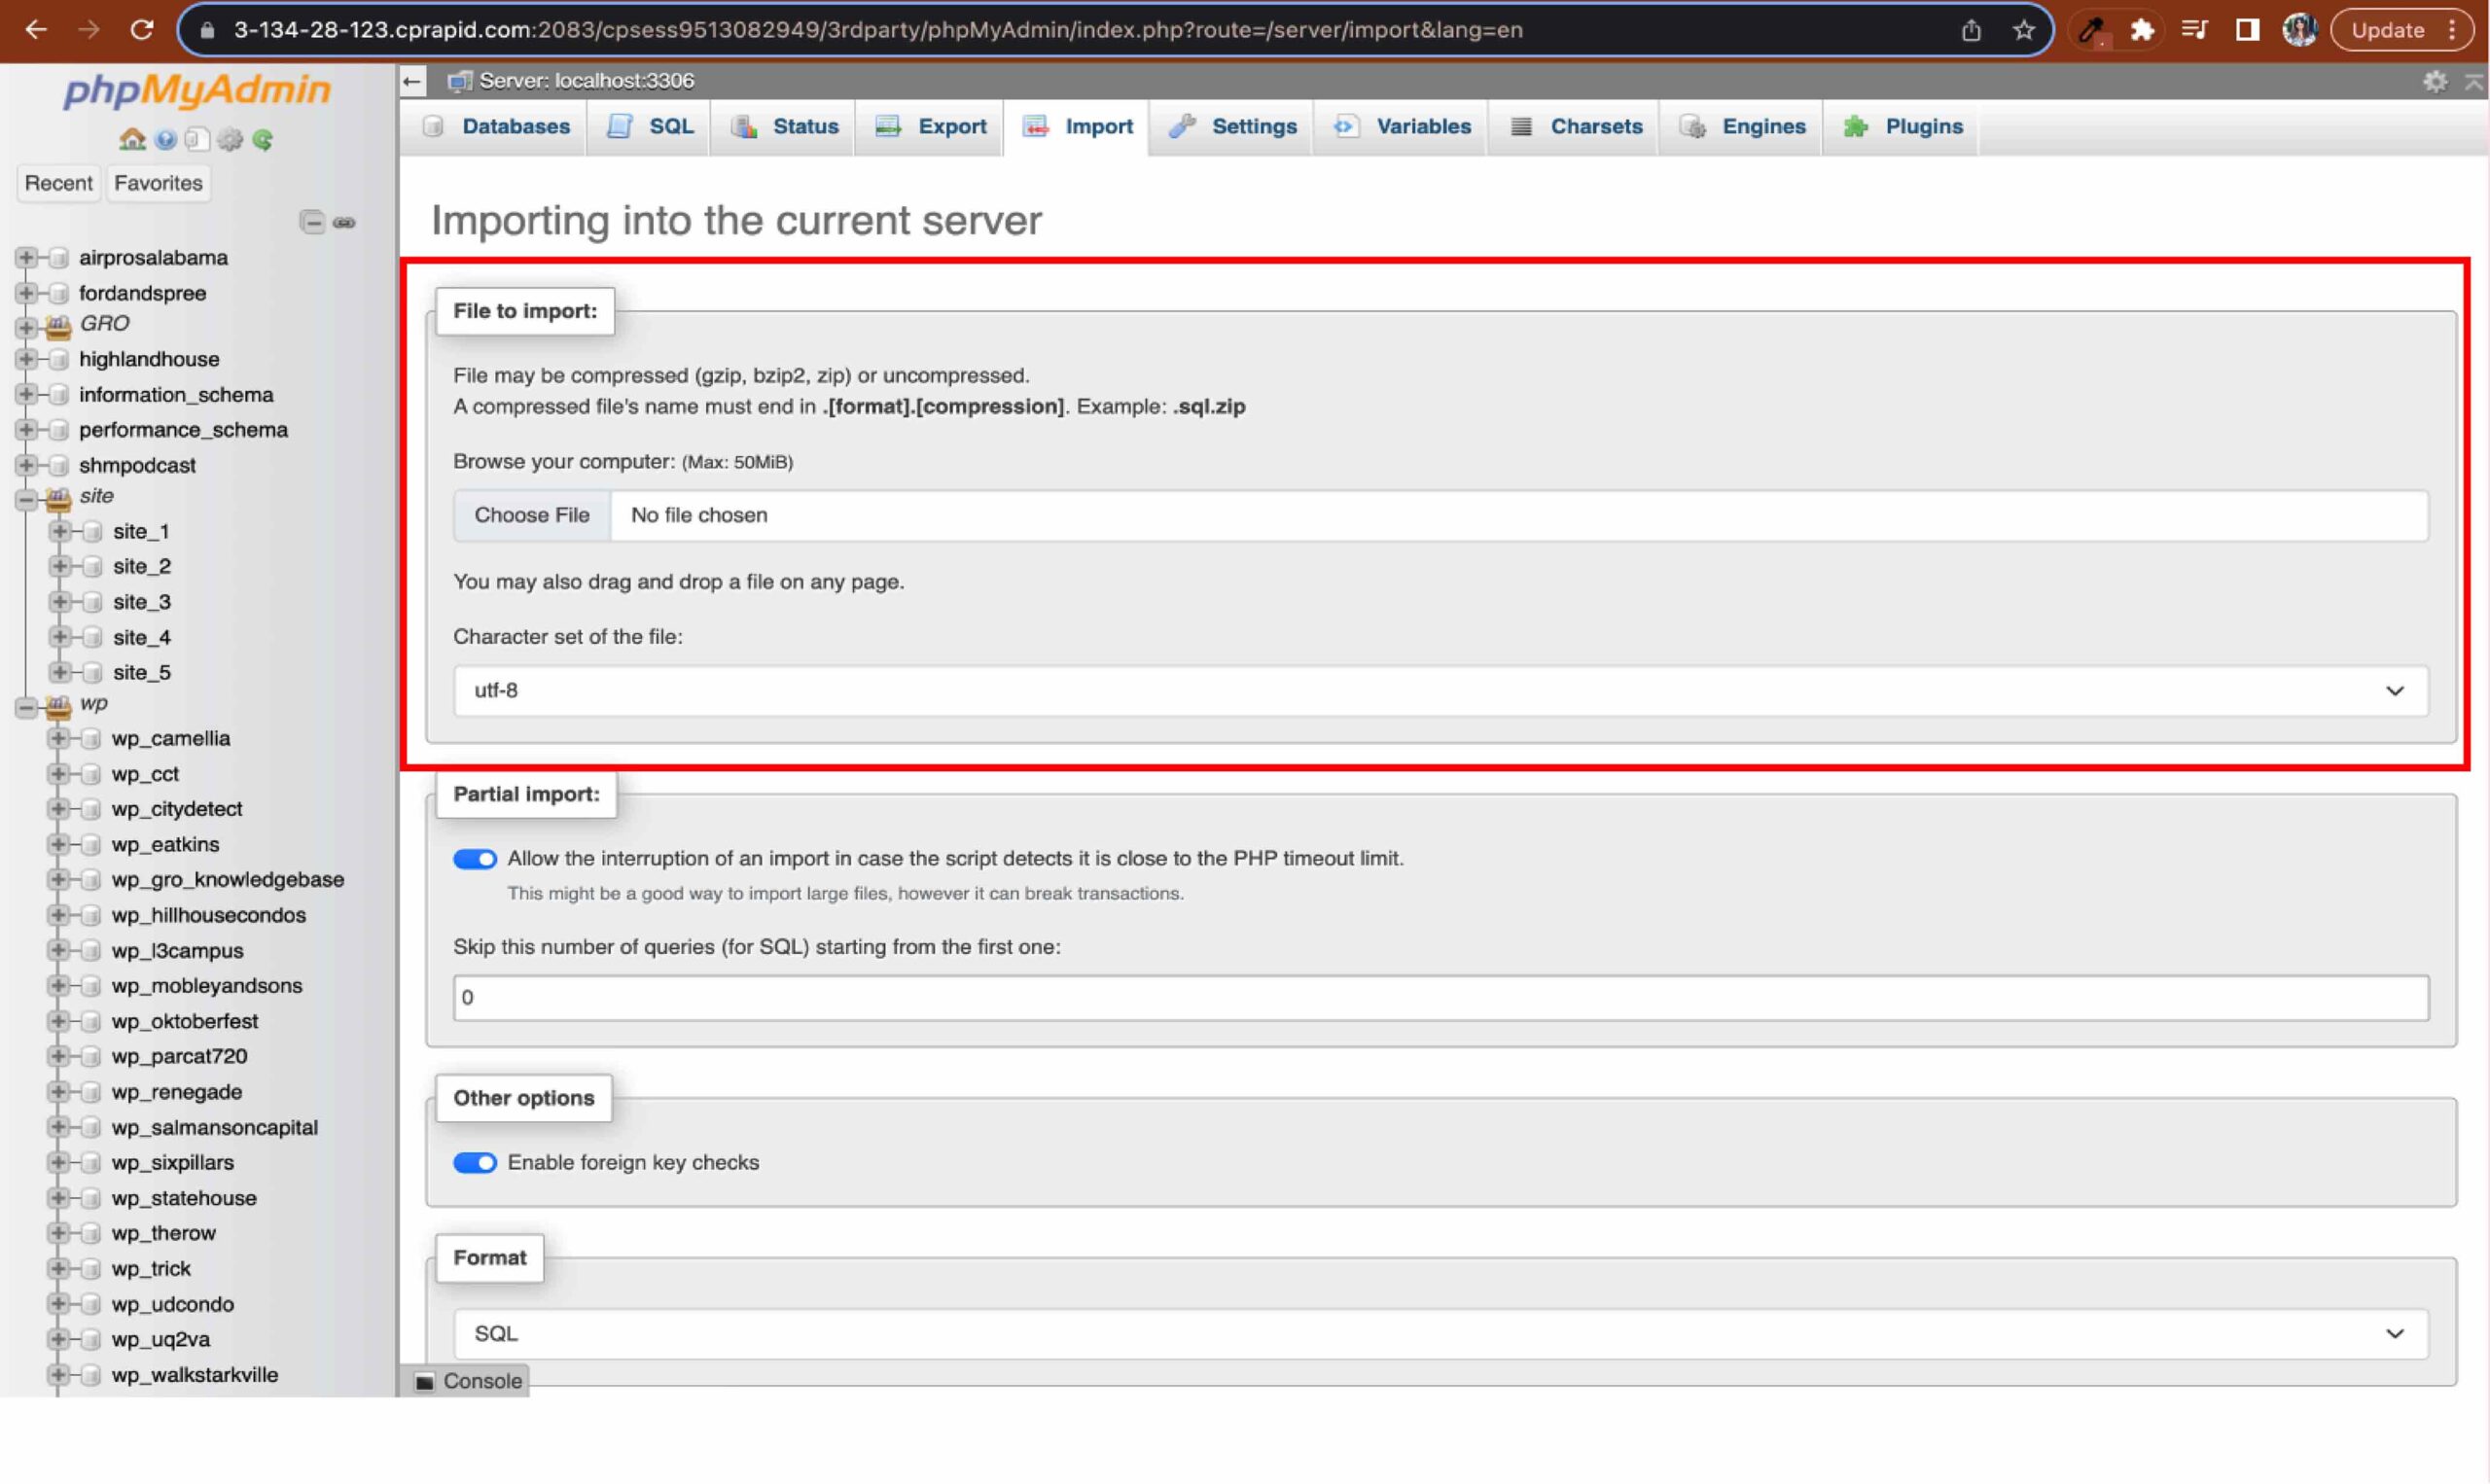
- Import compressed SQL to PHP MyAdmin. This might take a few minutes.
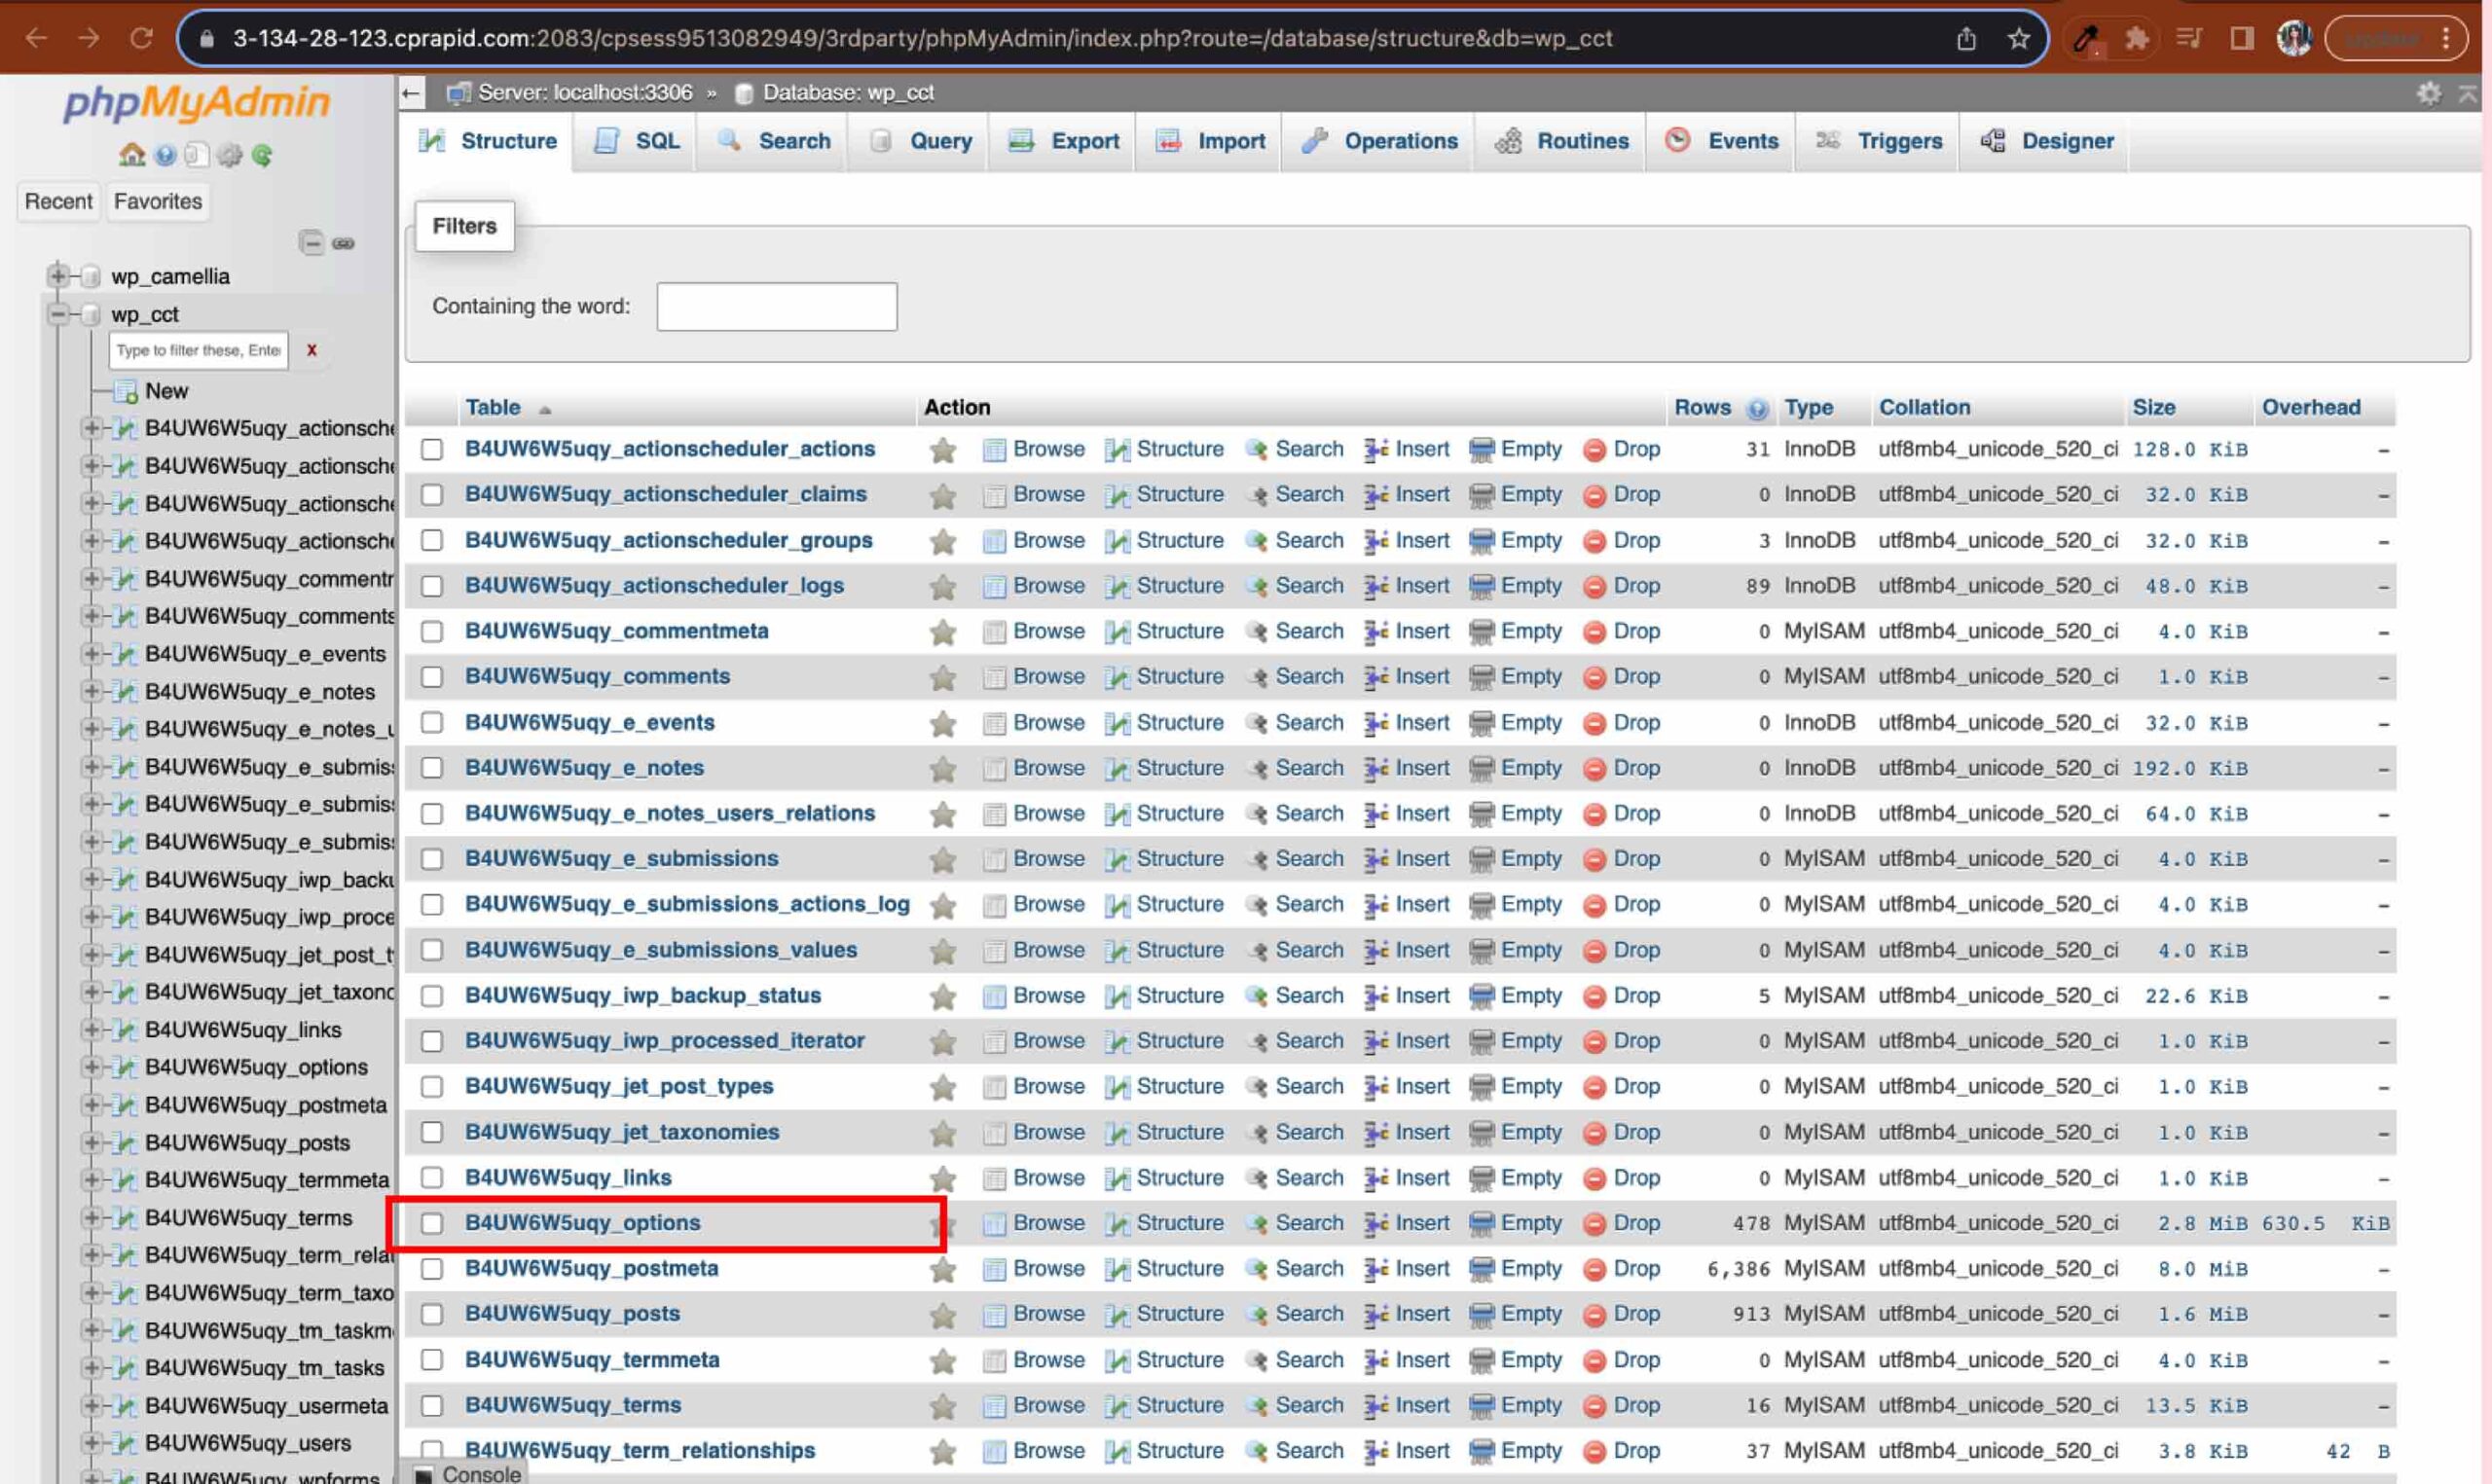
- Click into the new domain on the left side panel and review “options” to make sure everything is correct.
- Go back to File Manager and check if the ZIP file download from step one is complete.
- If complete, click “Go back”.
- Extract app_ ZIP under new domain in File Manager.
- Delete the following items:
- The ZIP you extracted
- APP-DATA
- APP-META
- WP-Config-SAMPLE file (if present)
- Go to WP Toolkit in CPanel and “Scan” for new domain.
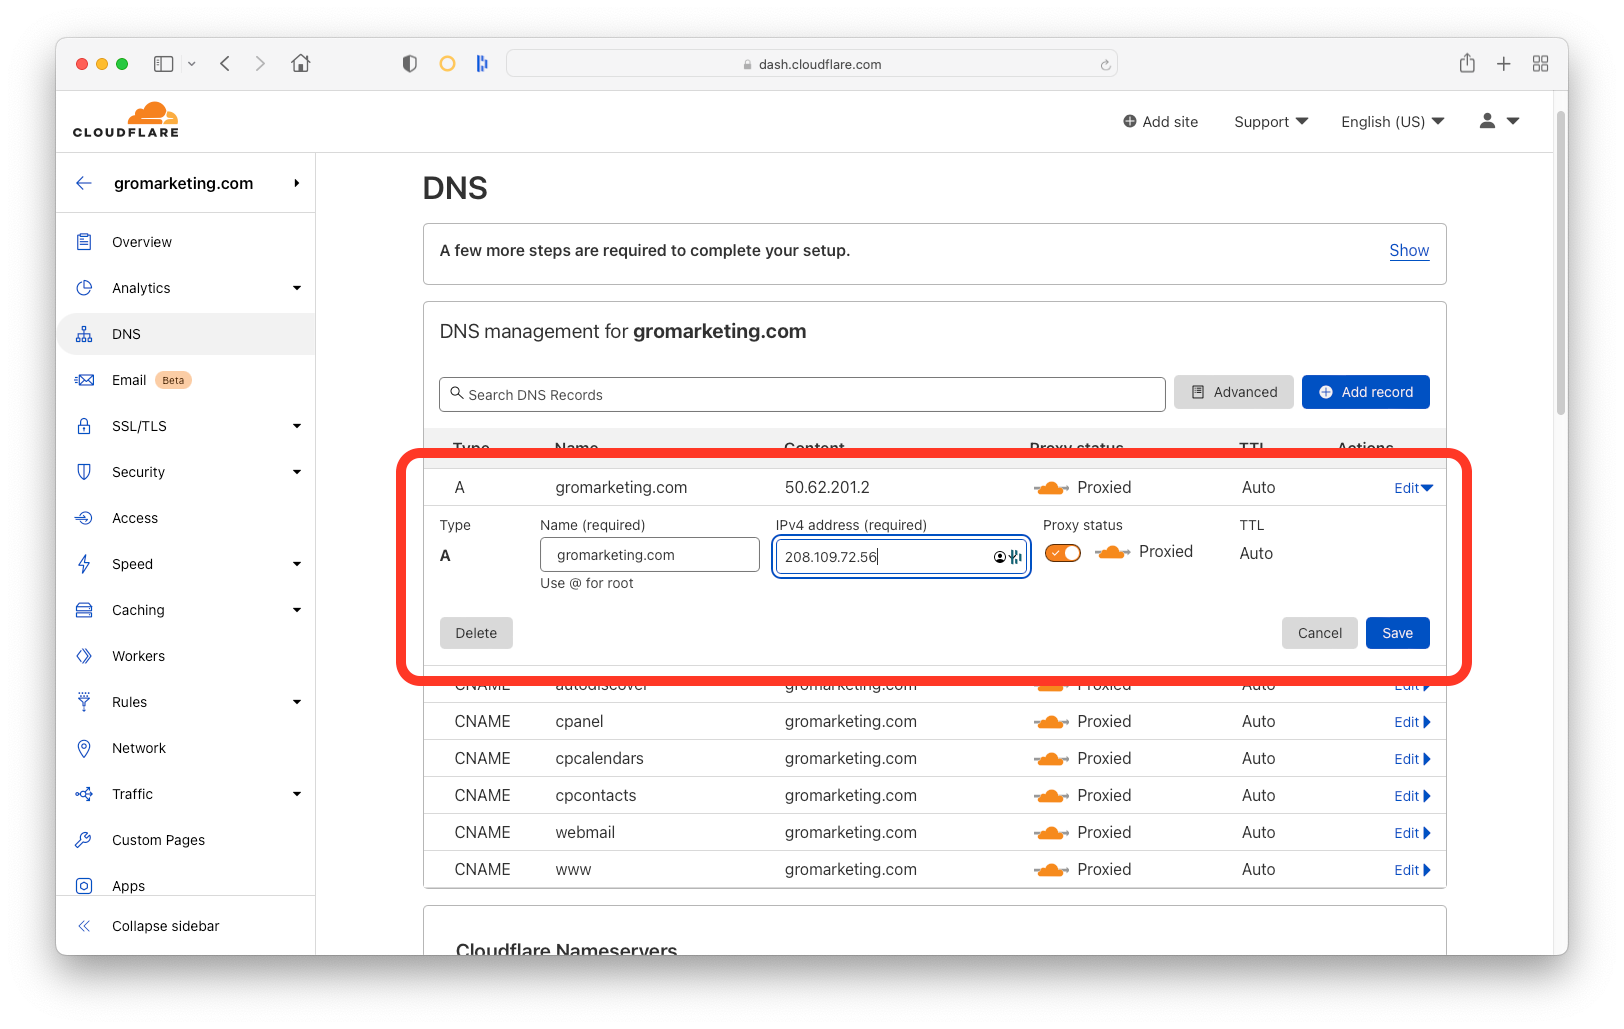
- Copy and paste IP to Cloudflare replacing the old IP.
Remember to confirm the transfer!
To confirm the transfer, add a period to the beginning of the .htaccess file and “save changes”. There should be an error. Go back and remove the period. The site should be up and running. Verify all pages are up. You're done!
