When setting up website forms, the most important aspect is insuring deliverability to the email address(s) where submissions should be sent. While Elementor does have the ability to simultaneously capture form leads and store them into a database as a backup (via the Collect Submissions option), insuring form submissions are properly sent to recipients is critical.
* After pushing a site live (from a development / staging environment), all web forms should be tested and confirmed to be working by both the web developer and the client.
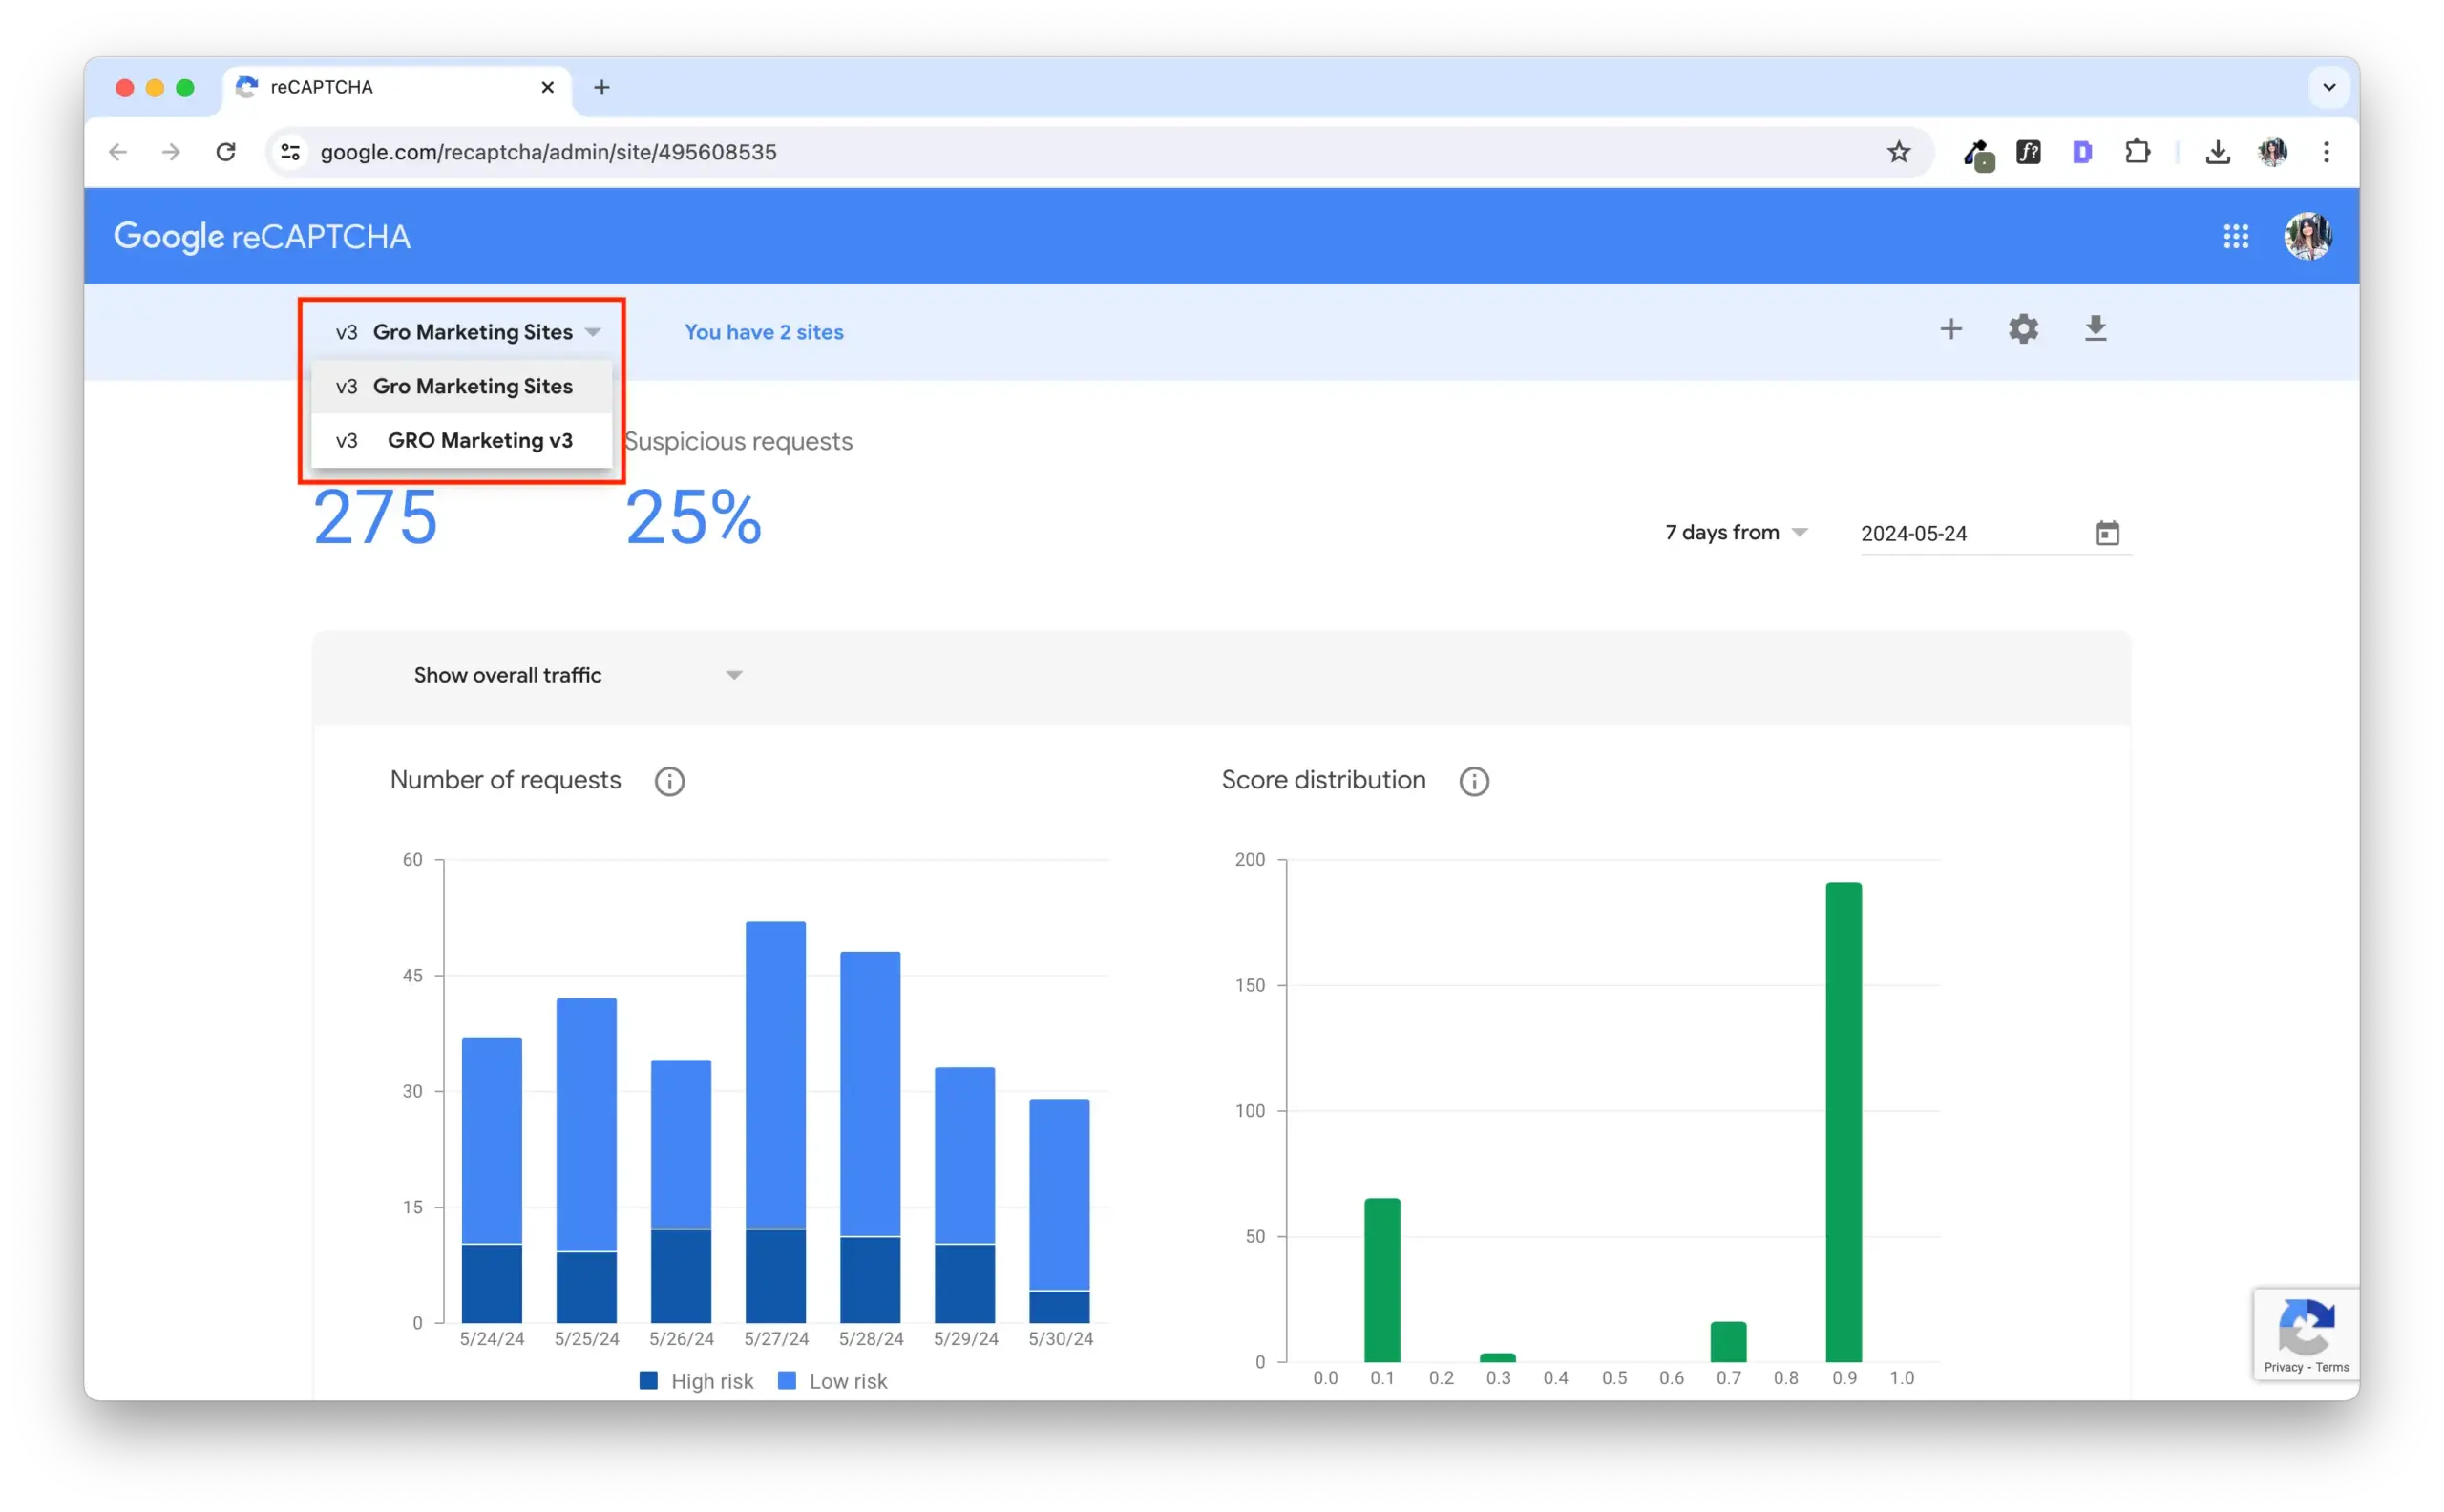
Depending on the capacity, select Gro Marketing Sites or Gro Marketing V3
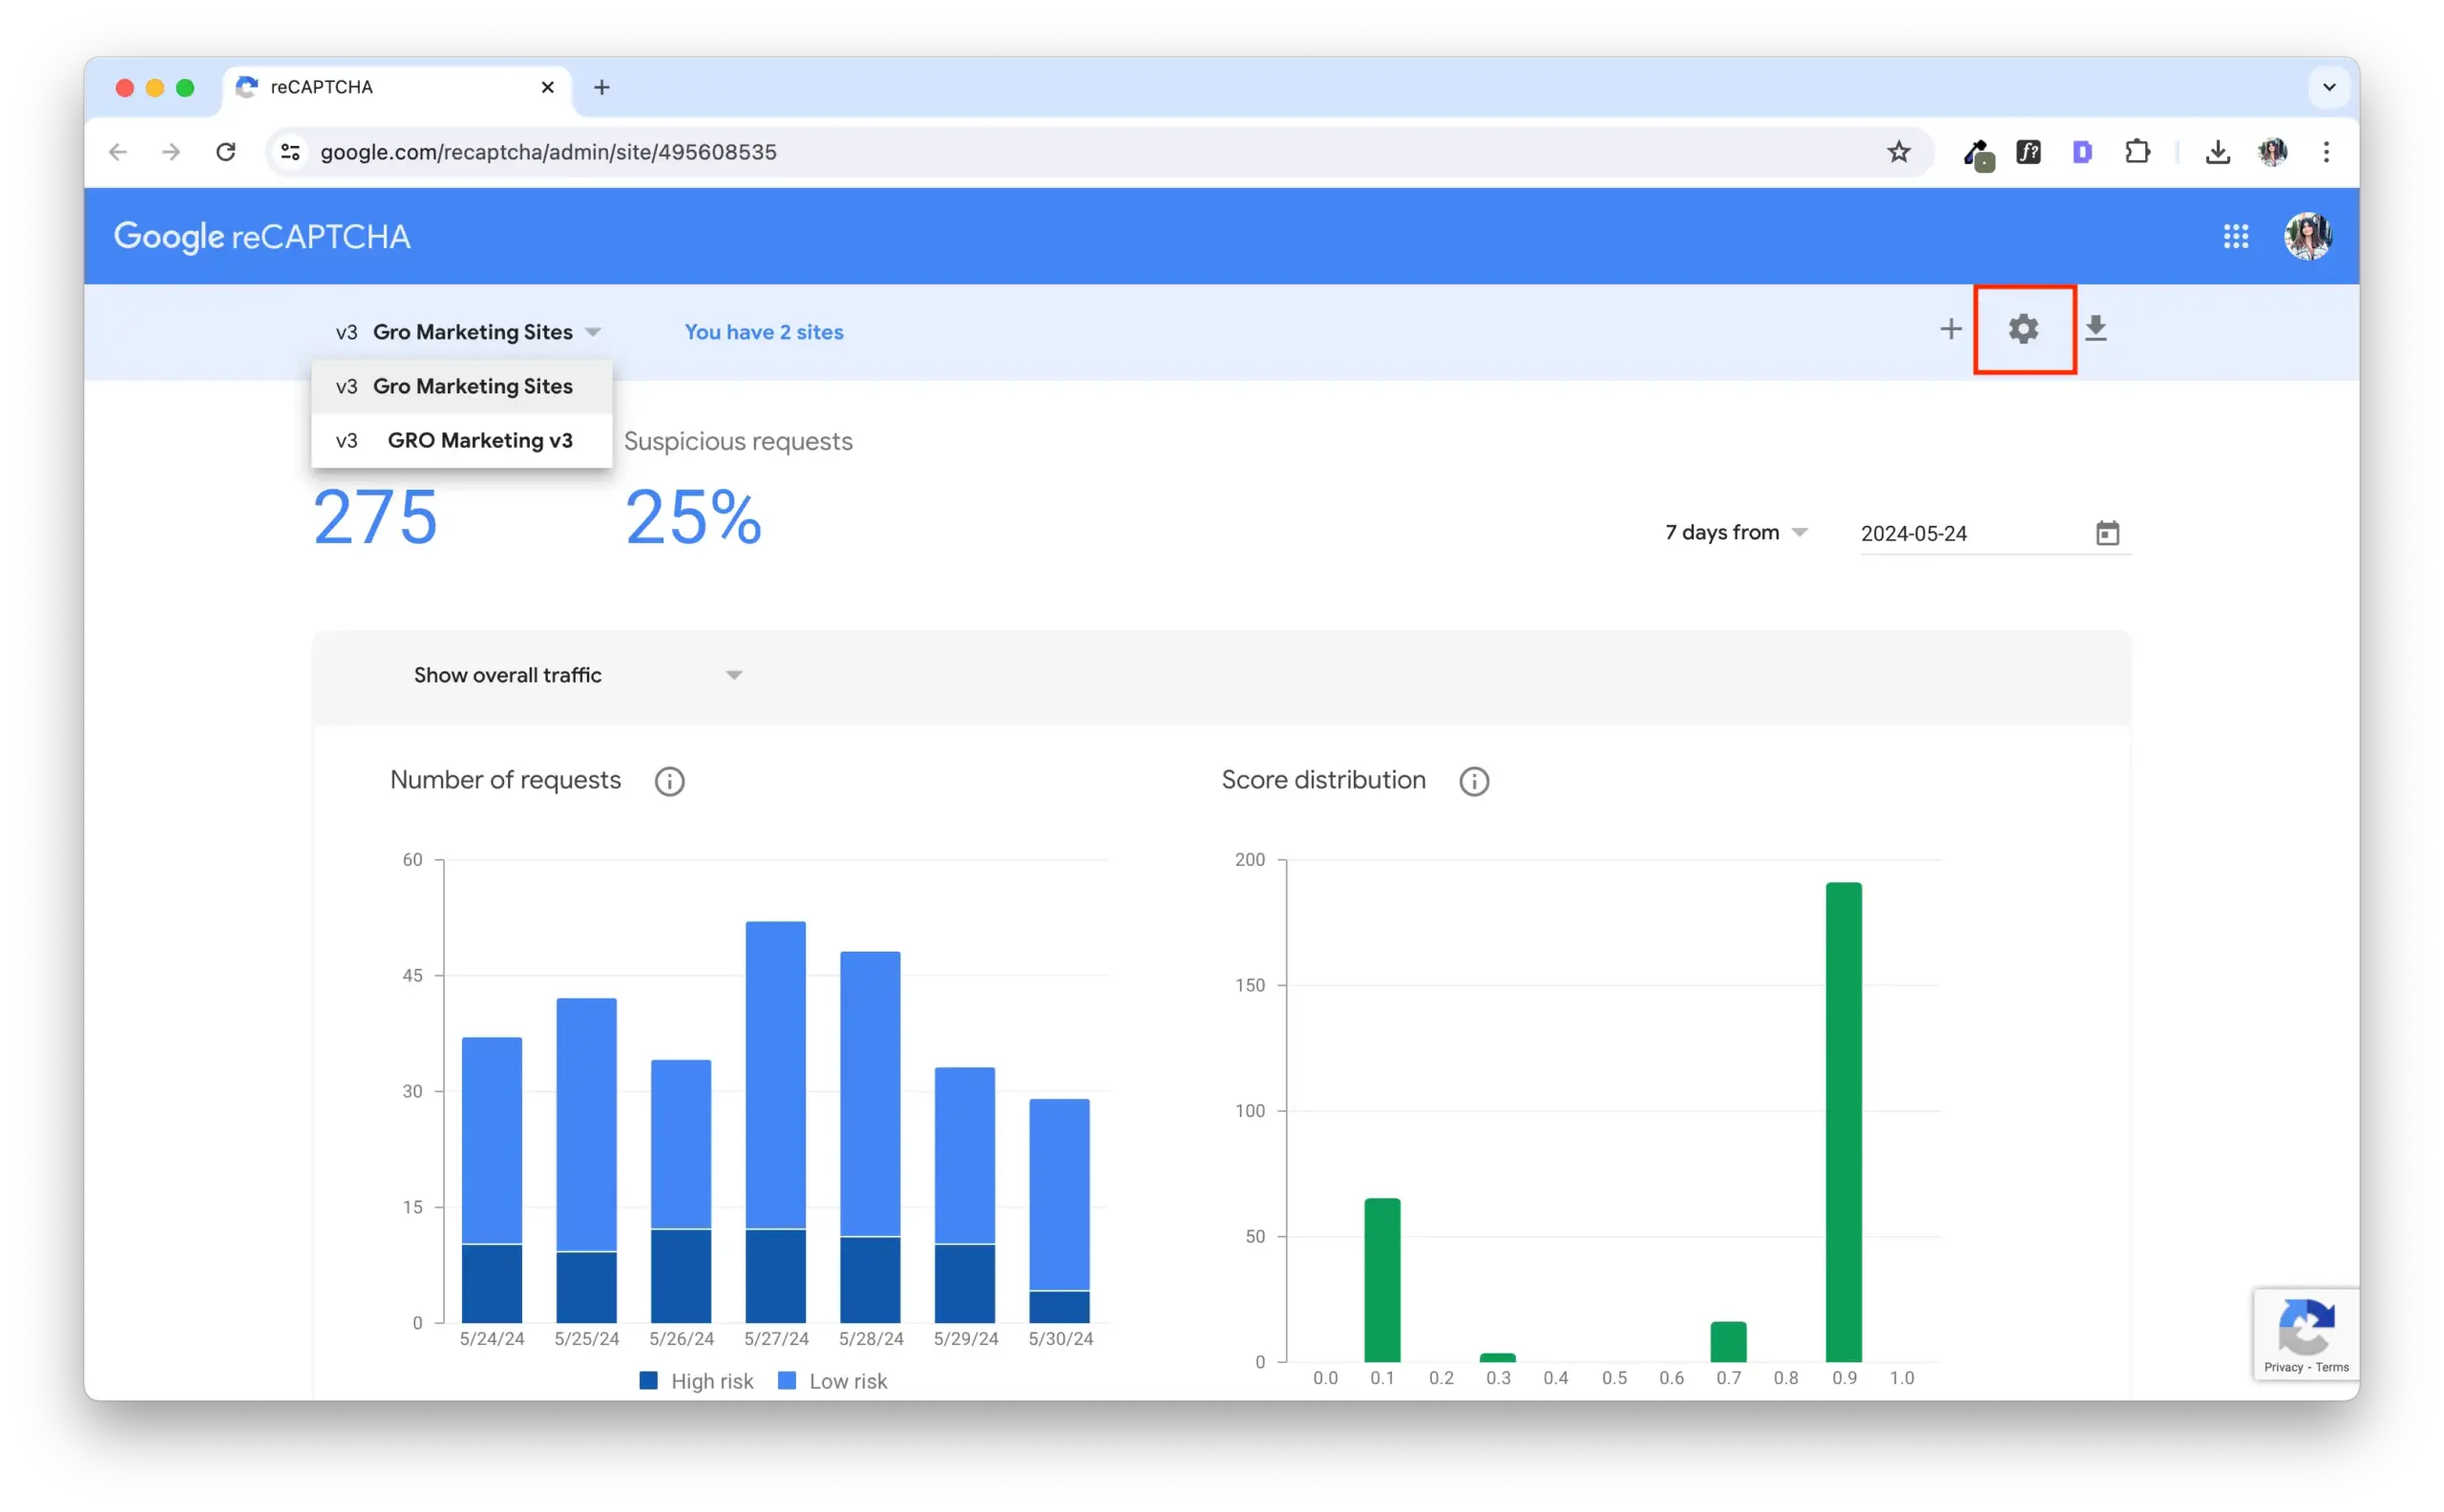
Click the Gear icon
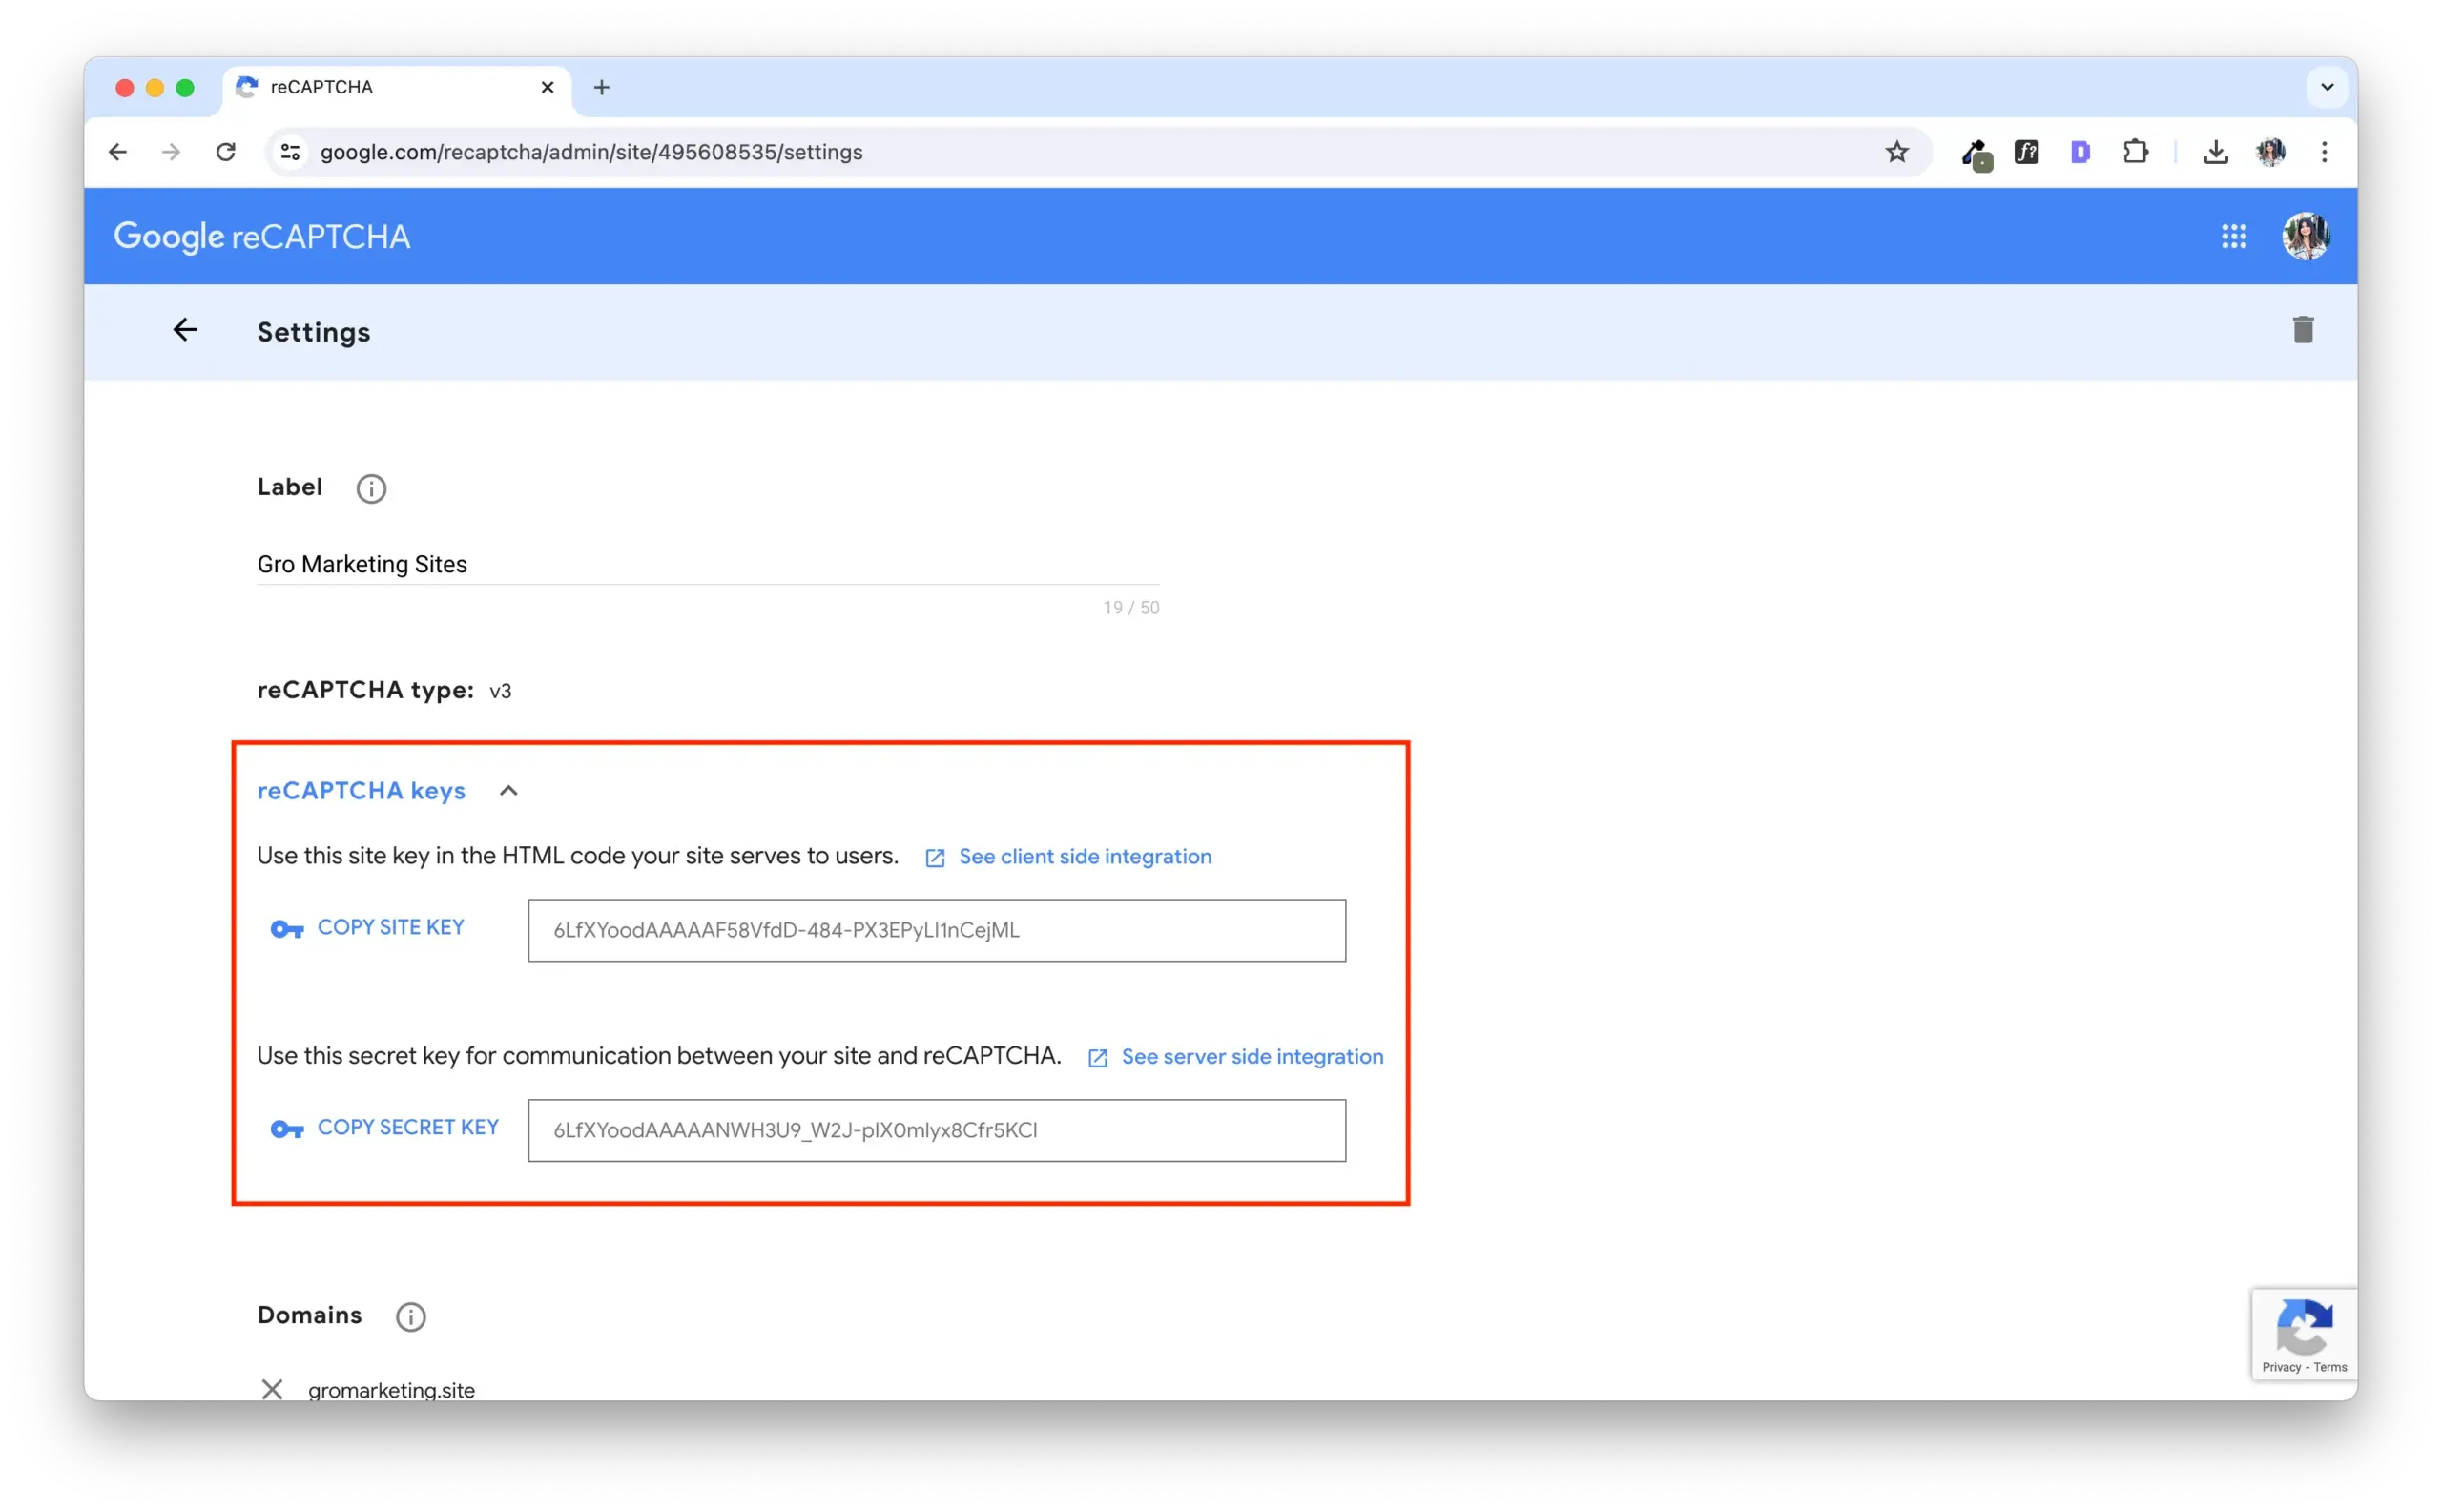
Under Domains, add the live URL (ex. sightlink.co/) If you are operating on a dev site, gromarketing.site is already added to reCAPTCHA.
Click Save
Make sure the keys in Elementor match the keys in ReCAPTCHA. You can find the keys above the list of domains in ReCAPTCHA.
Step 2 - WordPress
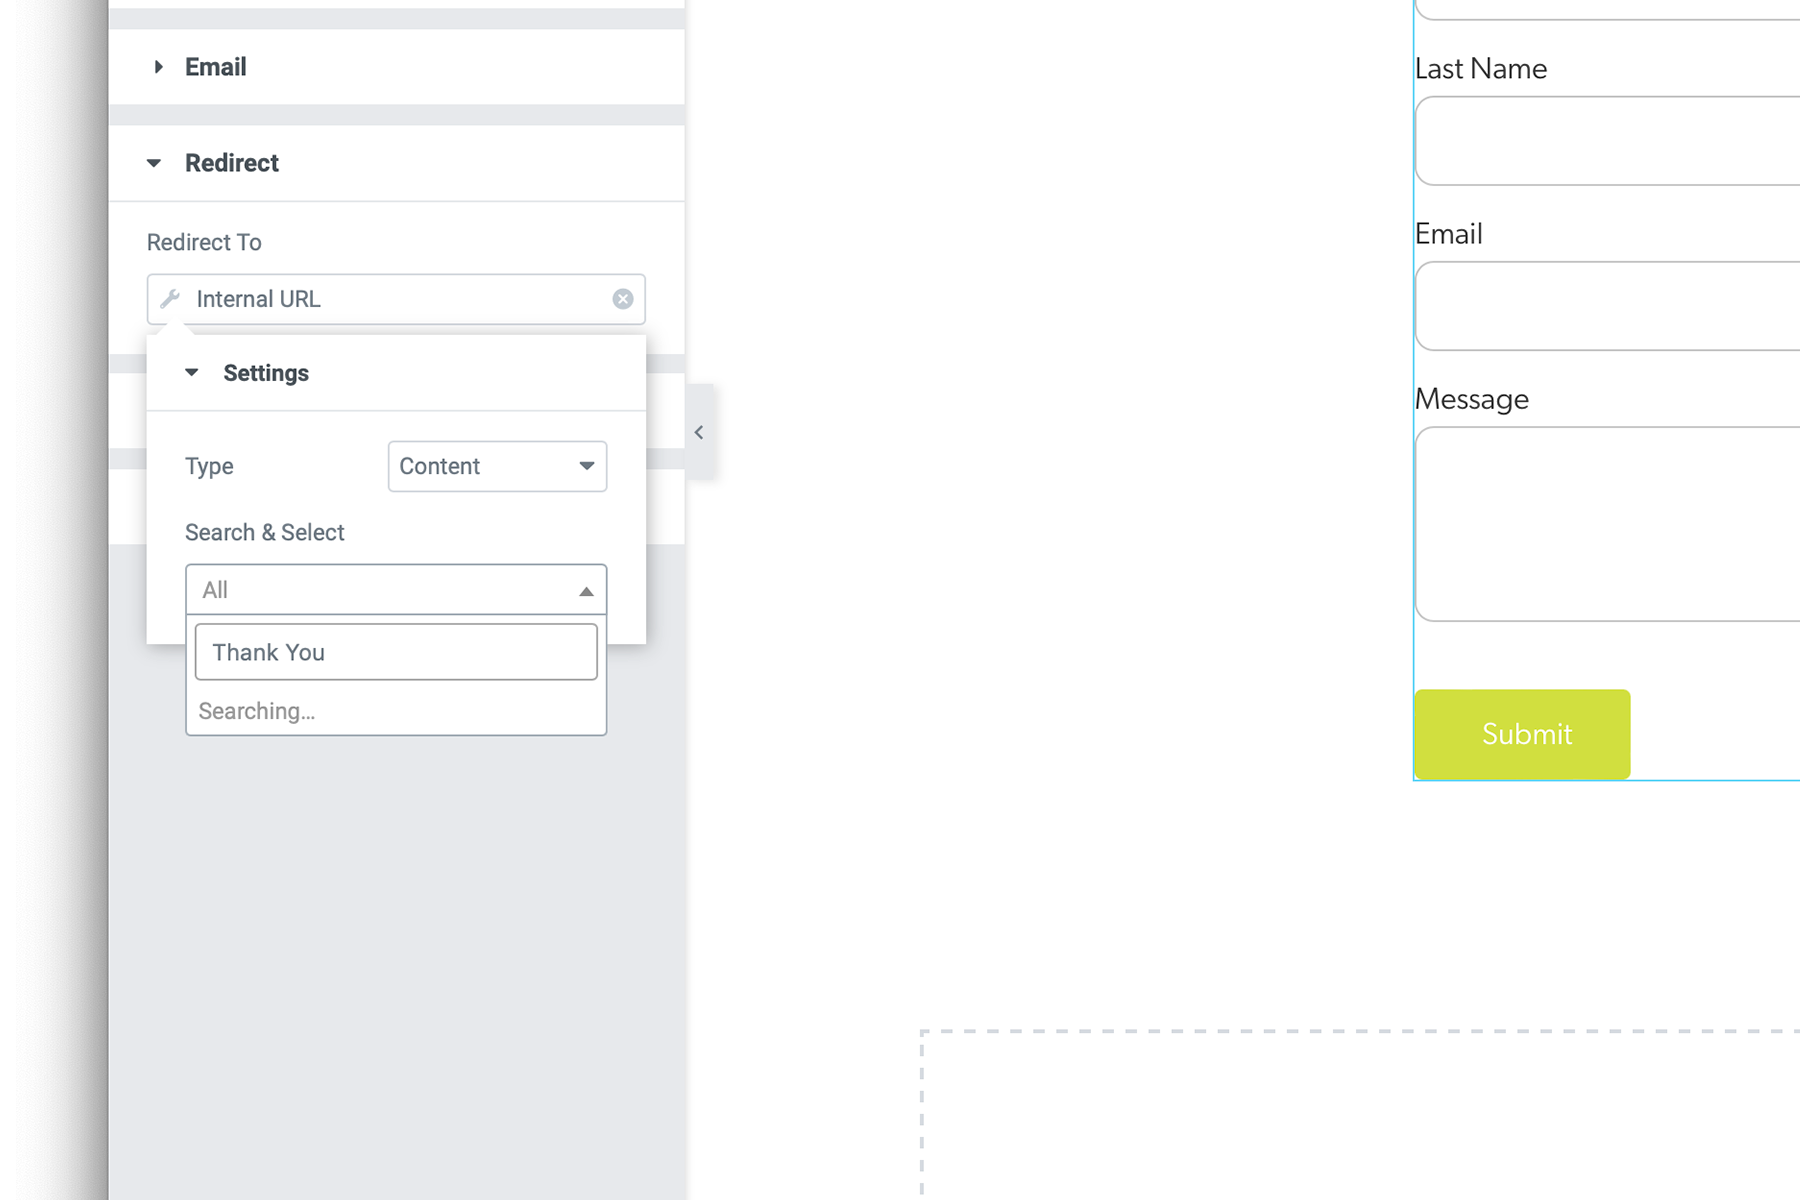
Create a Thank You page on your website if one is not already created.
Create an Elementor form
Form Name should be something relevant. (Ex. Contact form)
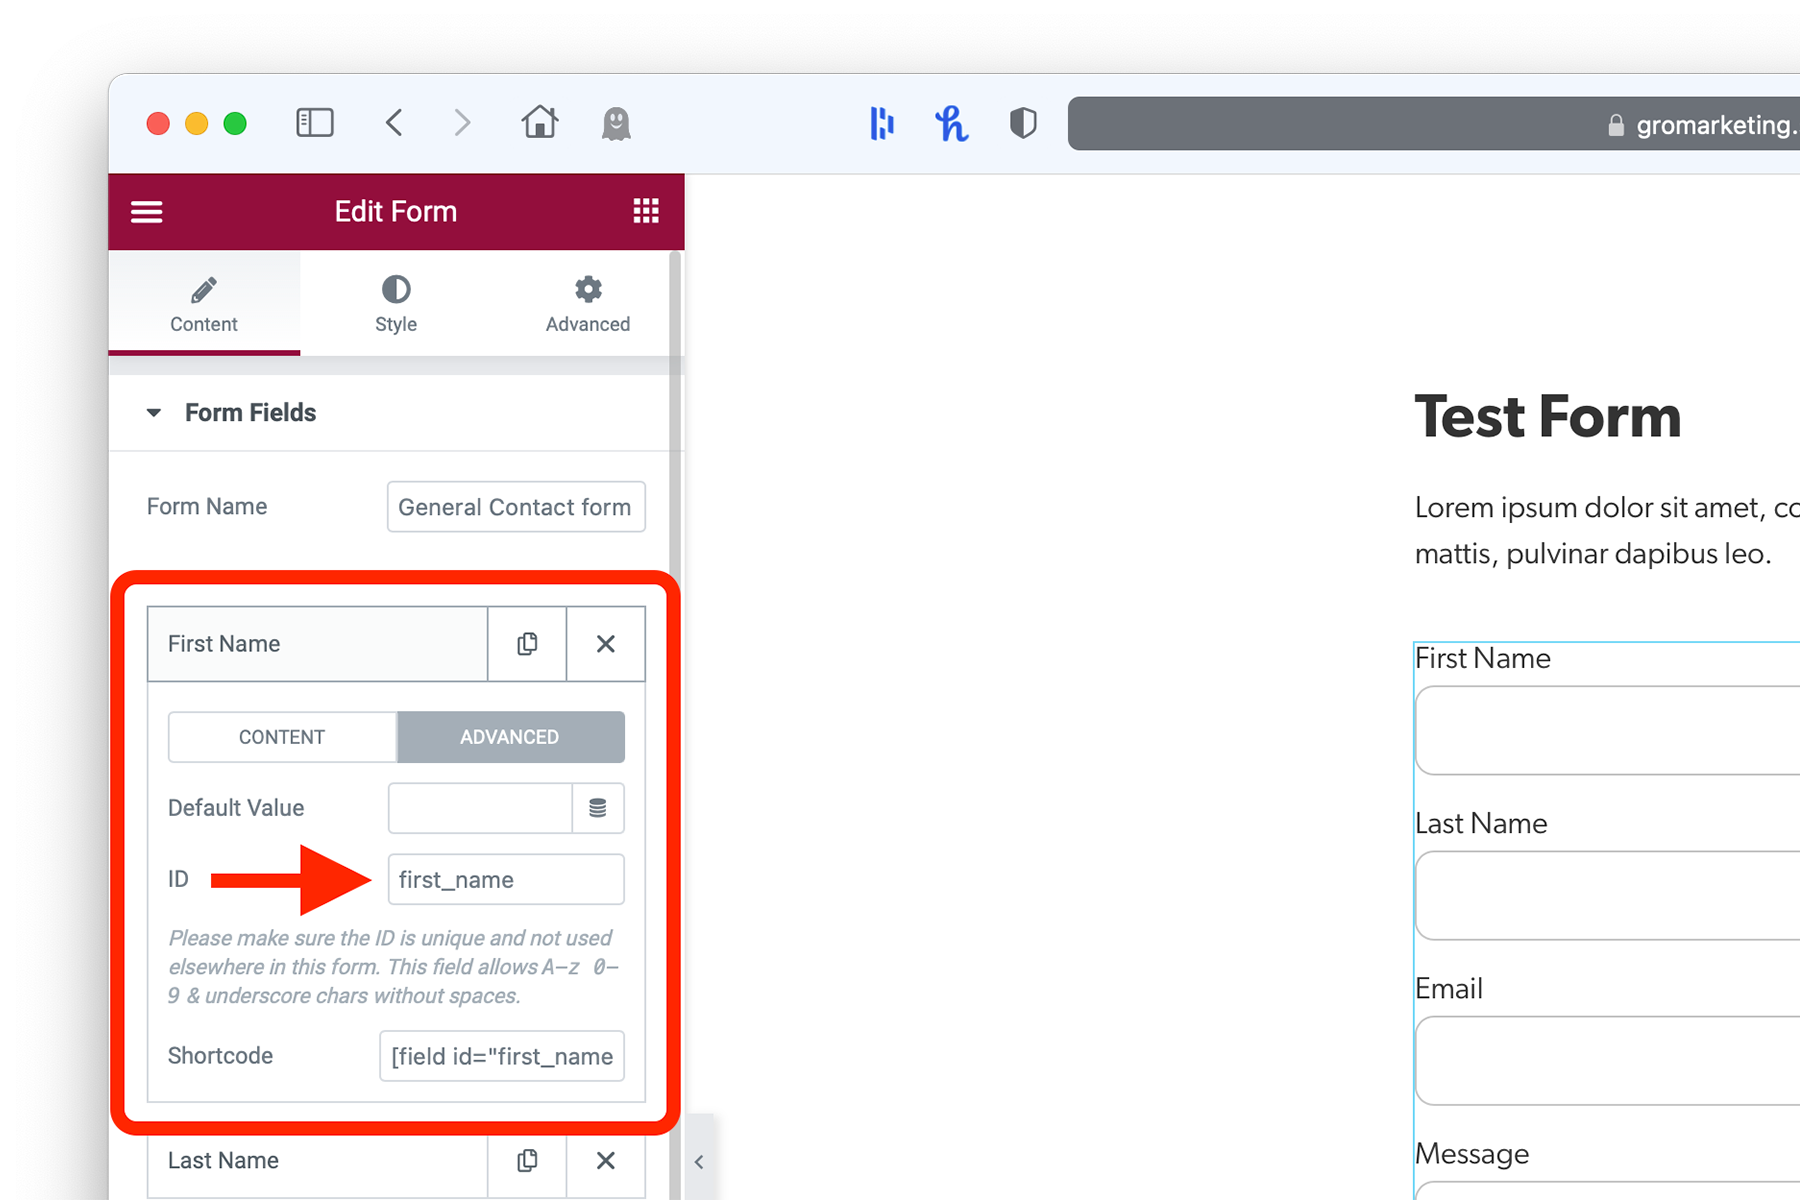
Set ID’s for each form field
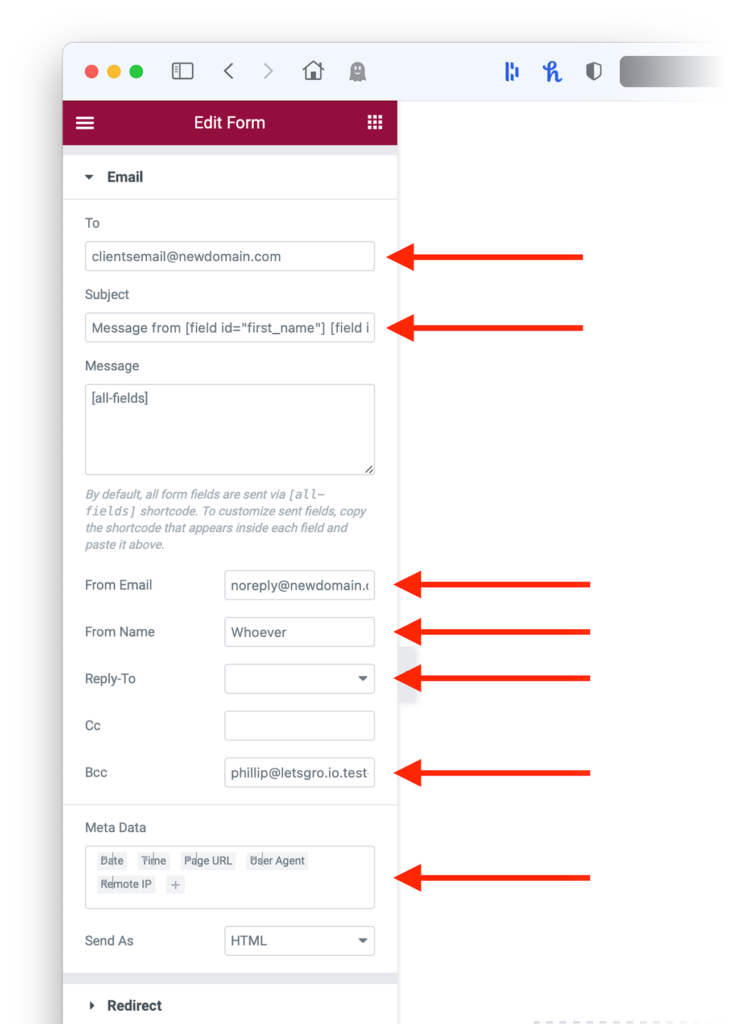
Setting field ID'sWithin Elementor’s Edit Form tab, be sure to give each field a corresponding ID (under Advanced), so that the Shortcode is recognizable. This keeps things clean when submissions are stored in the database. This way, if a client exports a CSV of form entries, the table headers will be easily identifiable, instead of random alphanumeric characters.
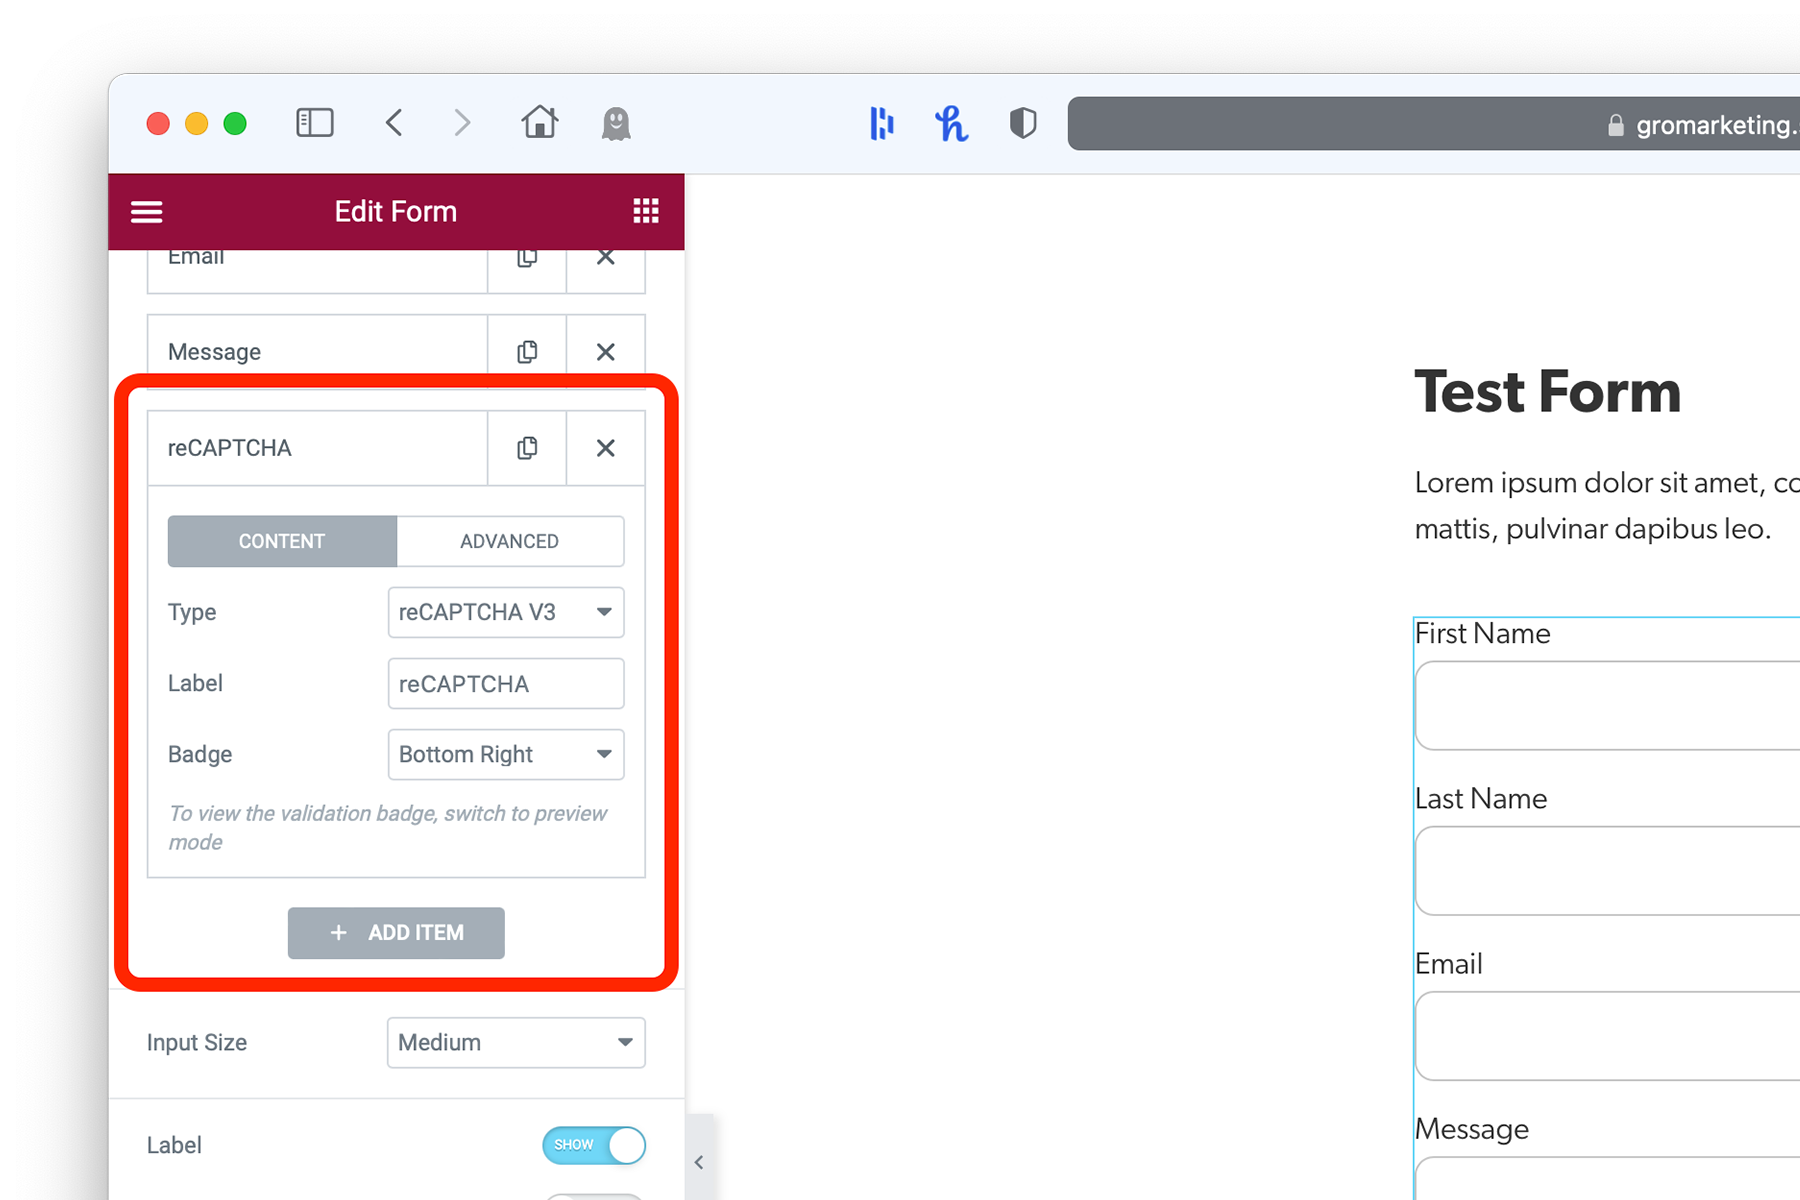
Add reCAPTCHA v3 field as the last field
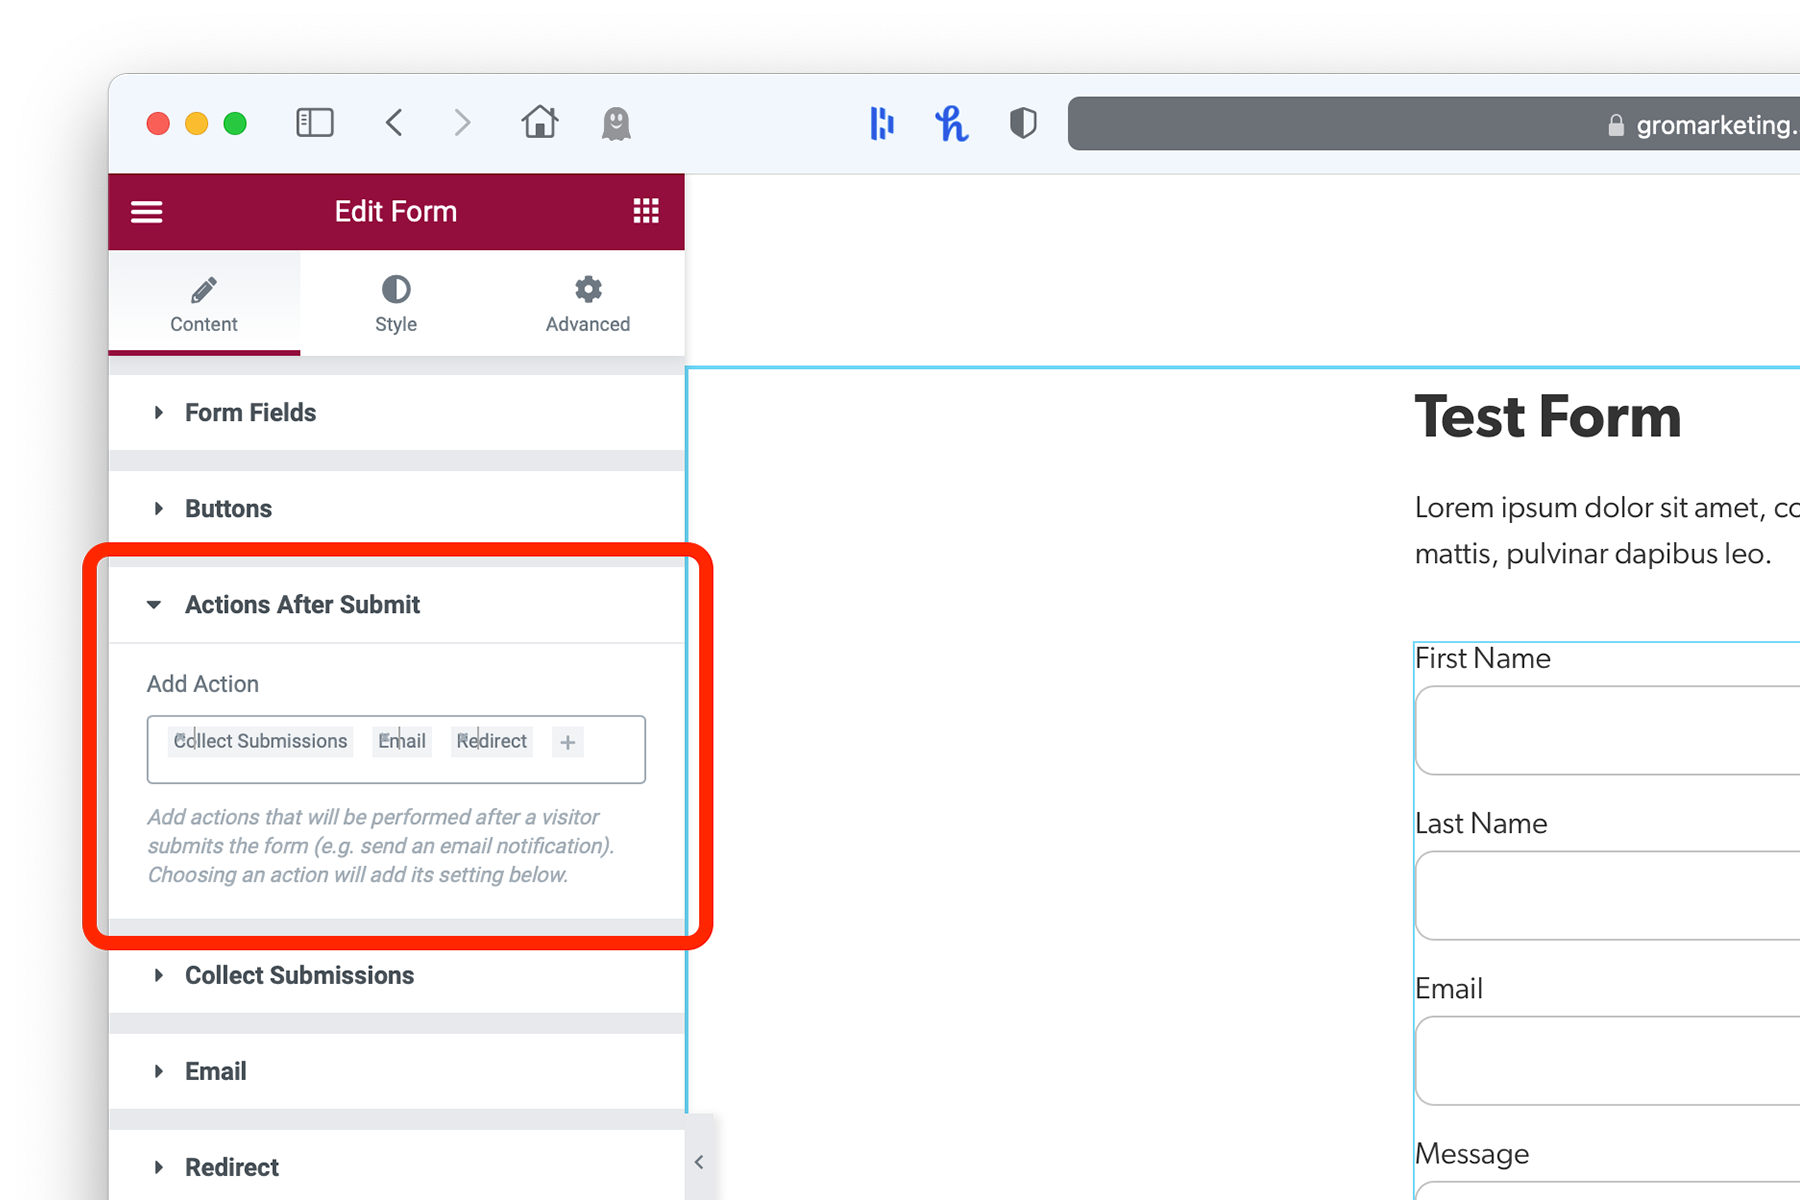
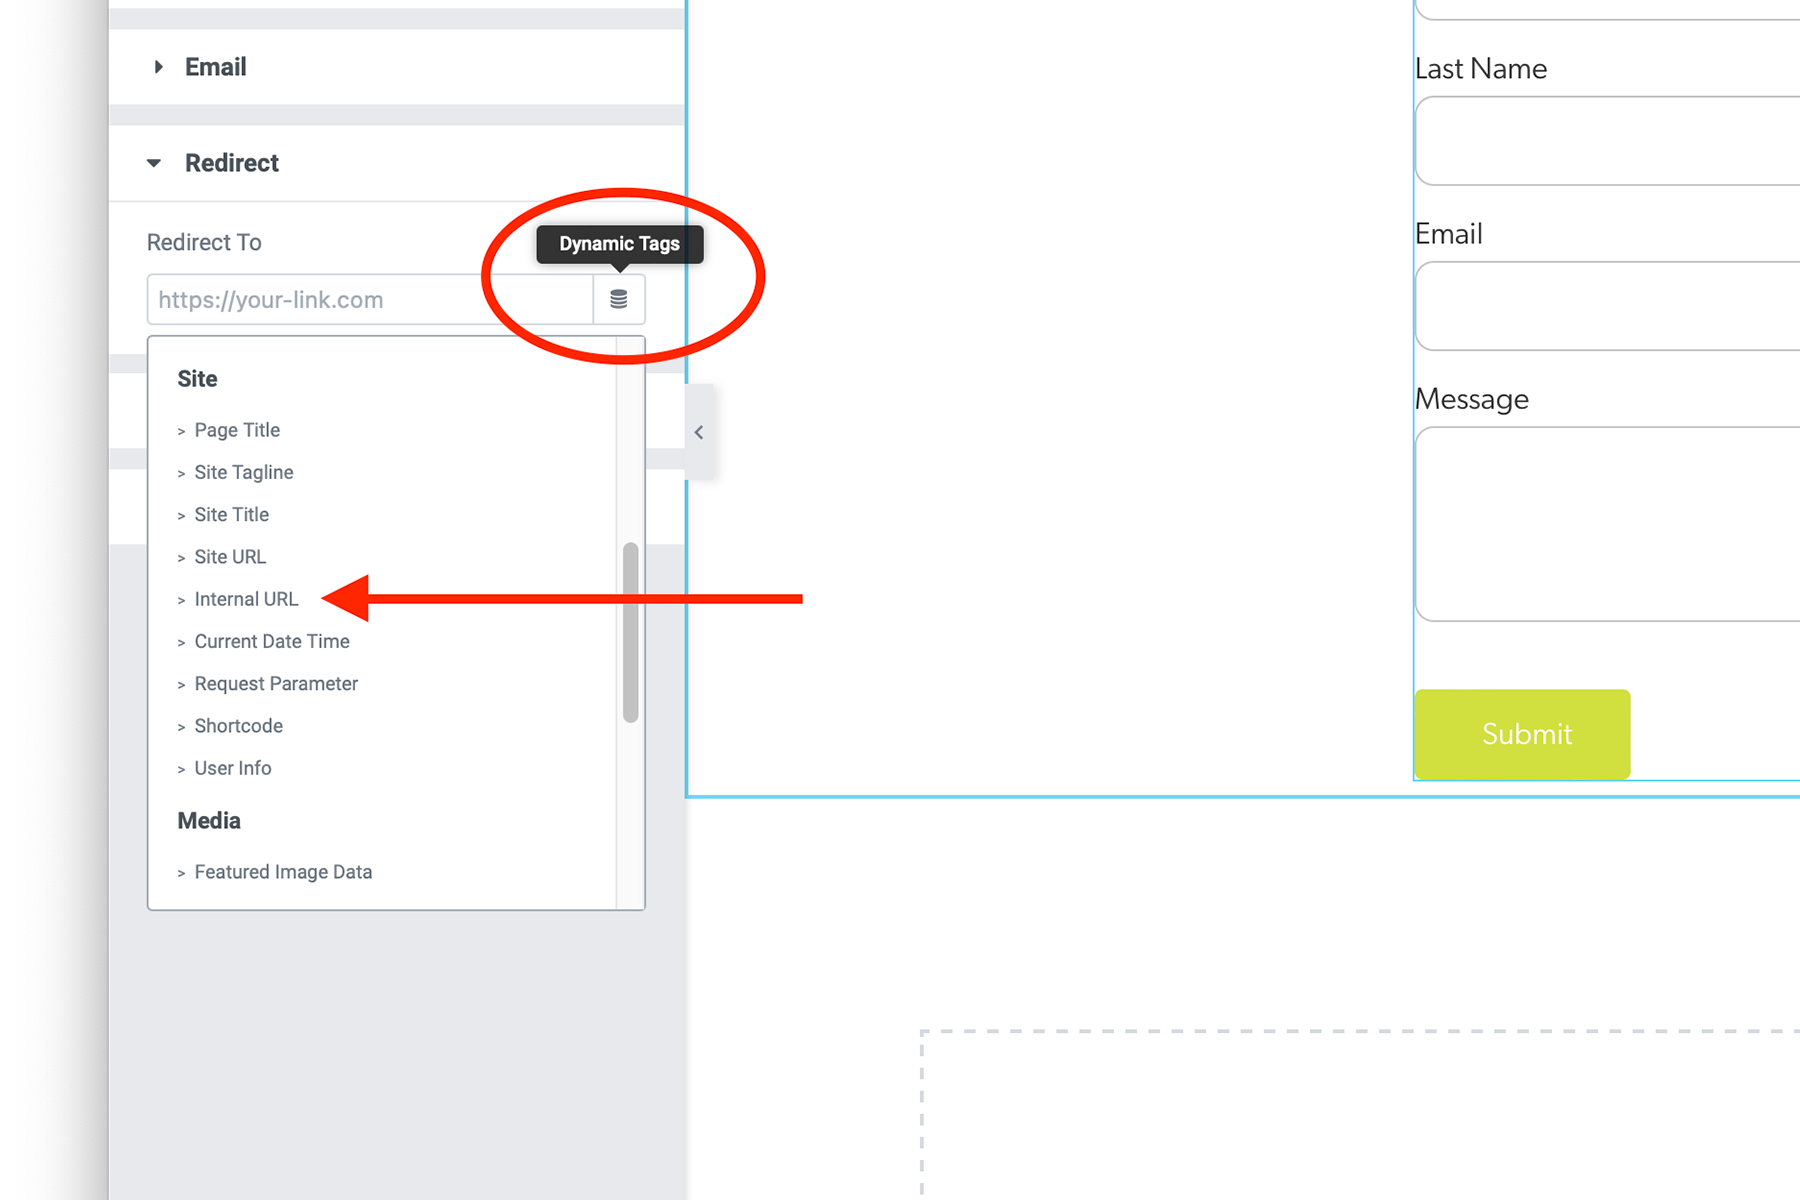
Set Actions After Submit to: Collect Submissions, Email, and Redirect
From Email:[email protected] - Check Force From Email* (For devs and live domains - if working on a dev site, use the domain that the site will launch on)
From Name: Site Name (ex. The Campbell, Statehouse Tallahassee, SightLink, etc.) - Check Force From Name*
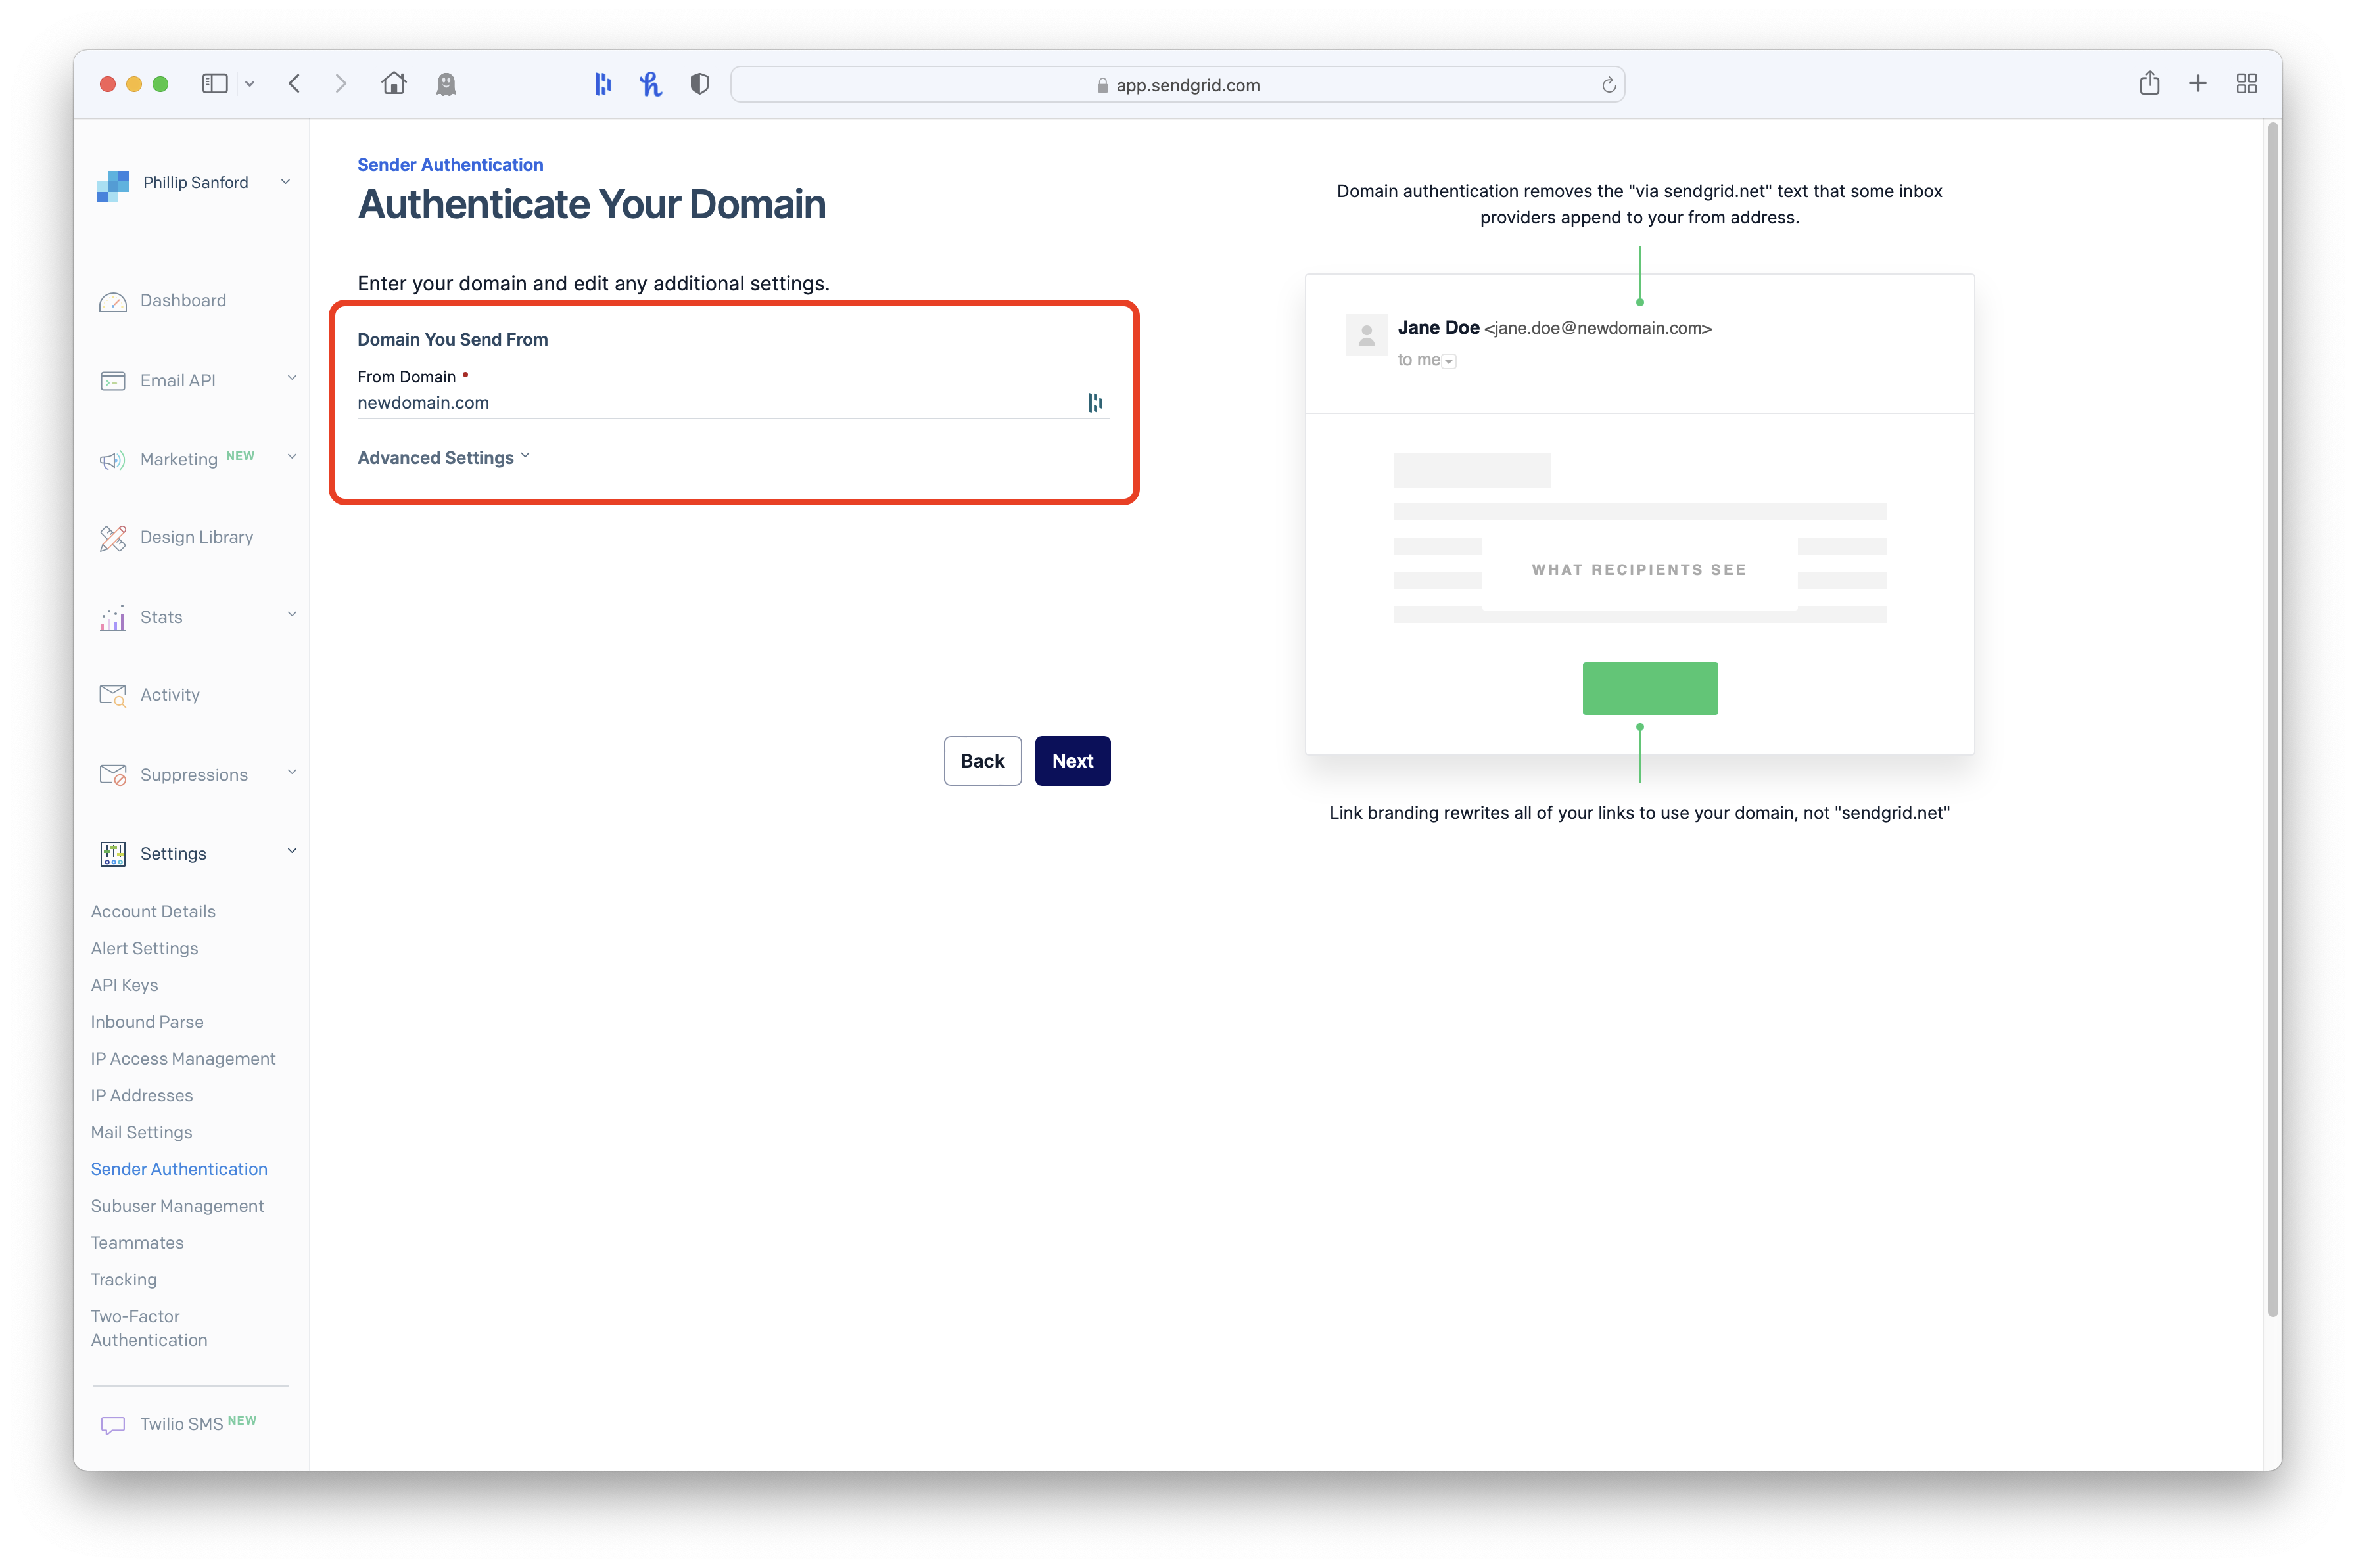
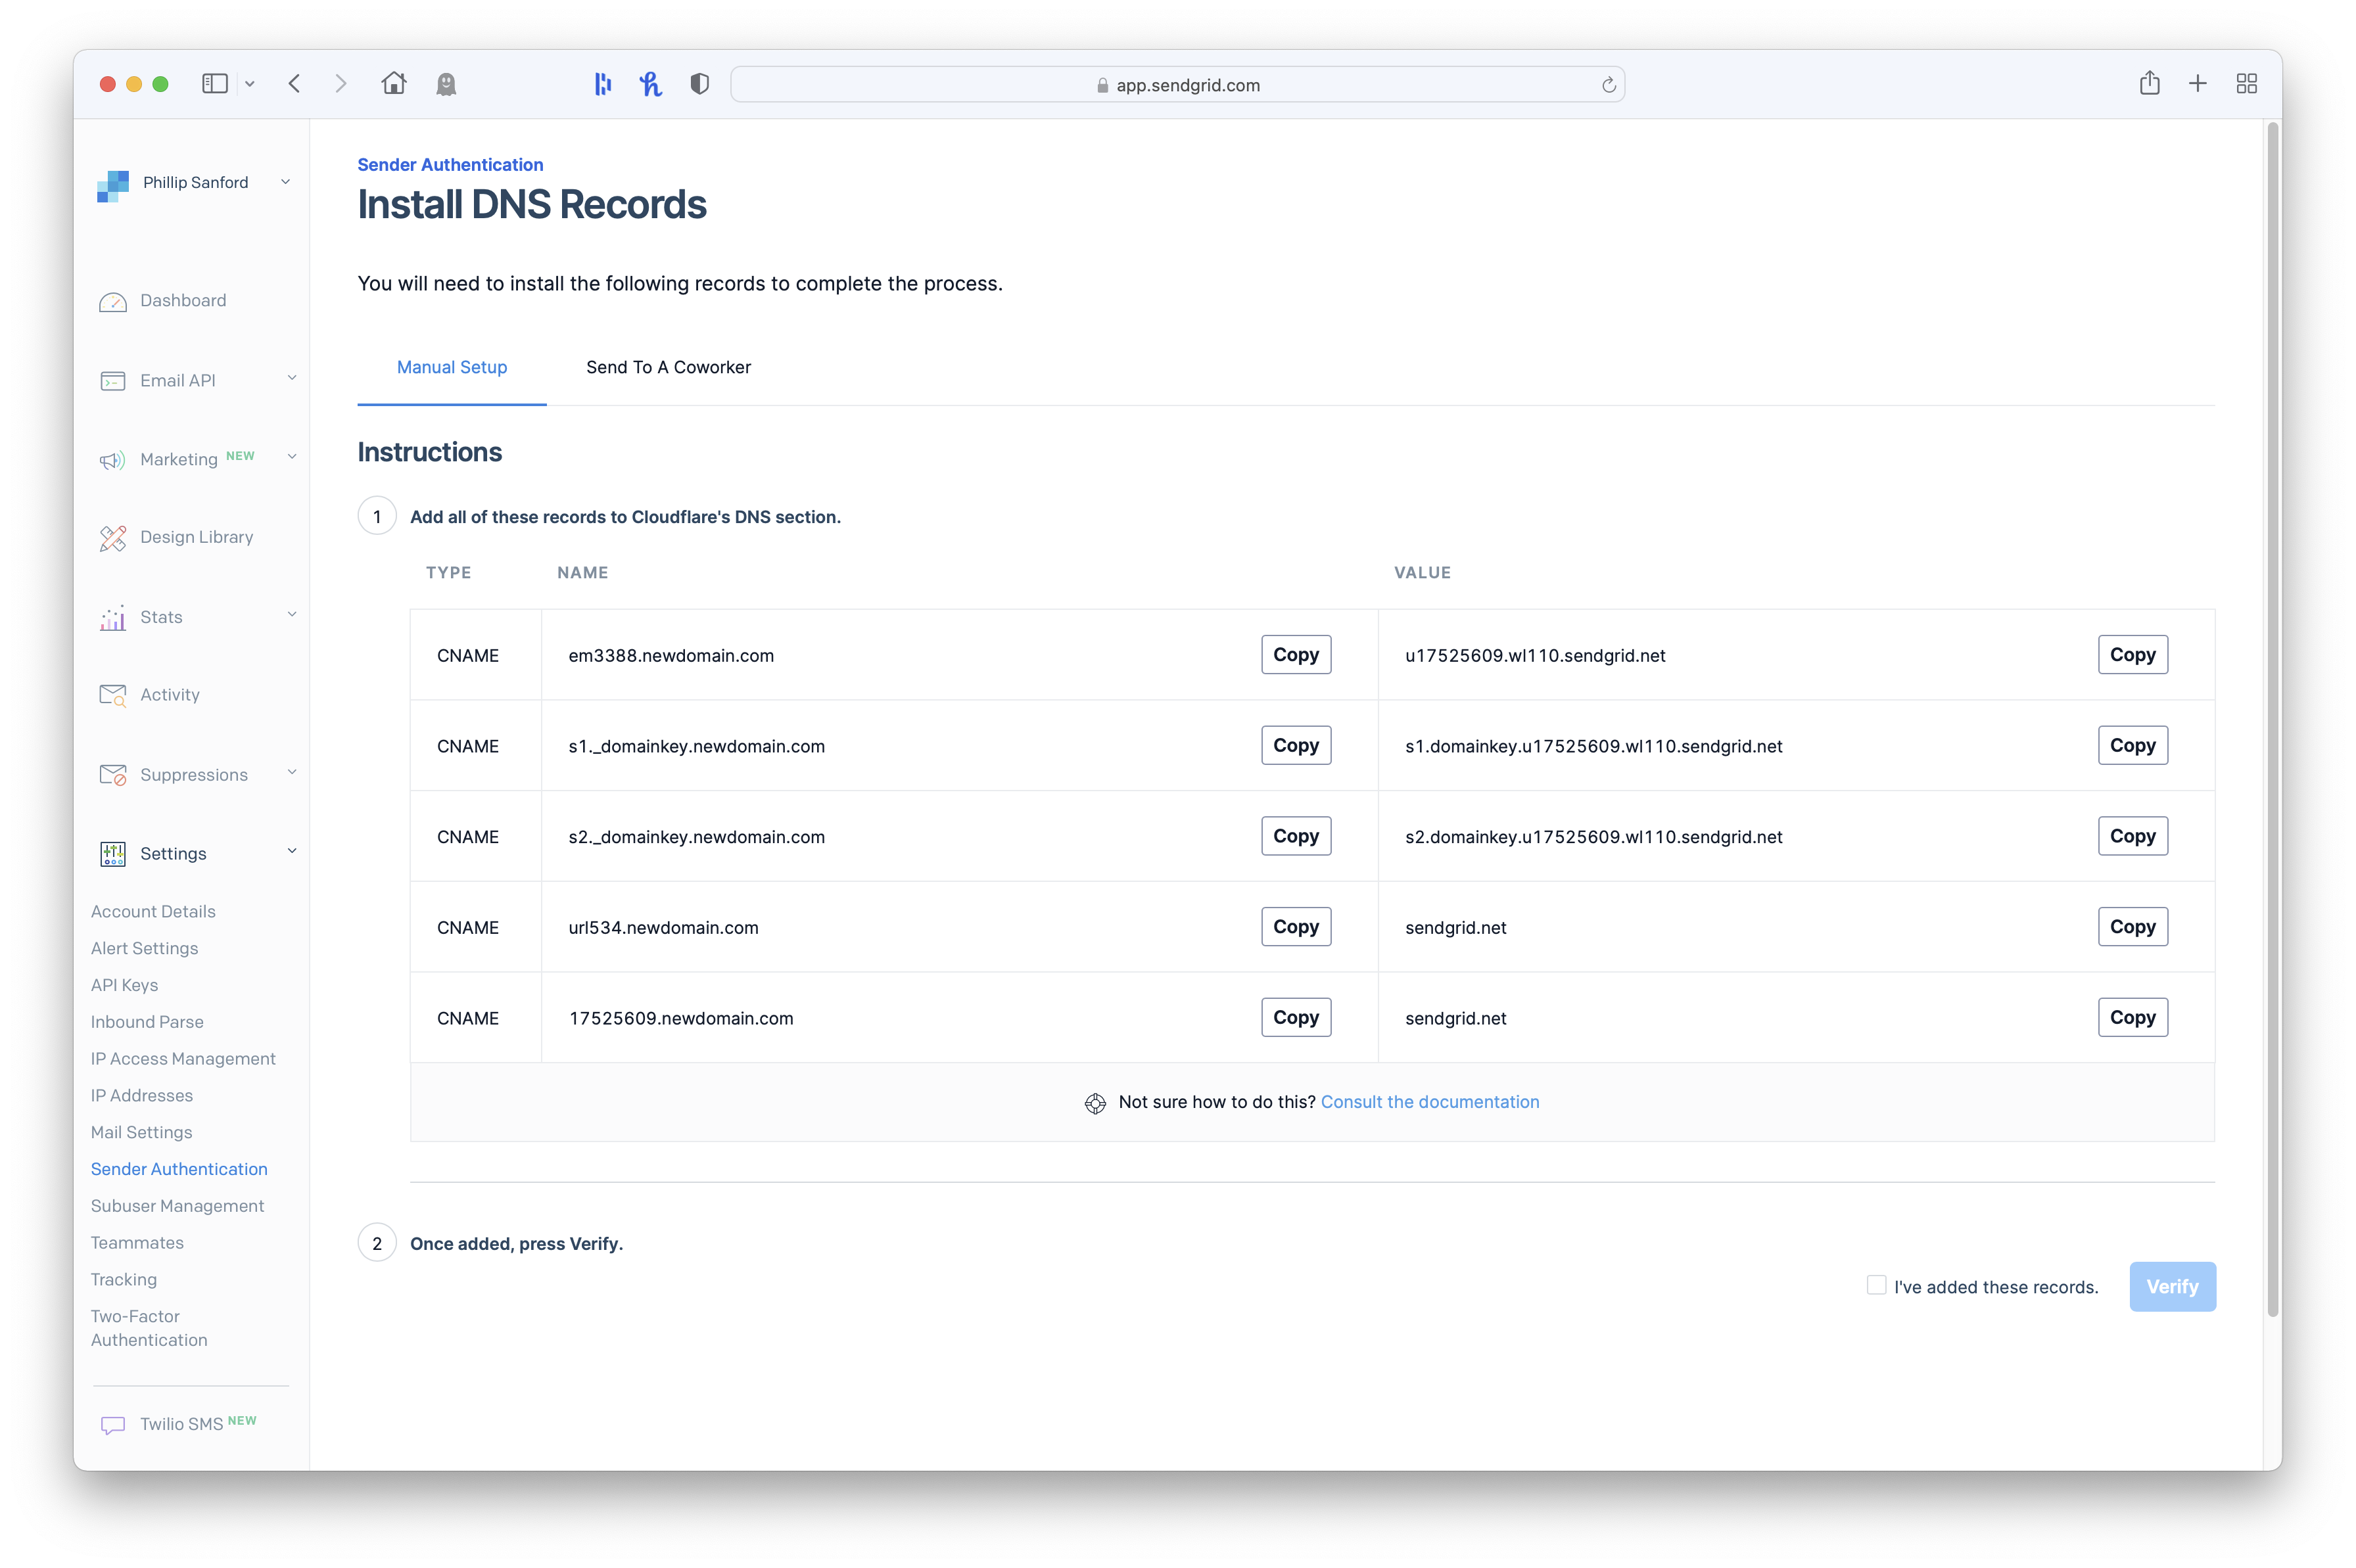
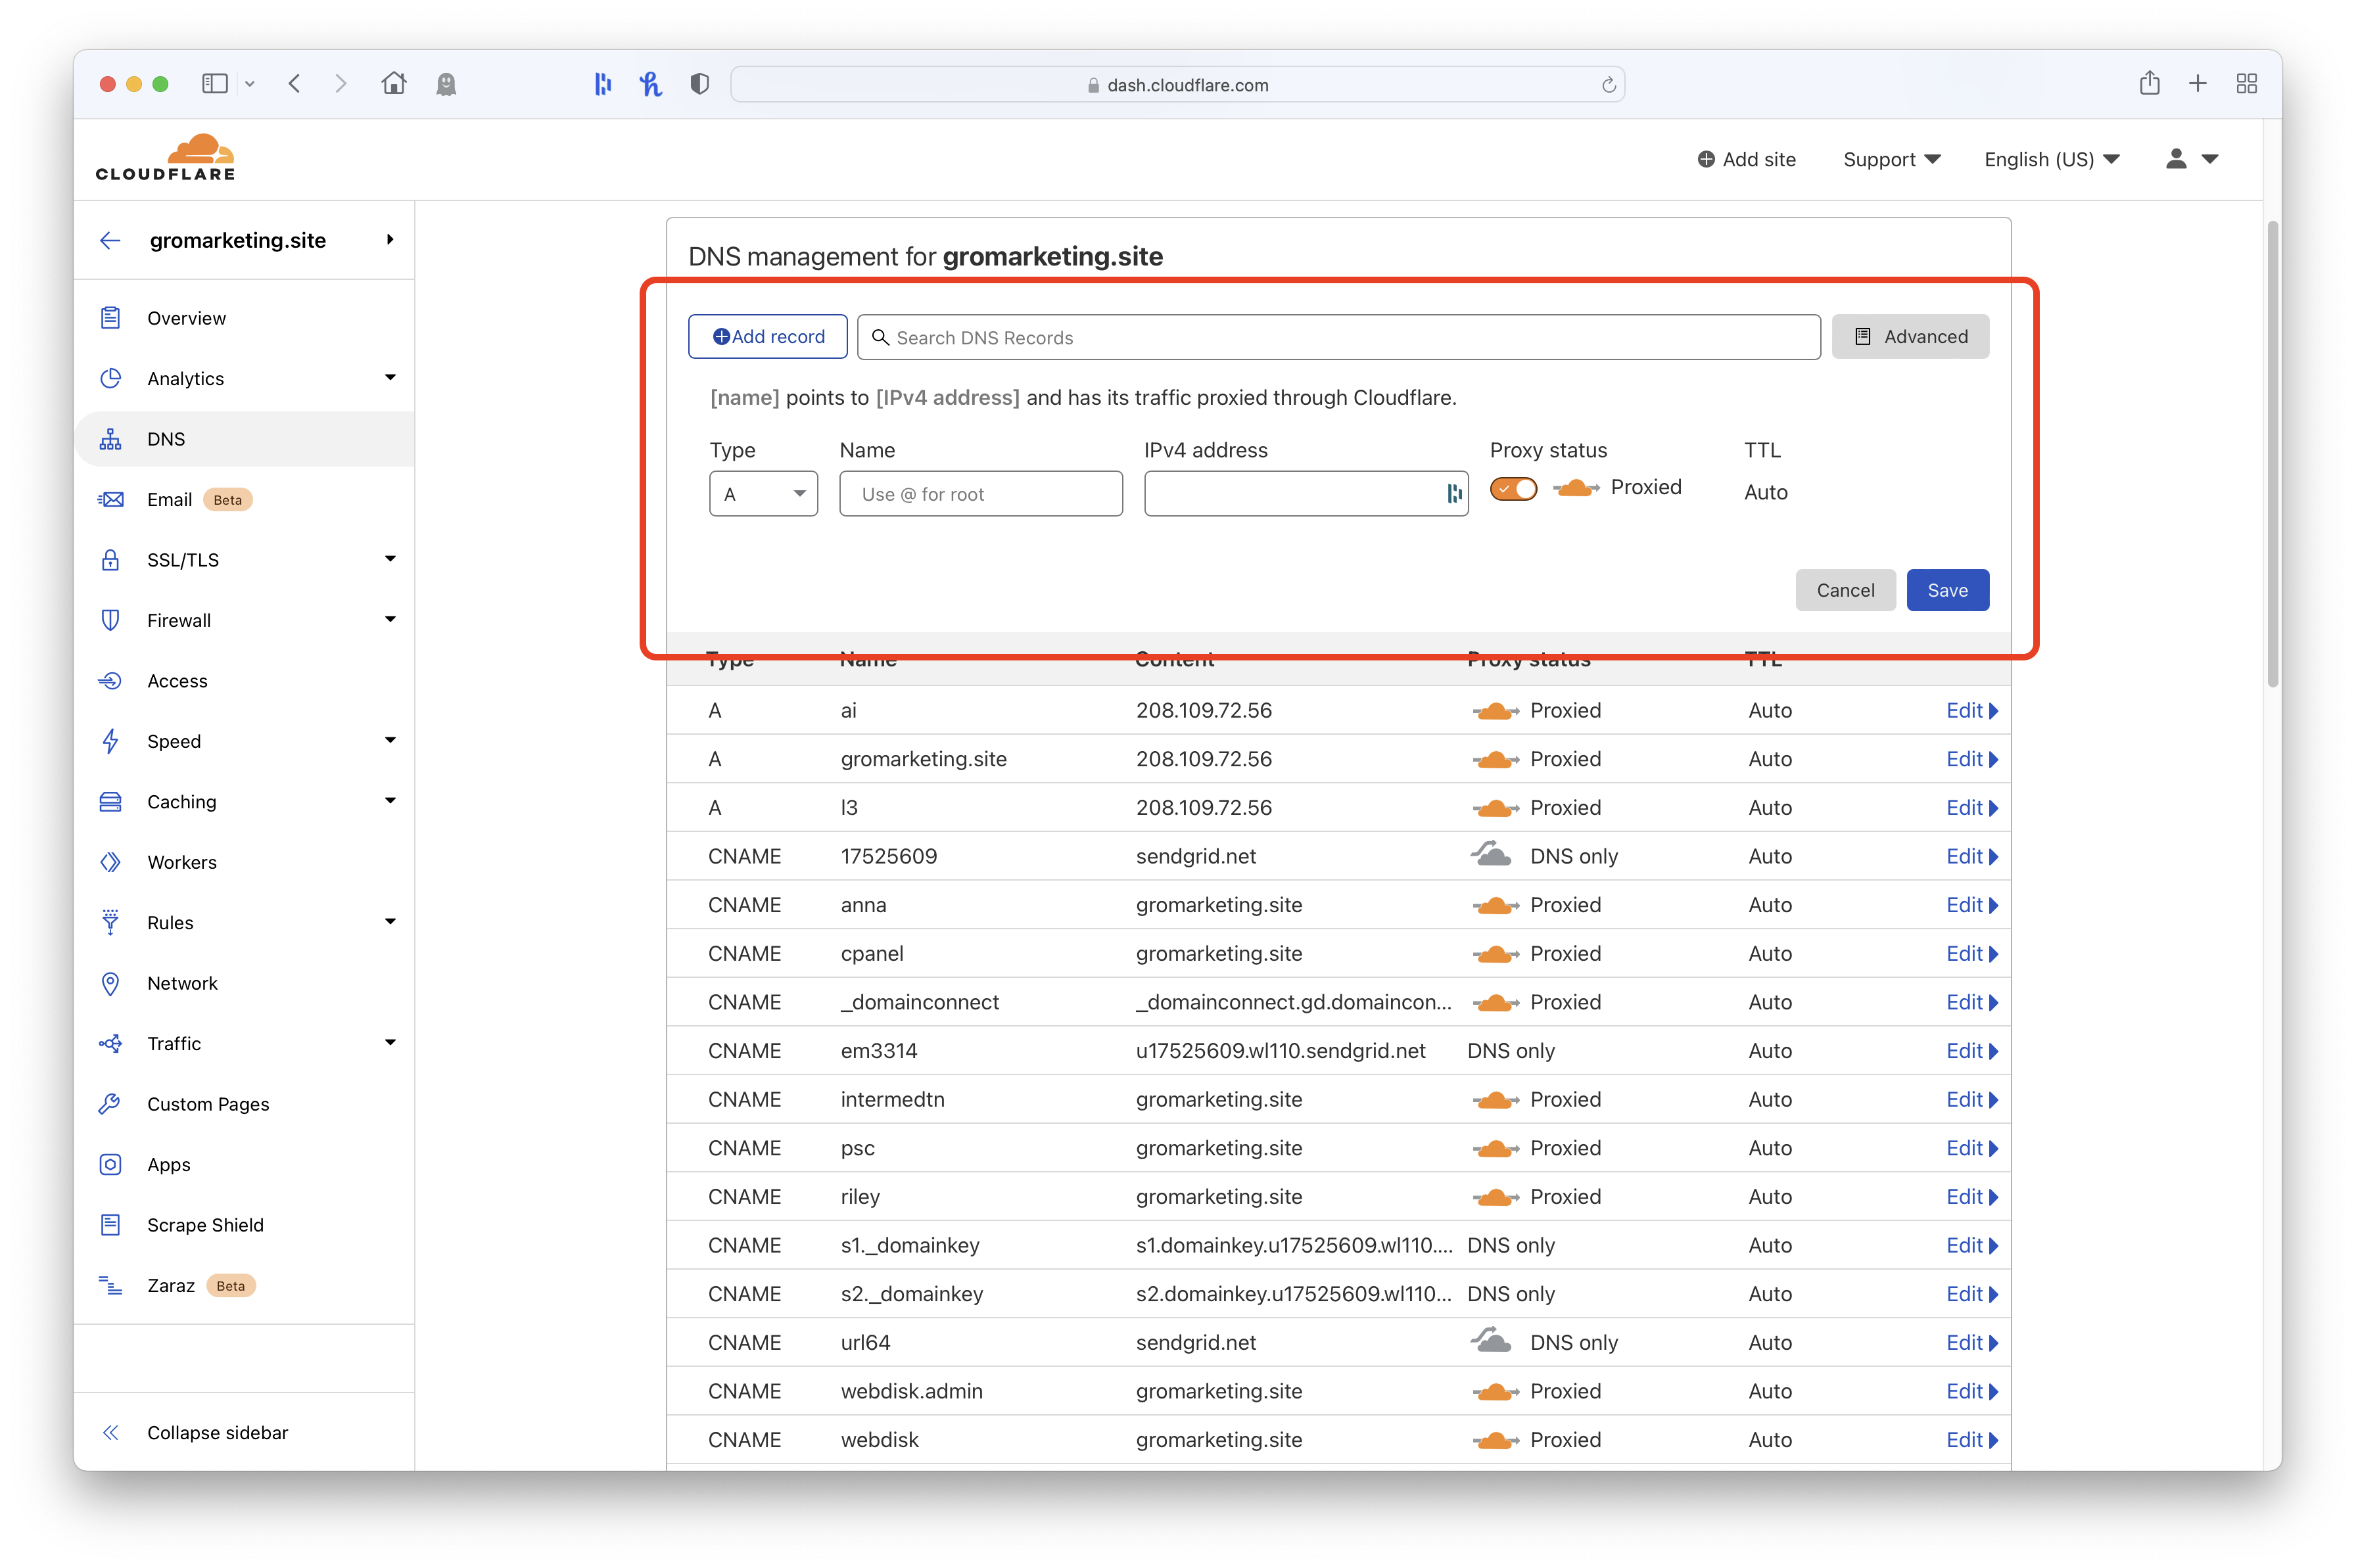
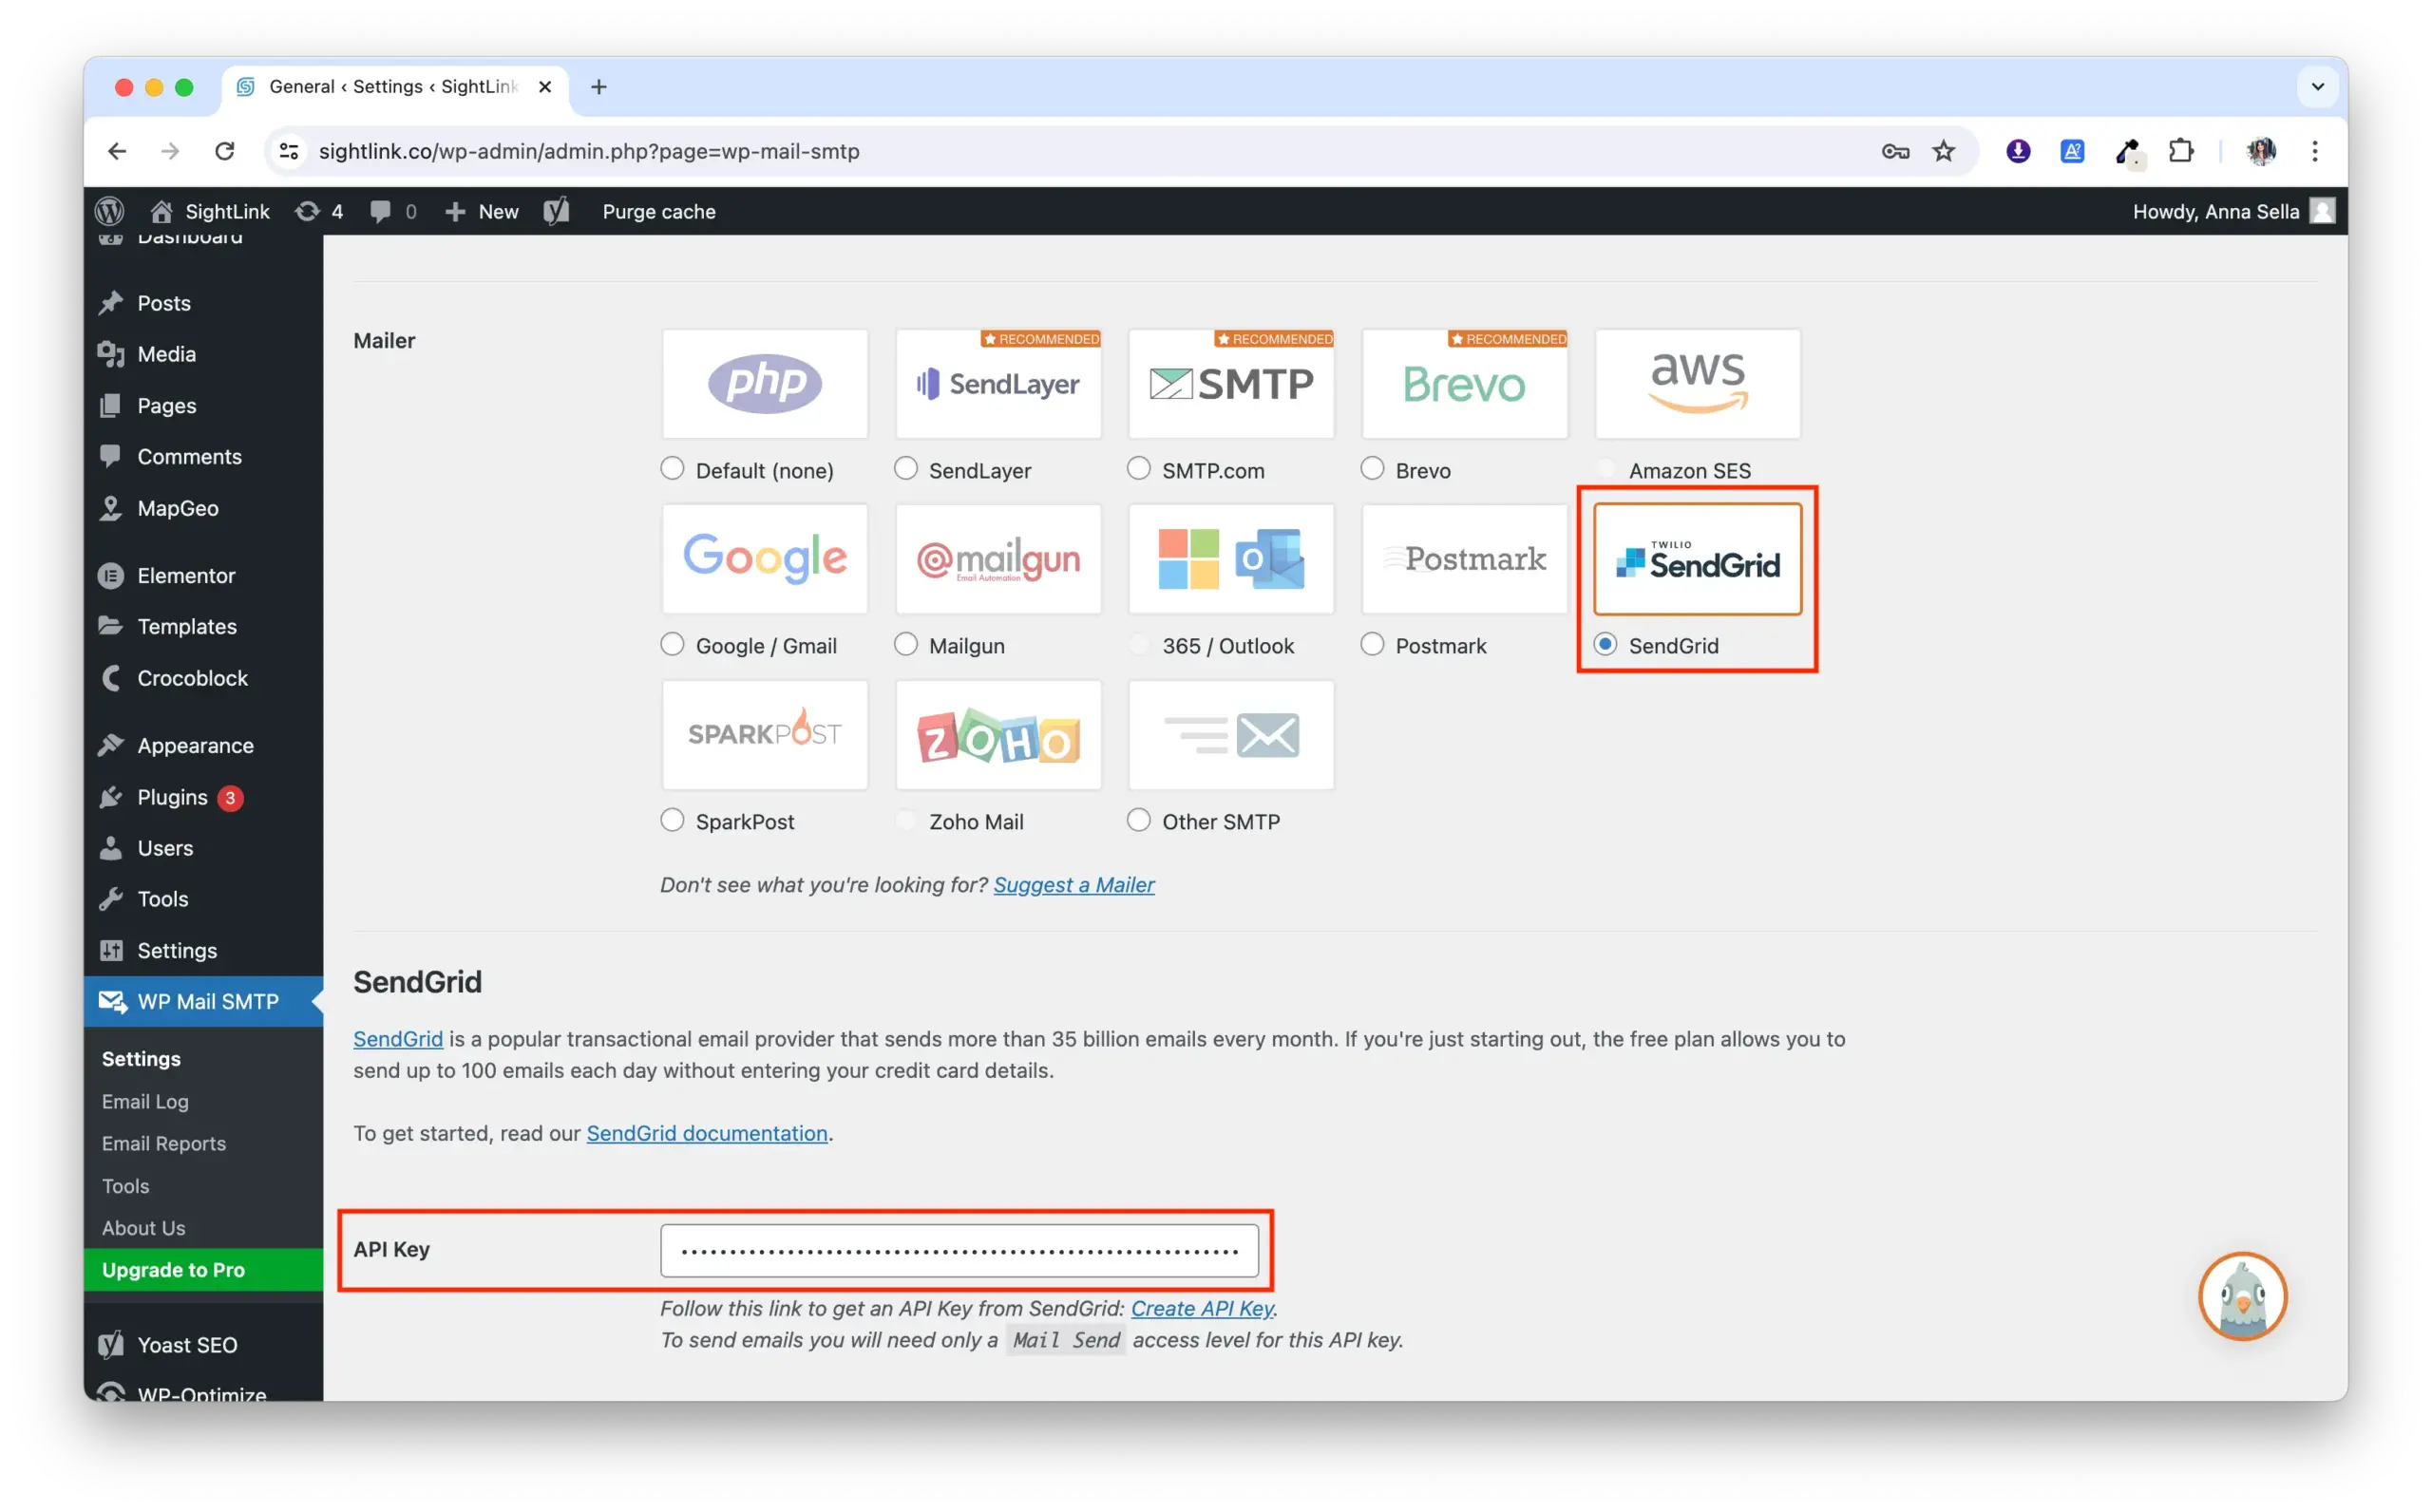
In the Mailer section, the SendGrid box should be checked.
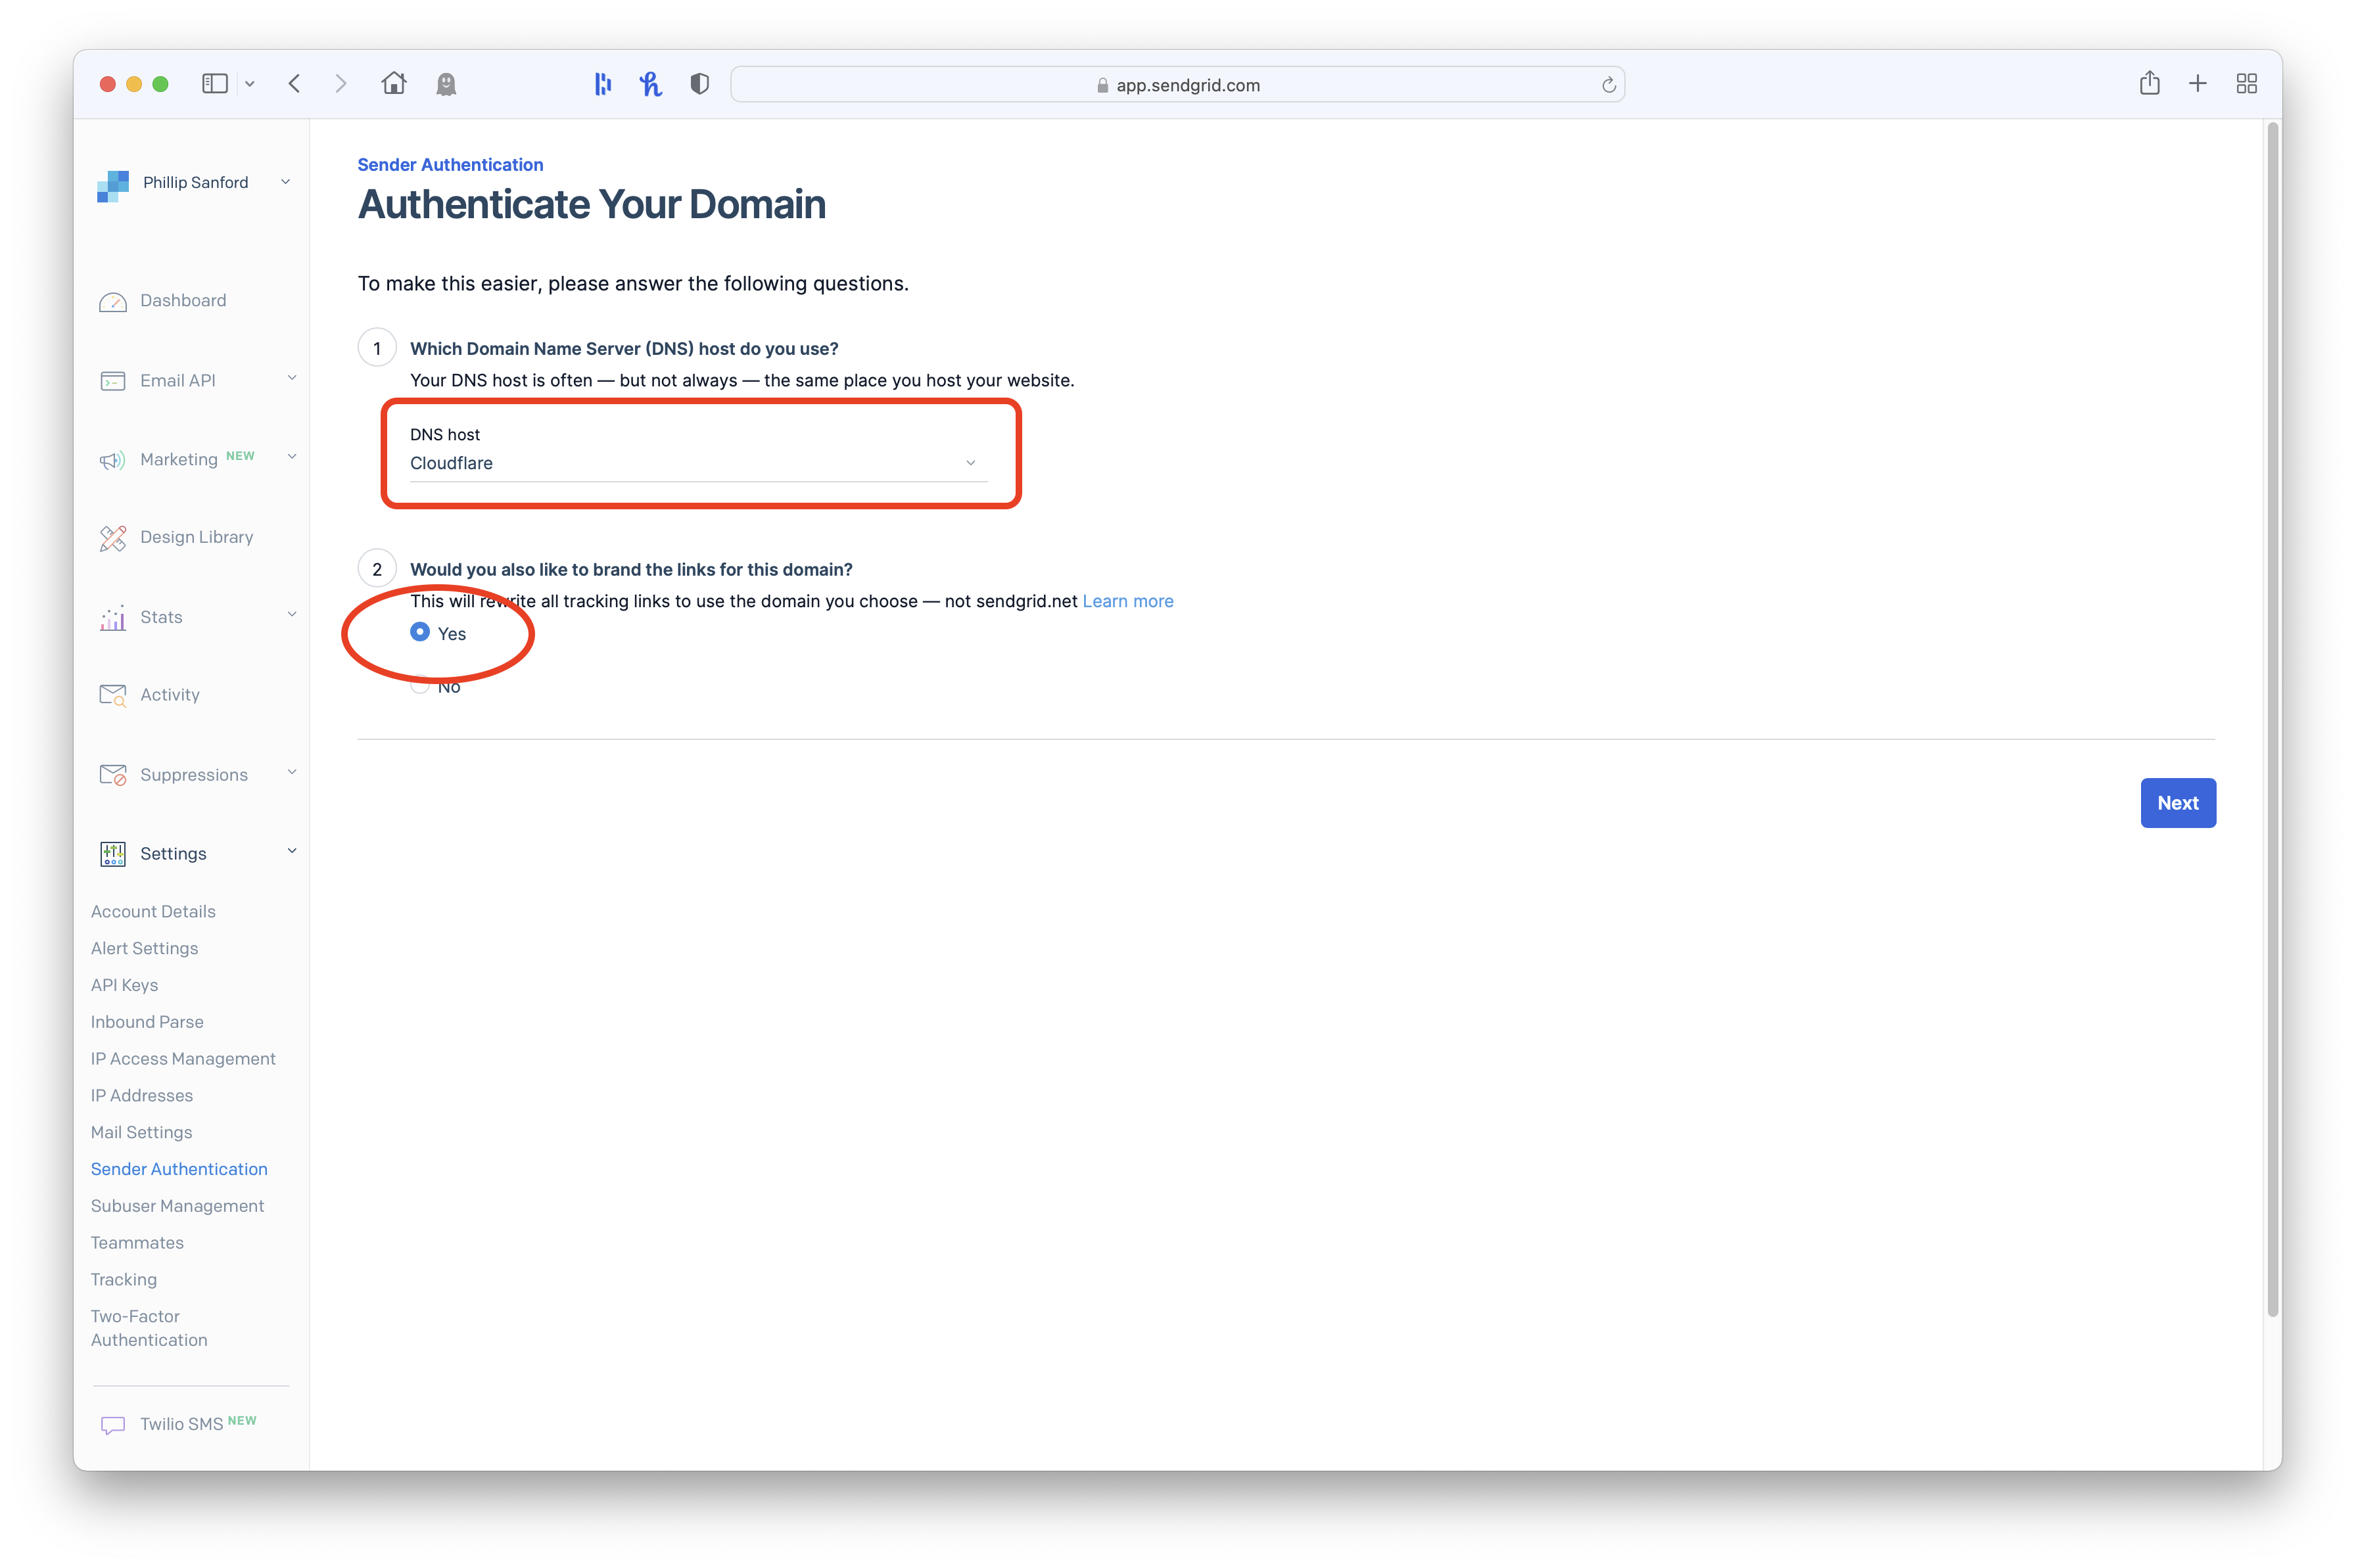
Set the Sending Domain to whatever the end goal domain is or will be.
Test Email Delivery (After Launch or on Live Domain)Test your email under WP Mail SMTP > Settings > Tools insert a valid email address in the Send To field, and click Send Email.
Be sure to check your Spam folder.
Force From Name or EmailIt's a case-by-case basis. For example, if we have a website with one or two forms, or a single global form (like most times), both can be switched on. But in the instance that you have multiple forms throughout a site, with some needing to be sent from different addresses or names, switch both of those off.
Optional: MailChimp Integration
First, you will need the following from the client:
MailChimp API Key
Audience / List Name (this is what the submissions will go to)
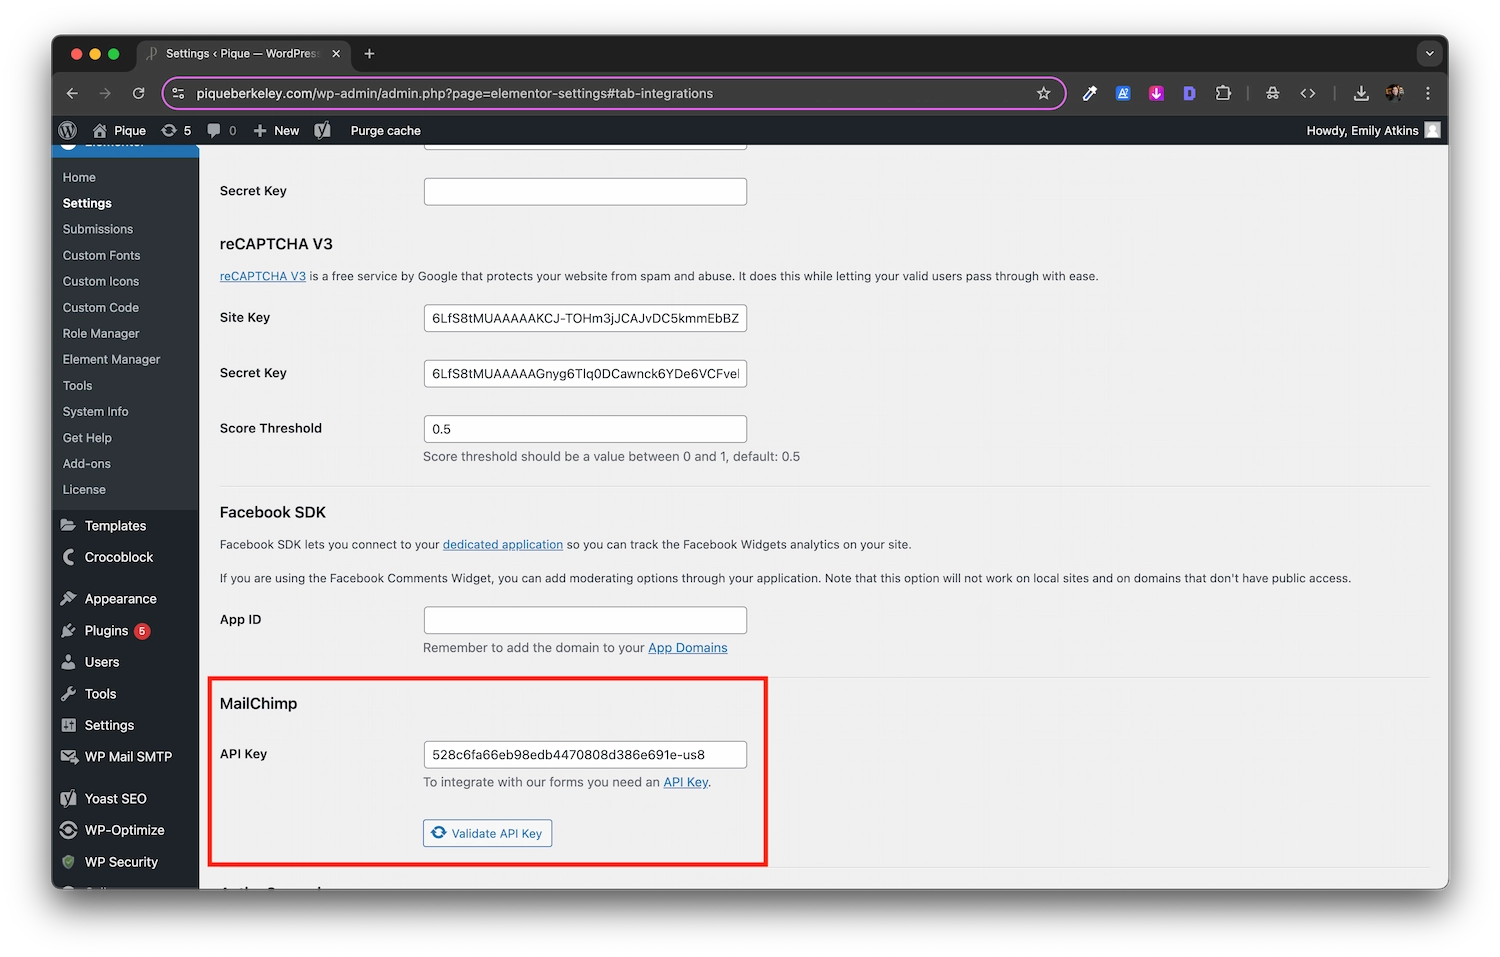
Navigate to Elementor > Settings > Integration
Paste the API Key into it's corresponding section and click Validate API Key. Then scroll down and click Save.
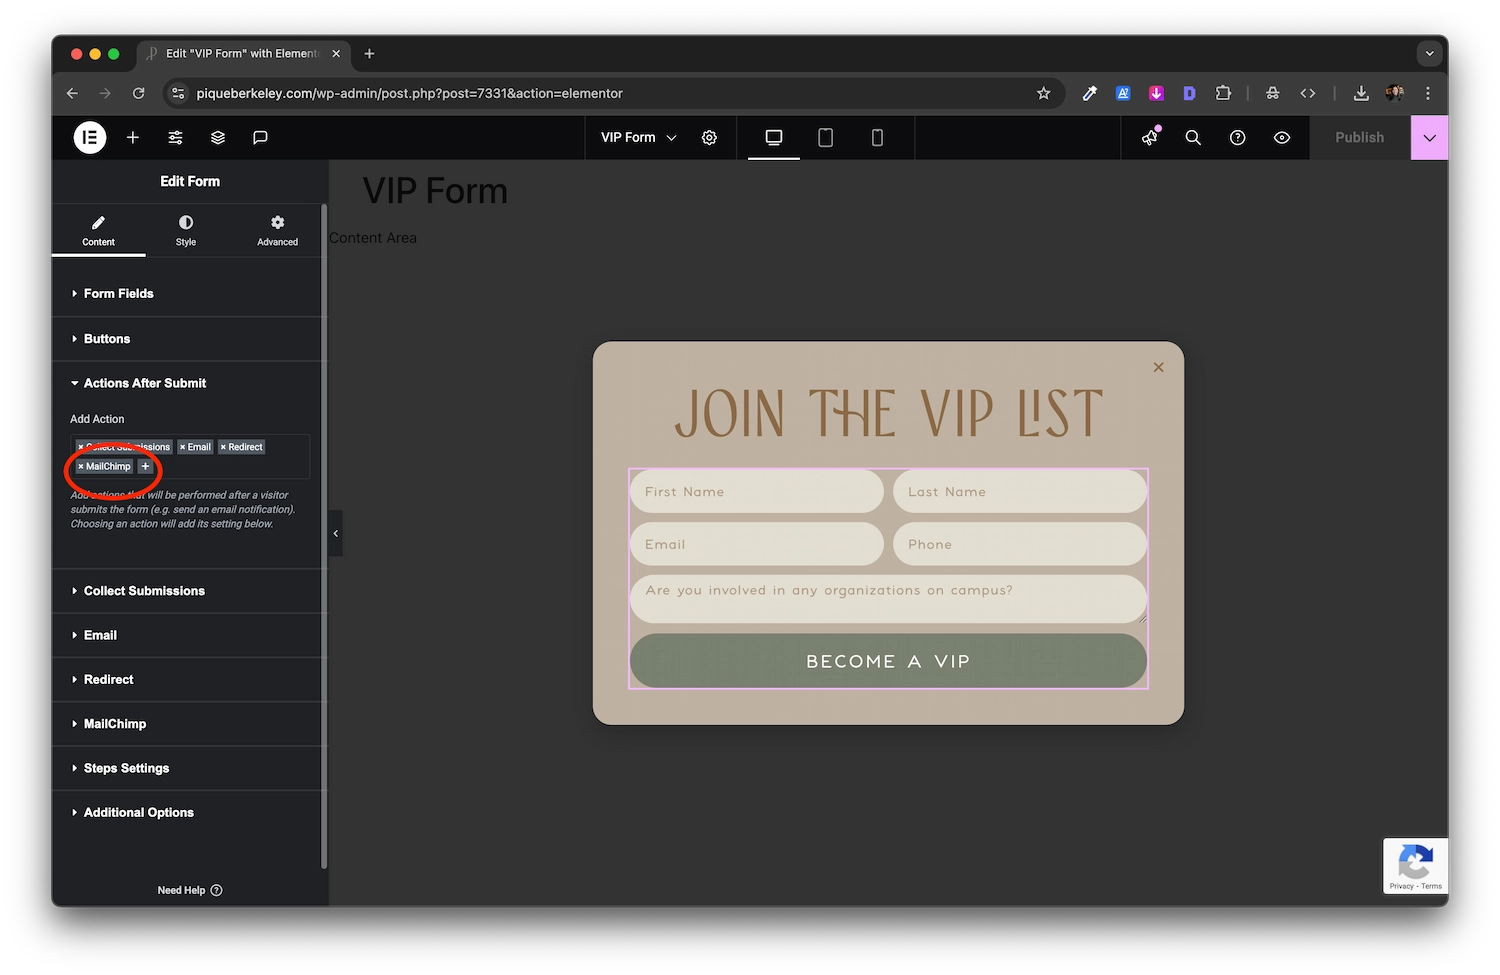
In the form you are using under Actions After Submit, click the plus button and add MailChimp
When the MailChimp tab shows up, set your API Key to Default if you put it into the Elementor settings. If it is different from that one, type in the custom API key.
Select your Audience
Under Field Mapping, change the Email* from None to Email
After site launch, it’s imperative to have the client test and confirm all form submissions are not only being sent, but also received at the appropriate addresses.