How to Go Live
Once a dev site is 100% complete and ready to launch (go live), there are 5 critical steps to follow. This involves domain access, DNS record changes, and eventually pointing the live domain to the server where the new site is hosted.
* NOTE: Editing domain DNS and records should be handled very delicately. Incorrect DNS adjustments can result in websites crashing, email disappearing, or other network problems.
Operating Spaces

Step 1 - Add Domain to Cloudflare
- Open Cloudflare and Log in
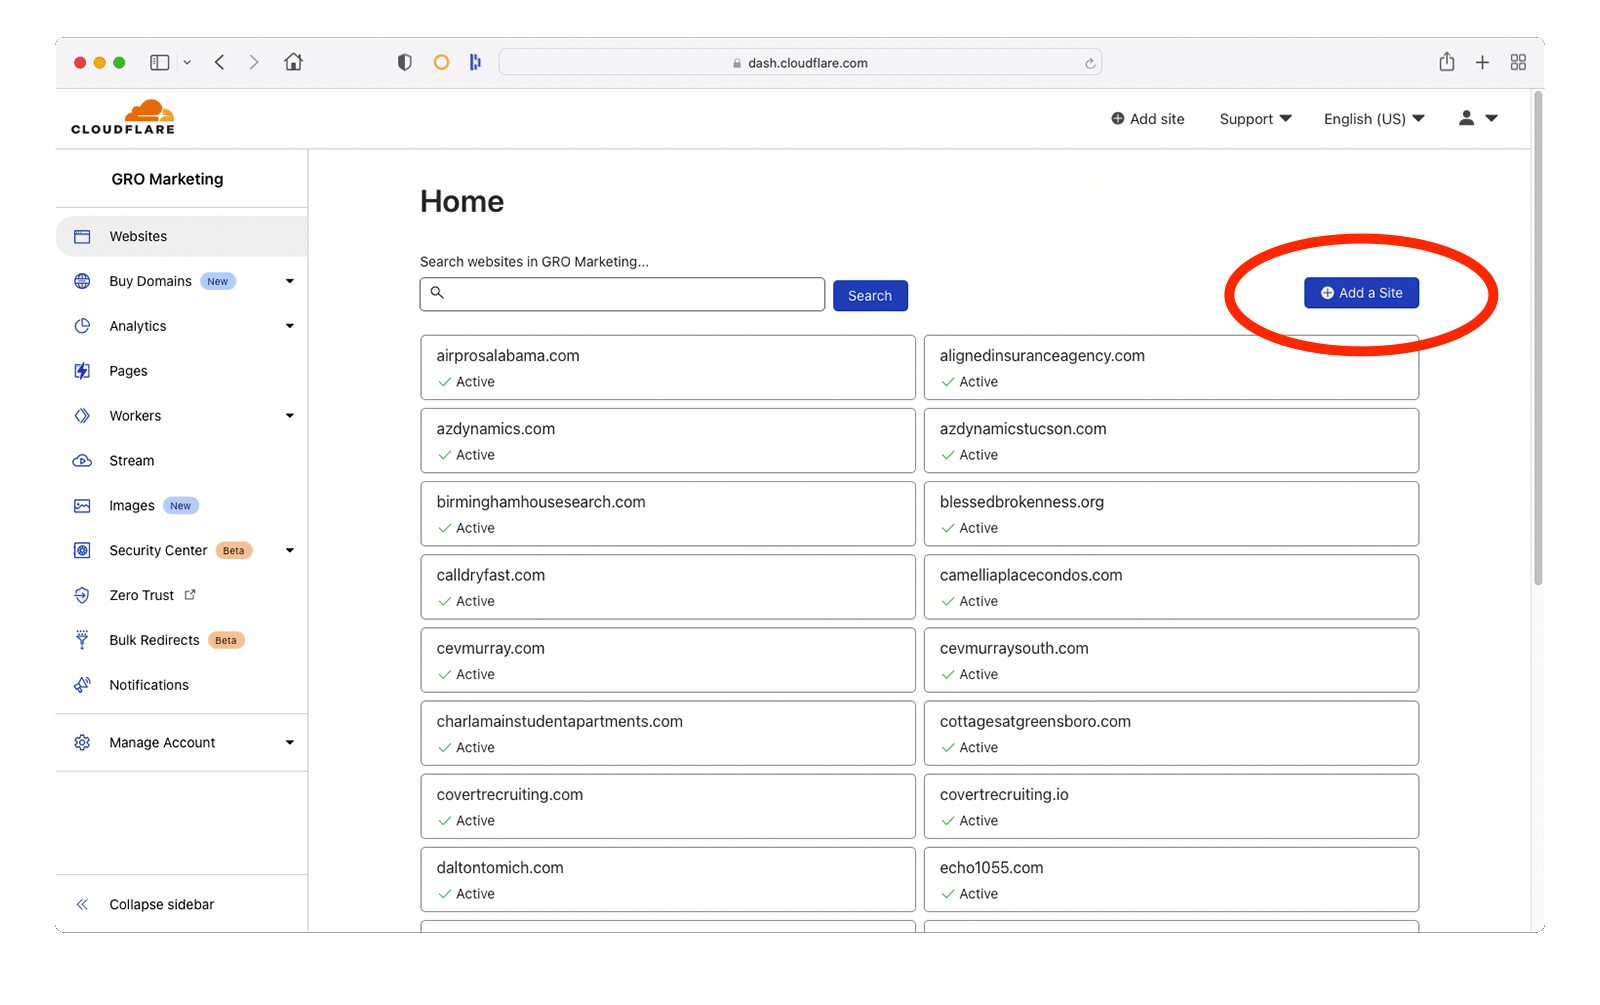
- Click the Add a Site button
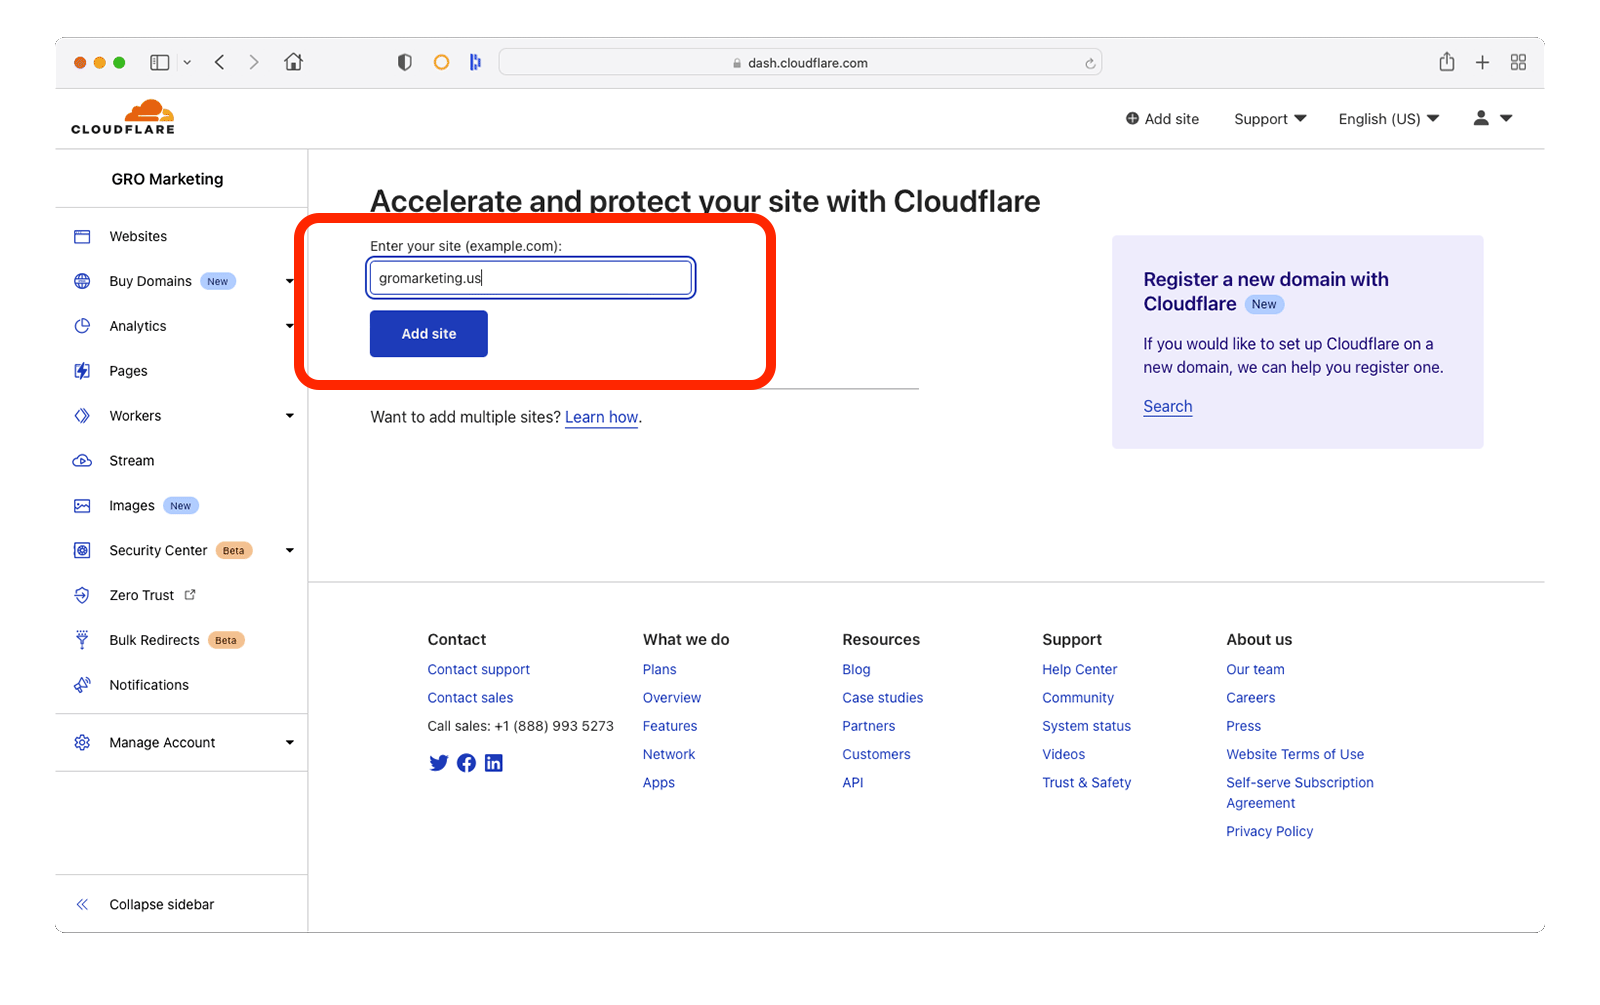
- Type in the live domain and click Add site
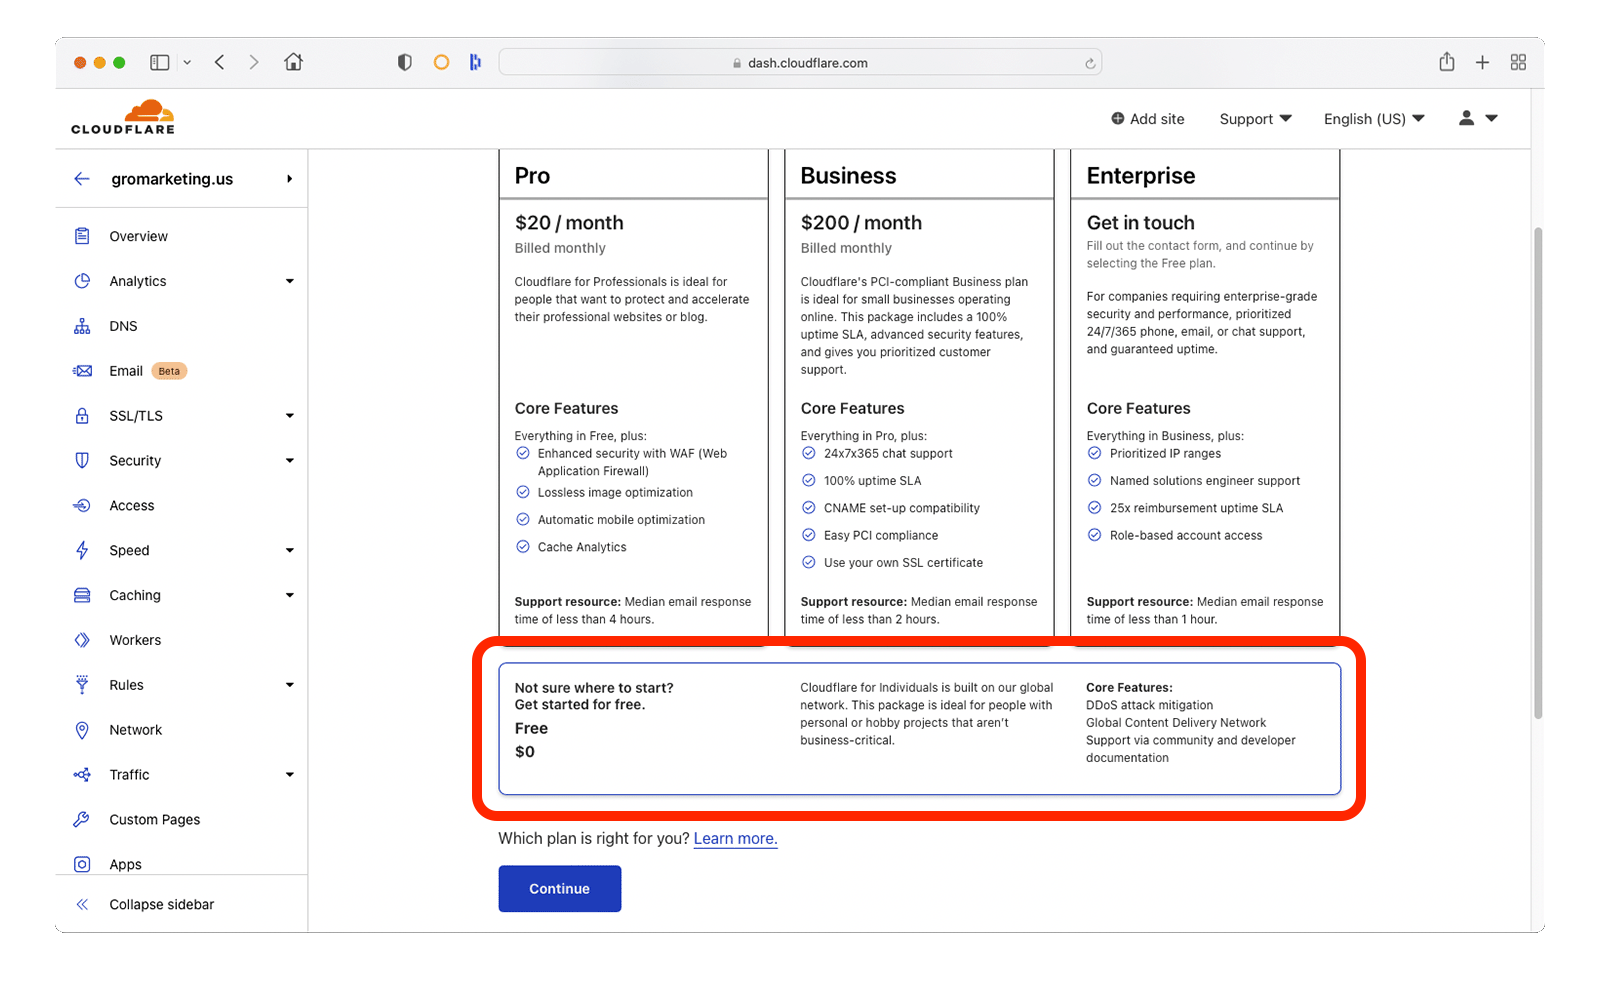
- Select the Free $0 option at the bottom and click Continue
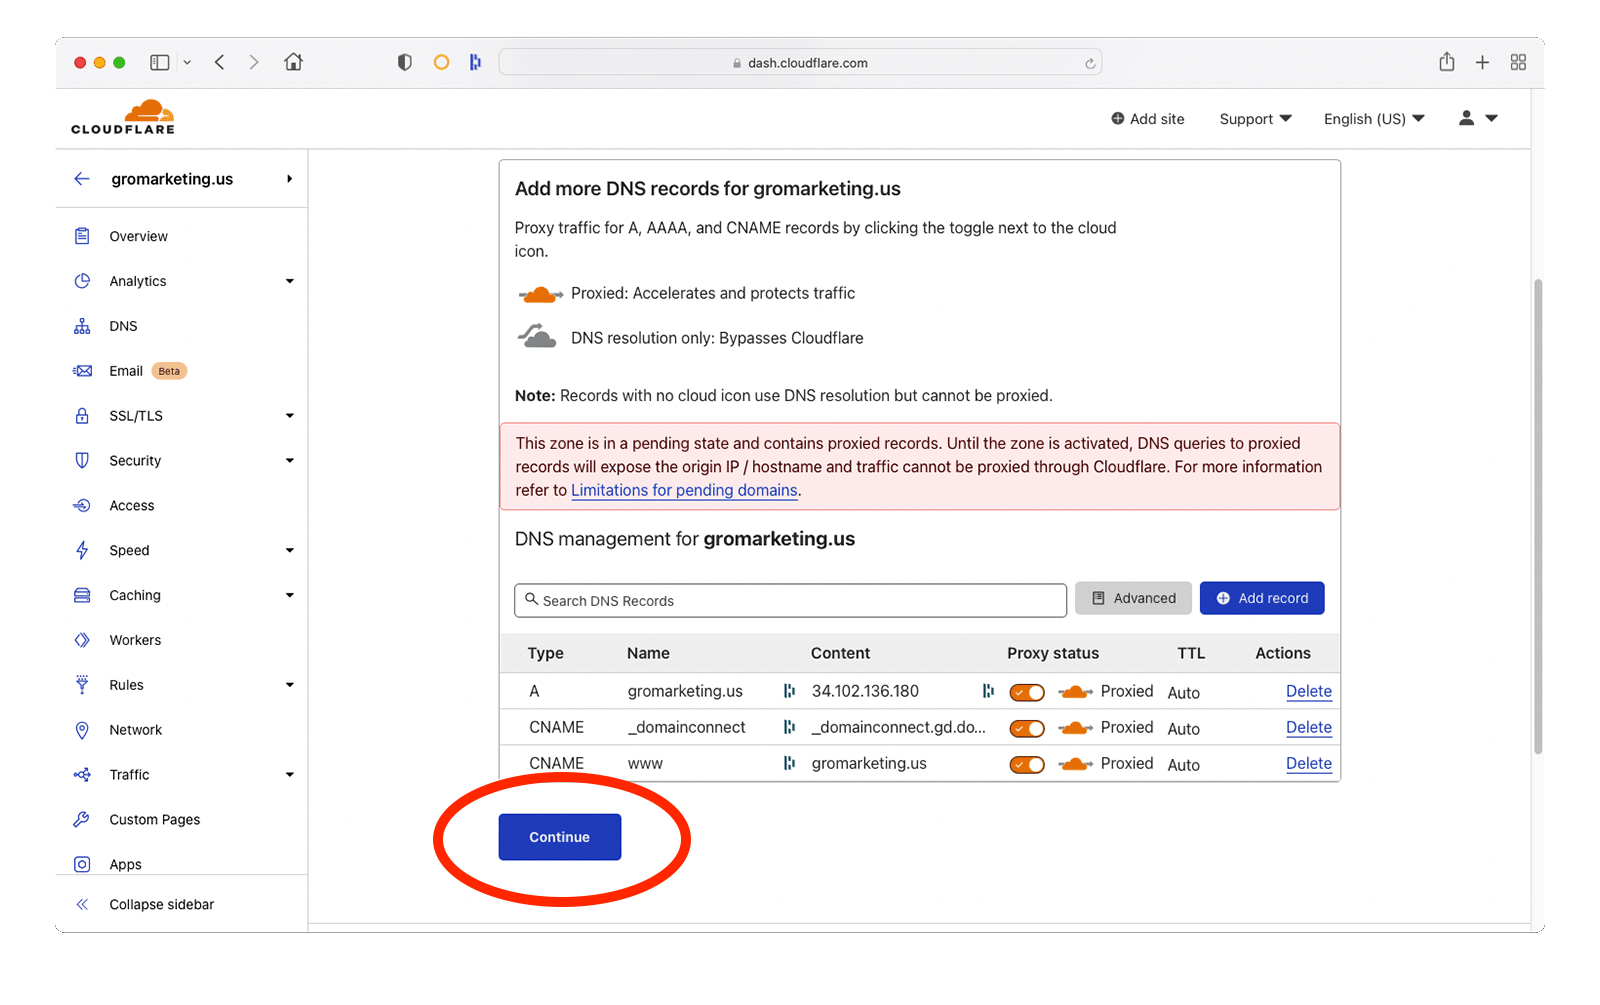
- After existing DNS records populate, click the Continue button
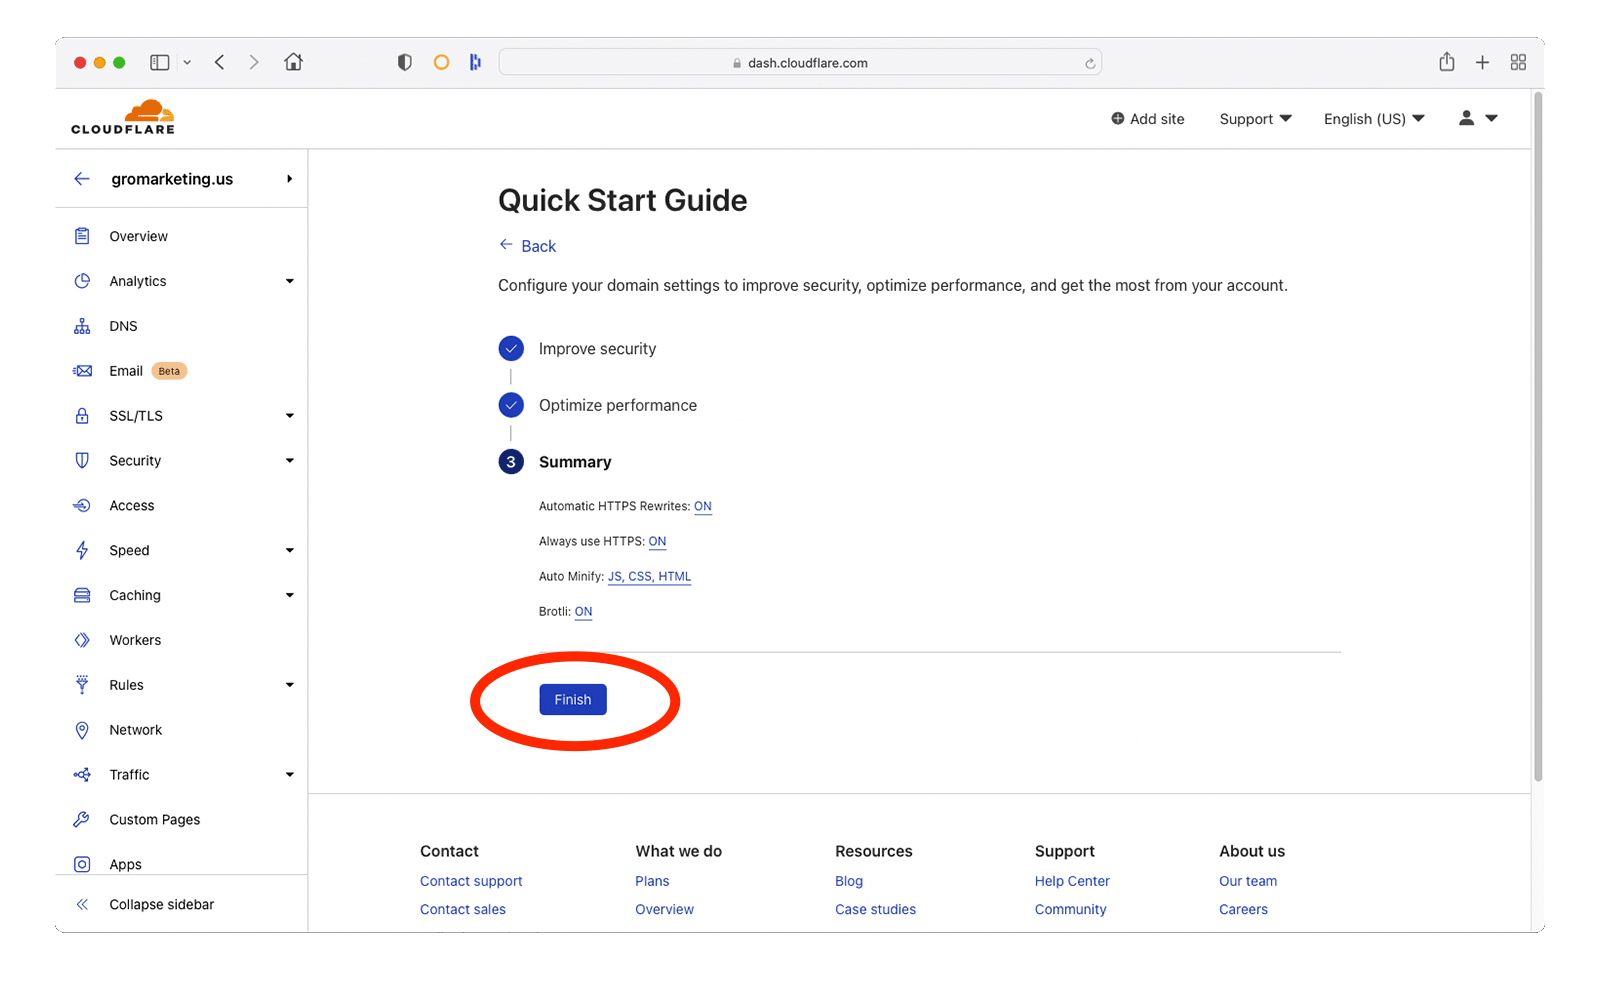
- Check ALL OPTIONS on the Quick Start Guide page and click Finish
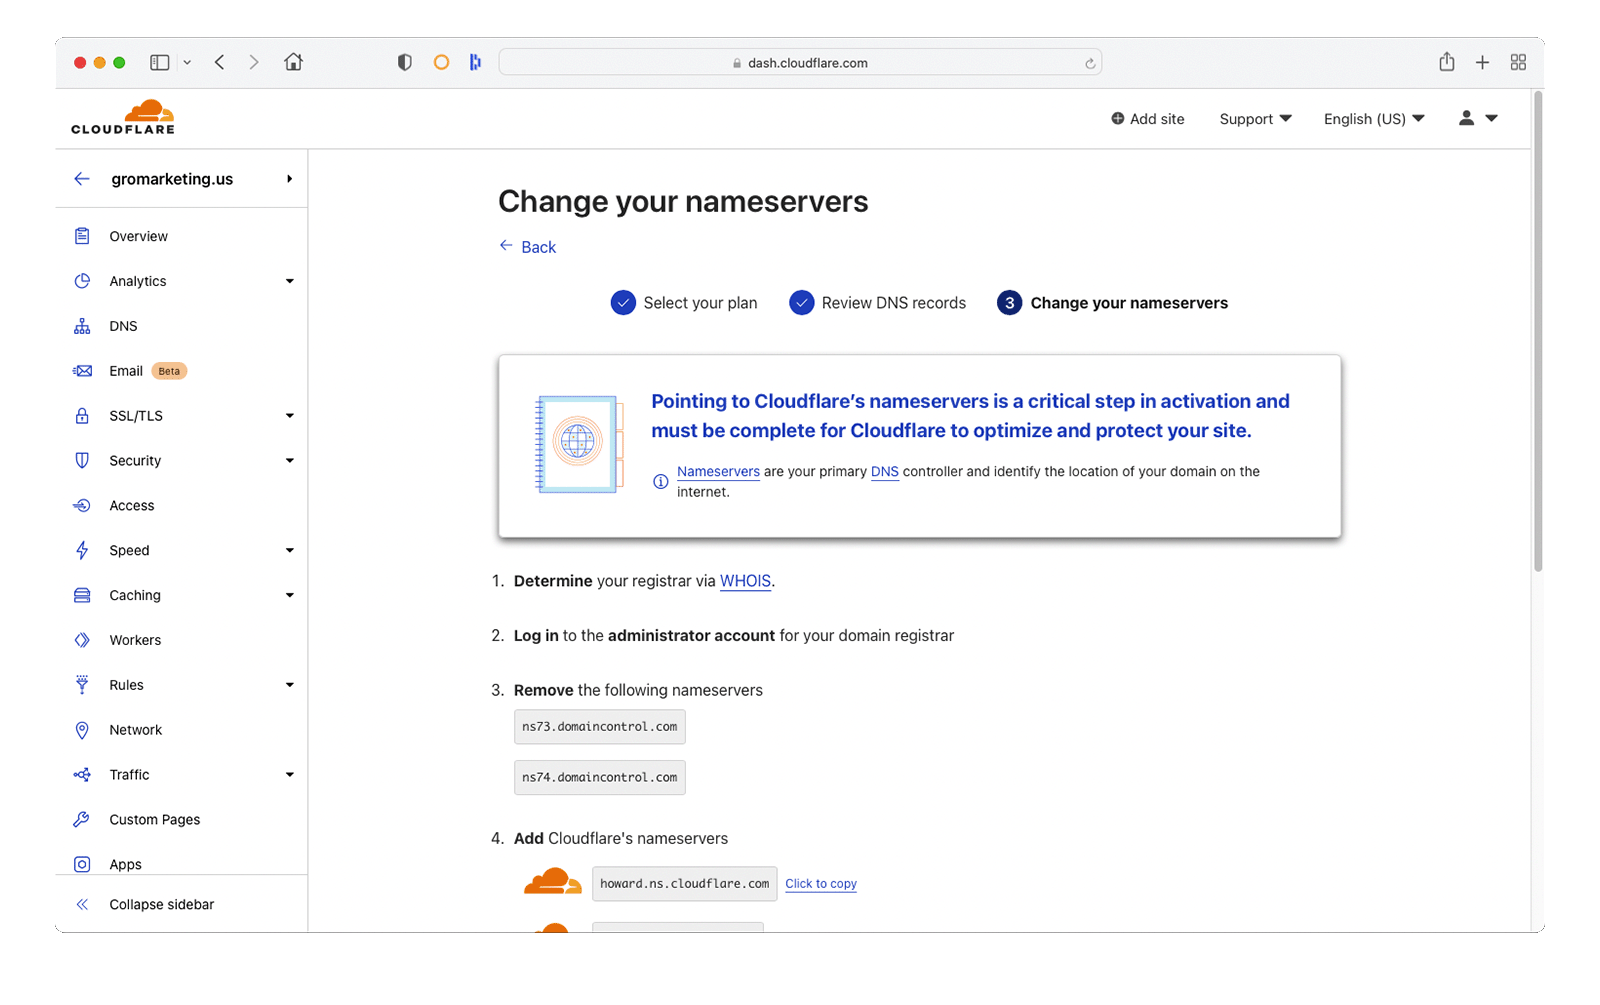
Step 2 - Point Nameservers to Cloudflare
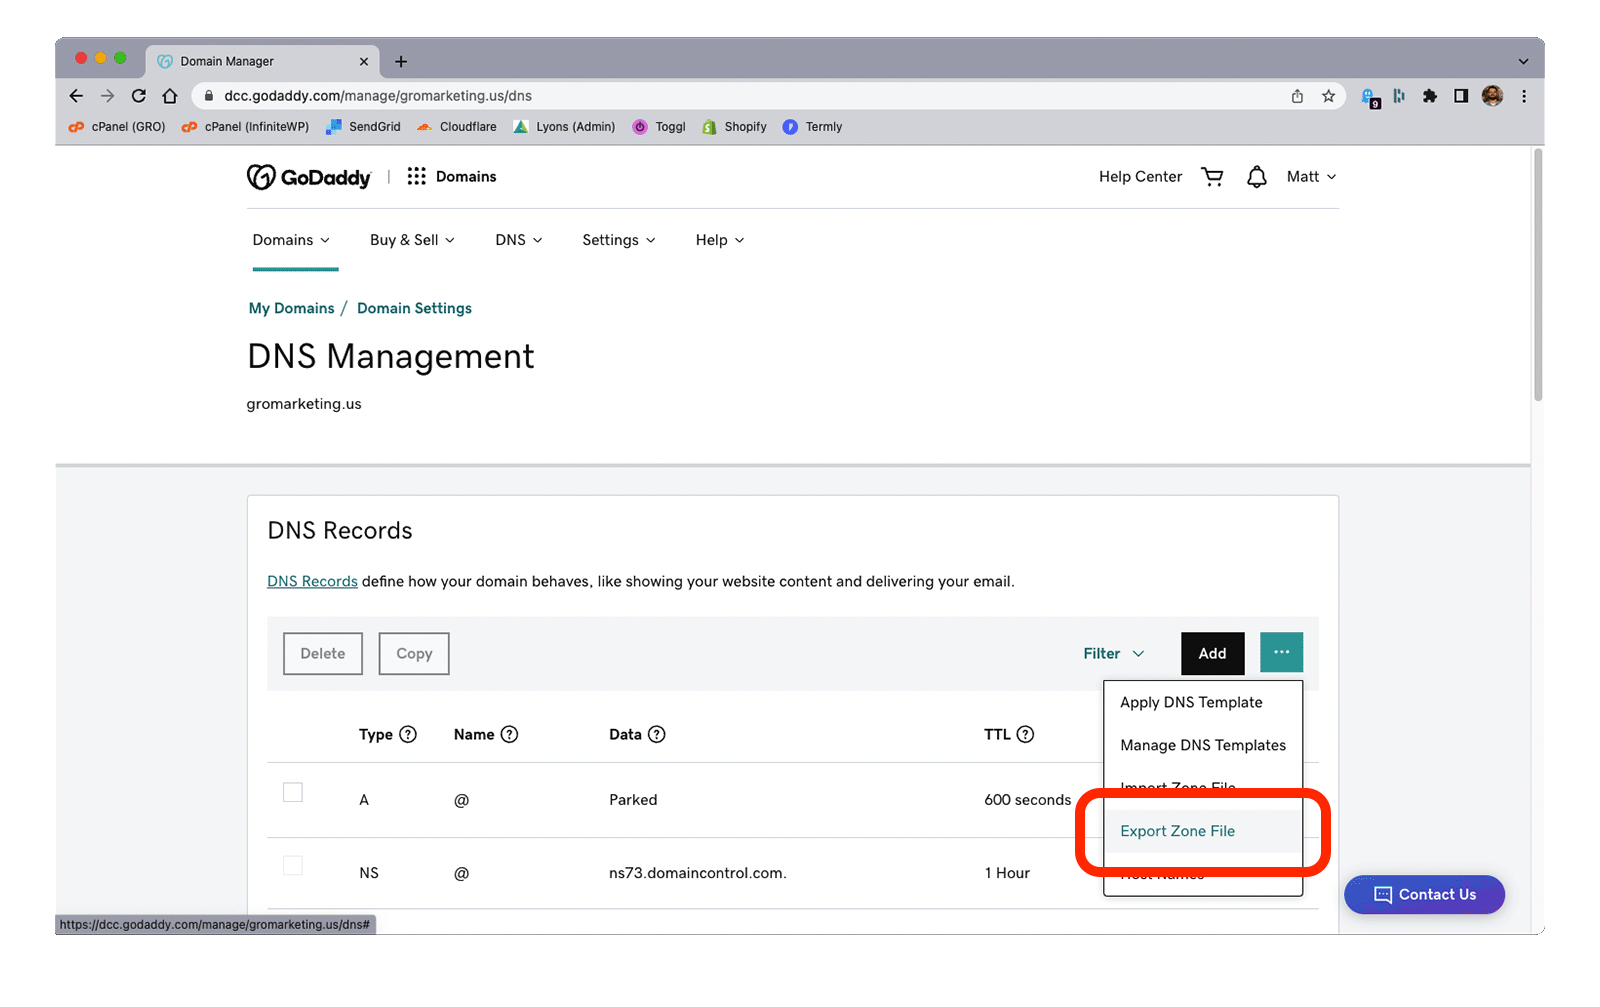
- Login to domain registrar (GoDaddy, Bluehost, Network Solutions, etc)
- Backup the existing DNS Zone file (export as TXT / upload to Monday.com task)
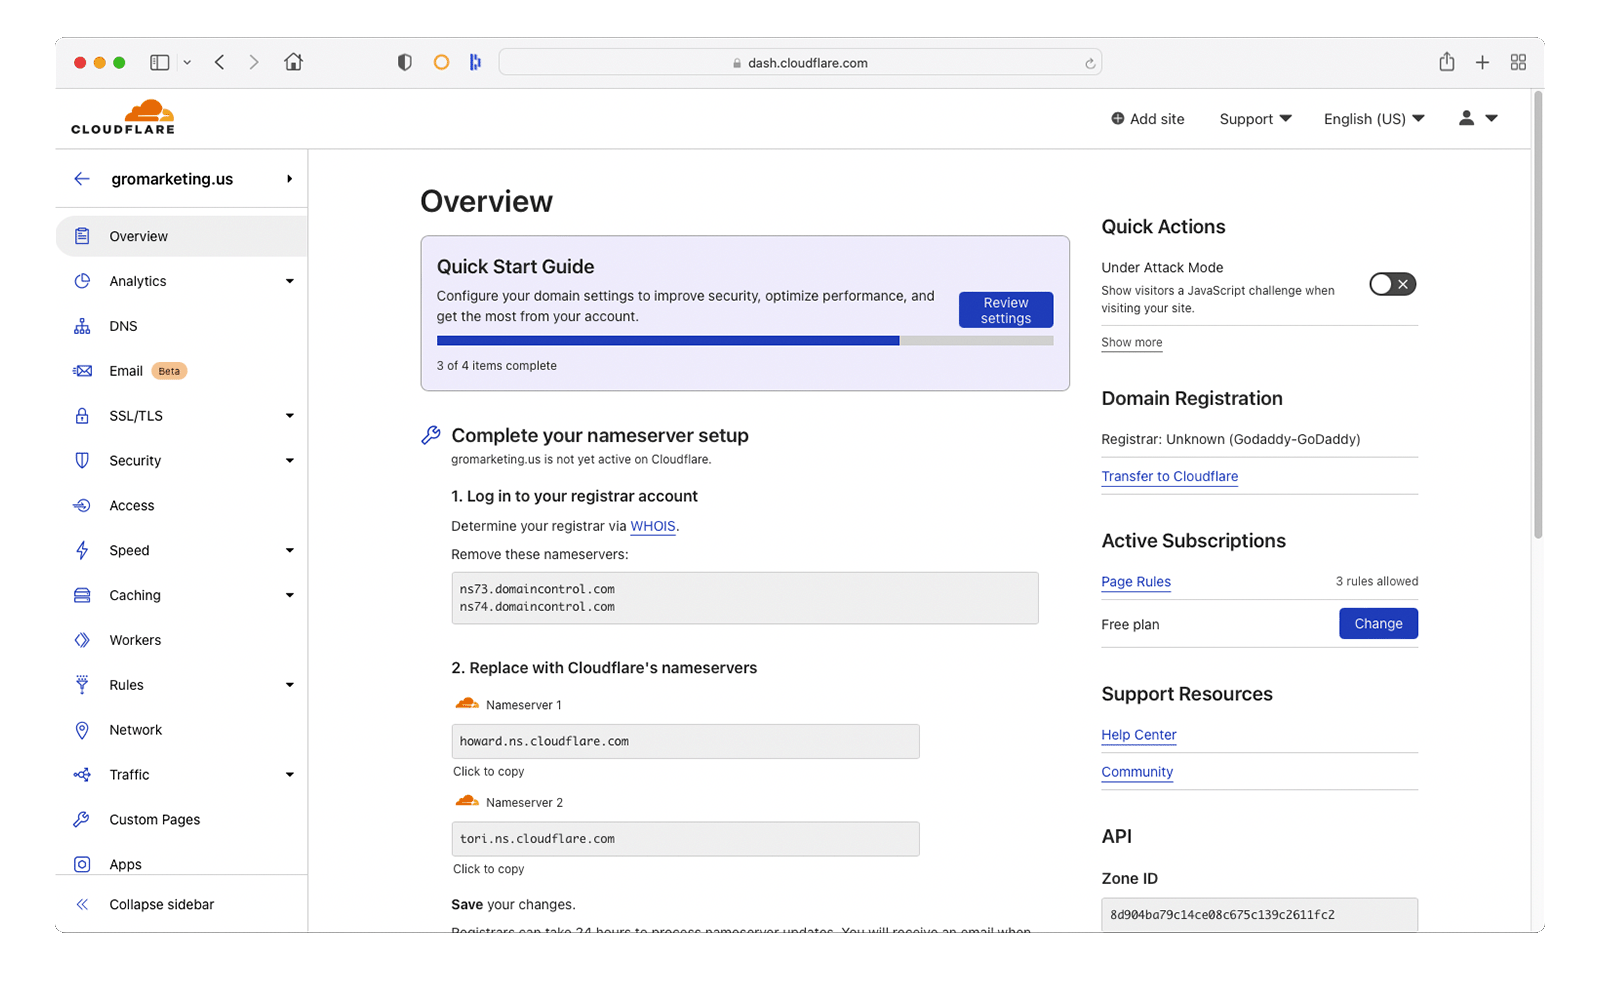
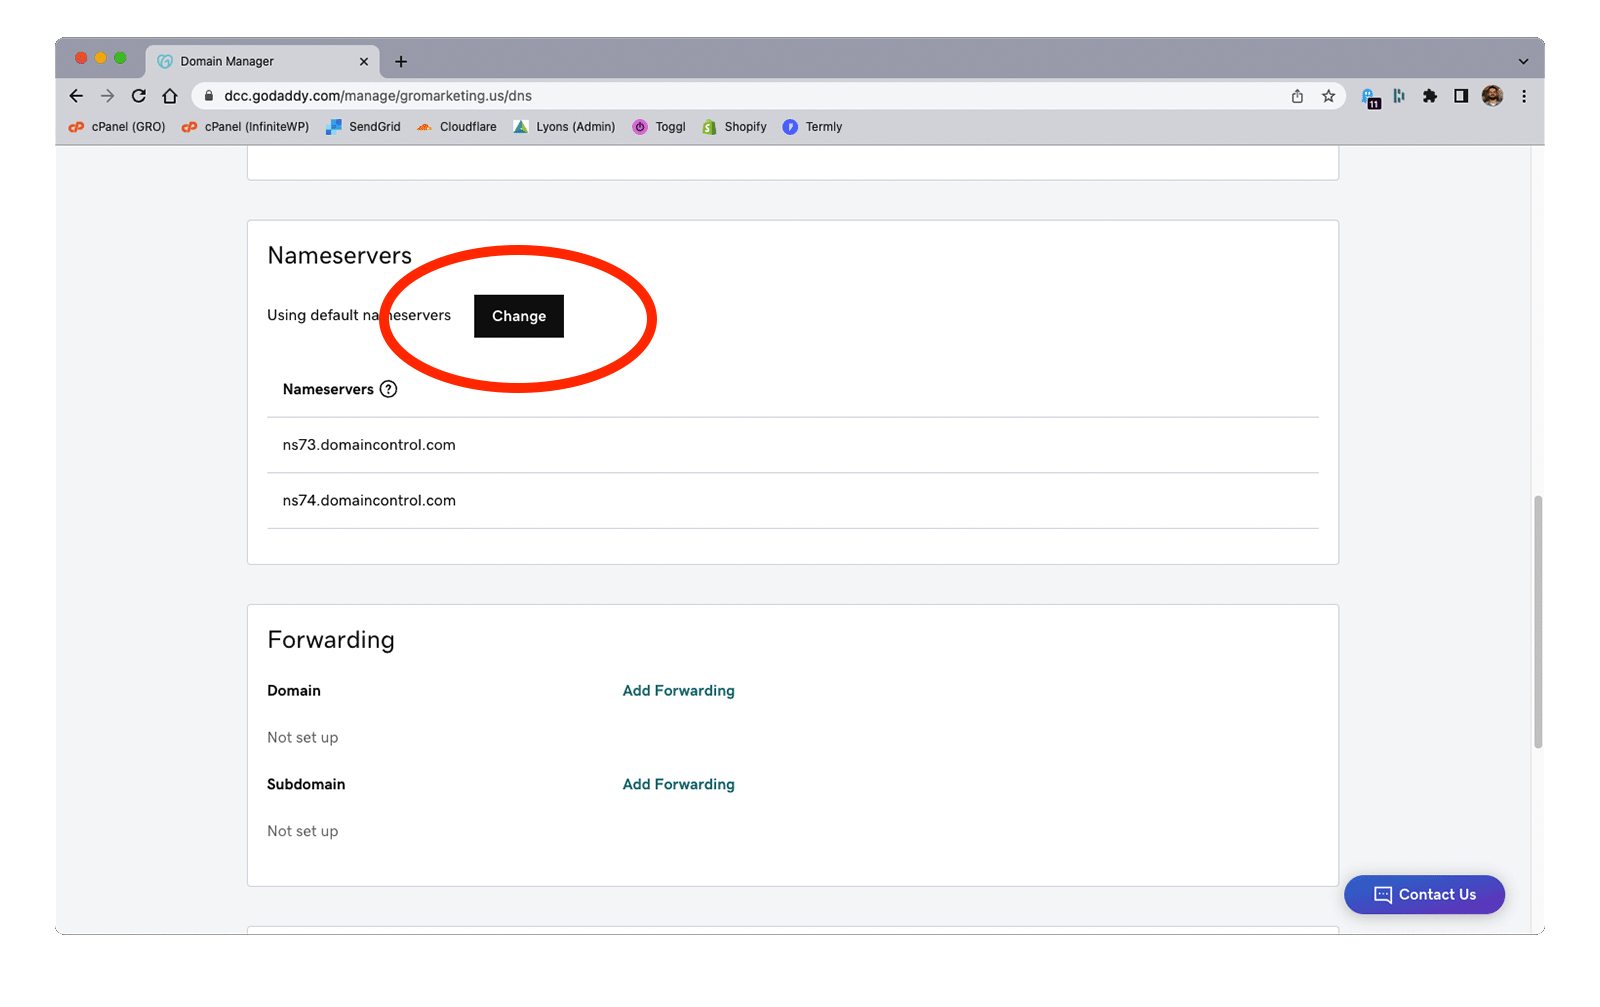
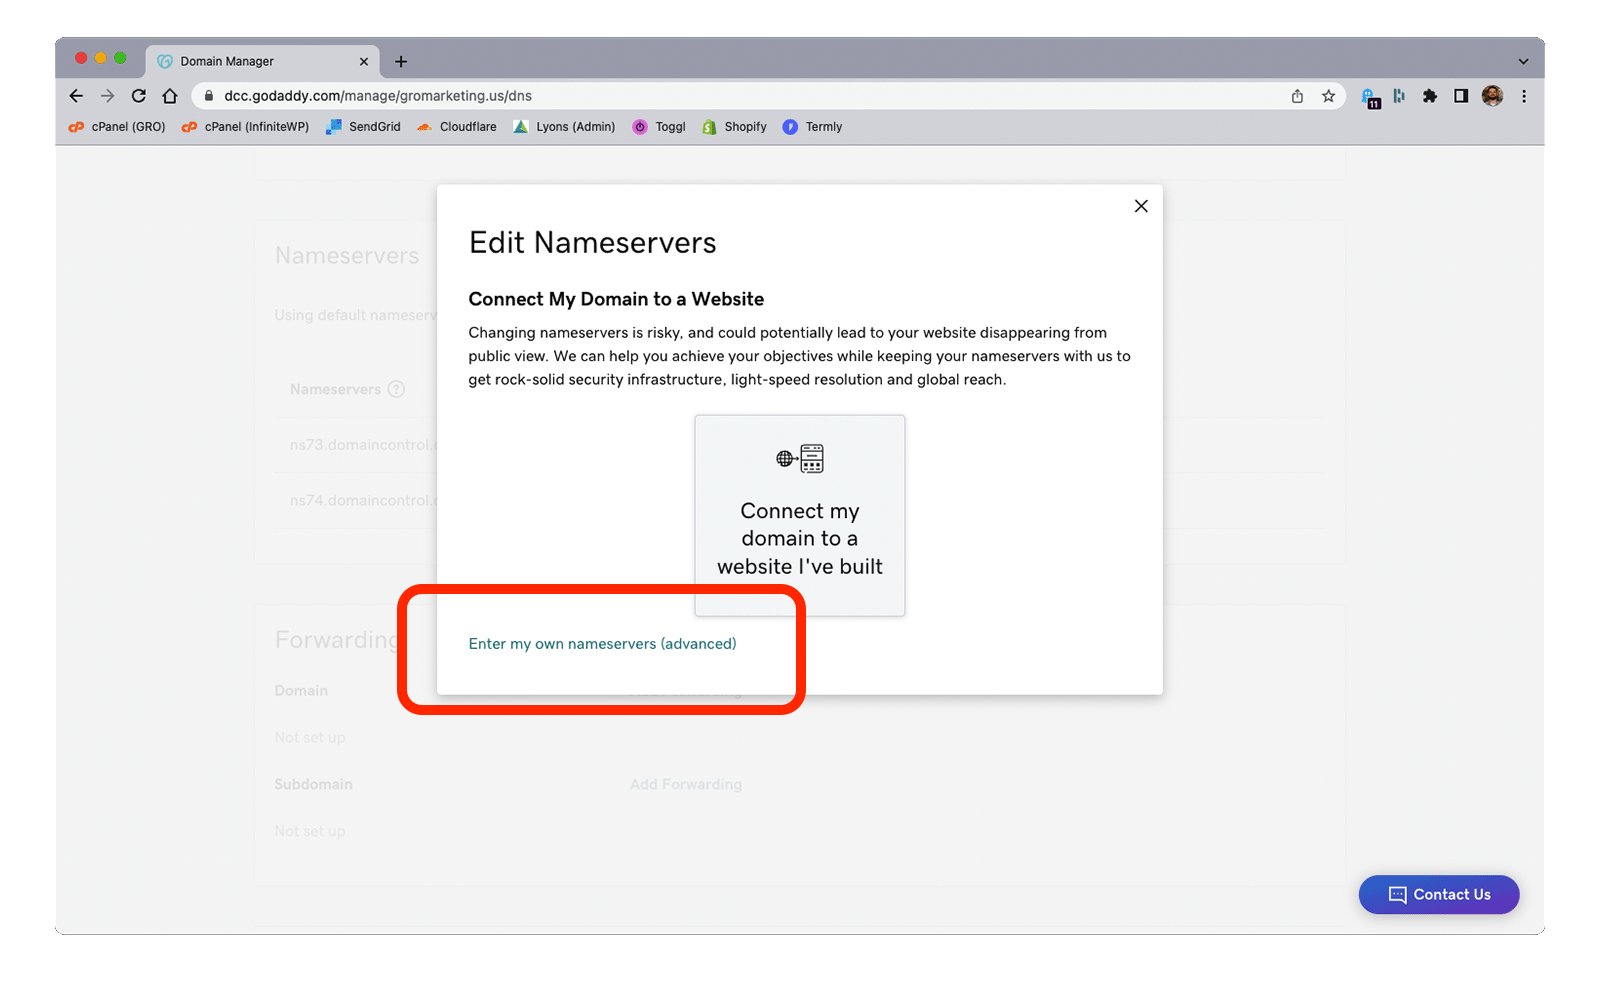
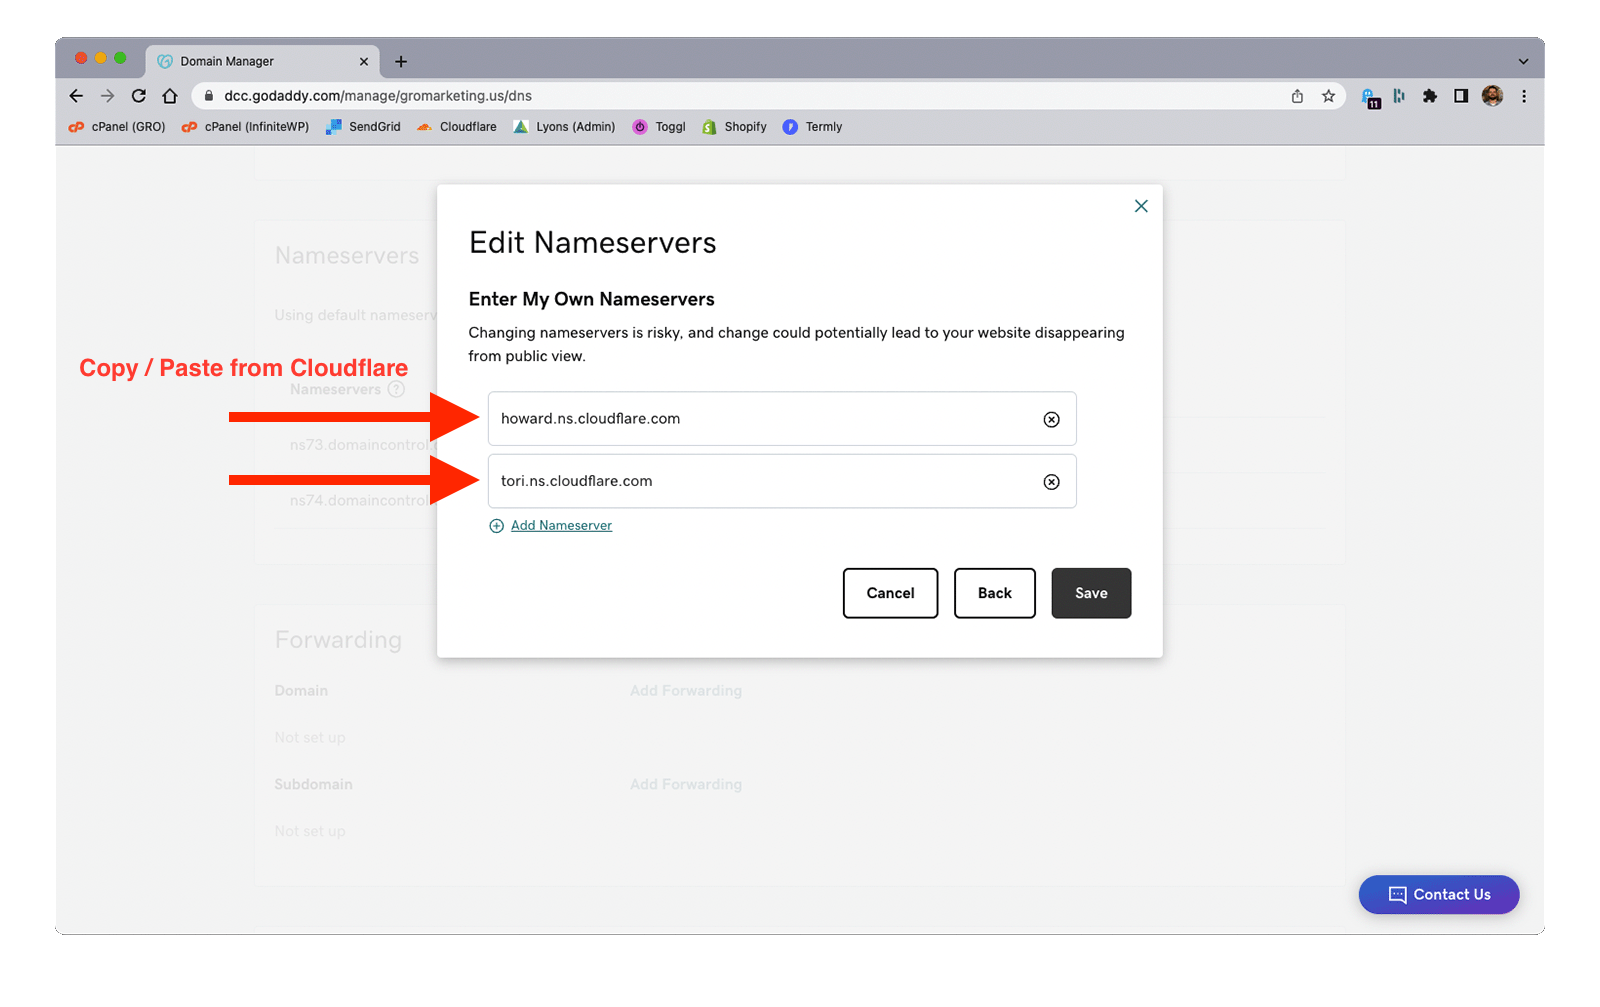
- Change the nameservers (copy / paste from Cloudflare)
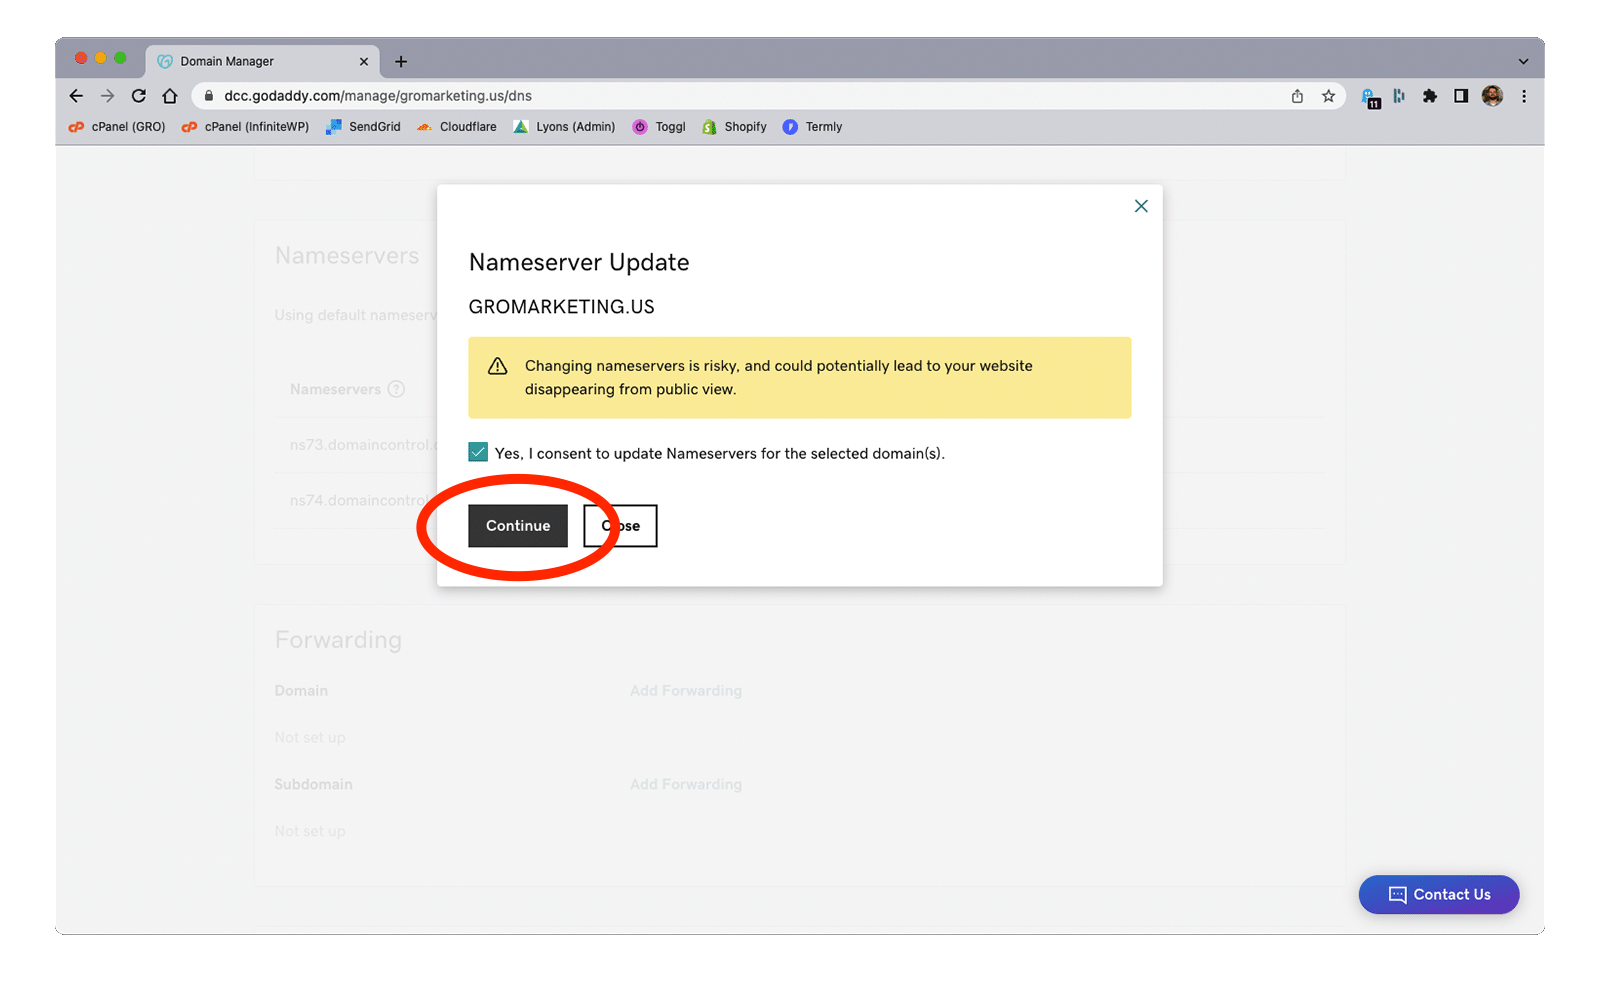
- Save. It could take up to 48 hours to process, but it's normally much faster.

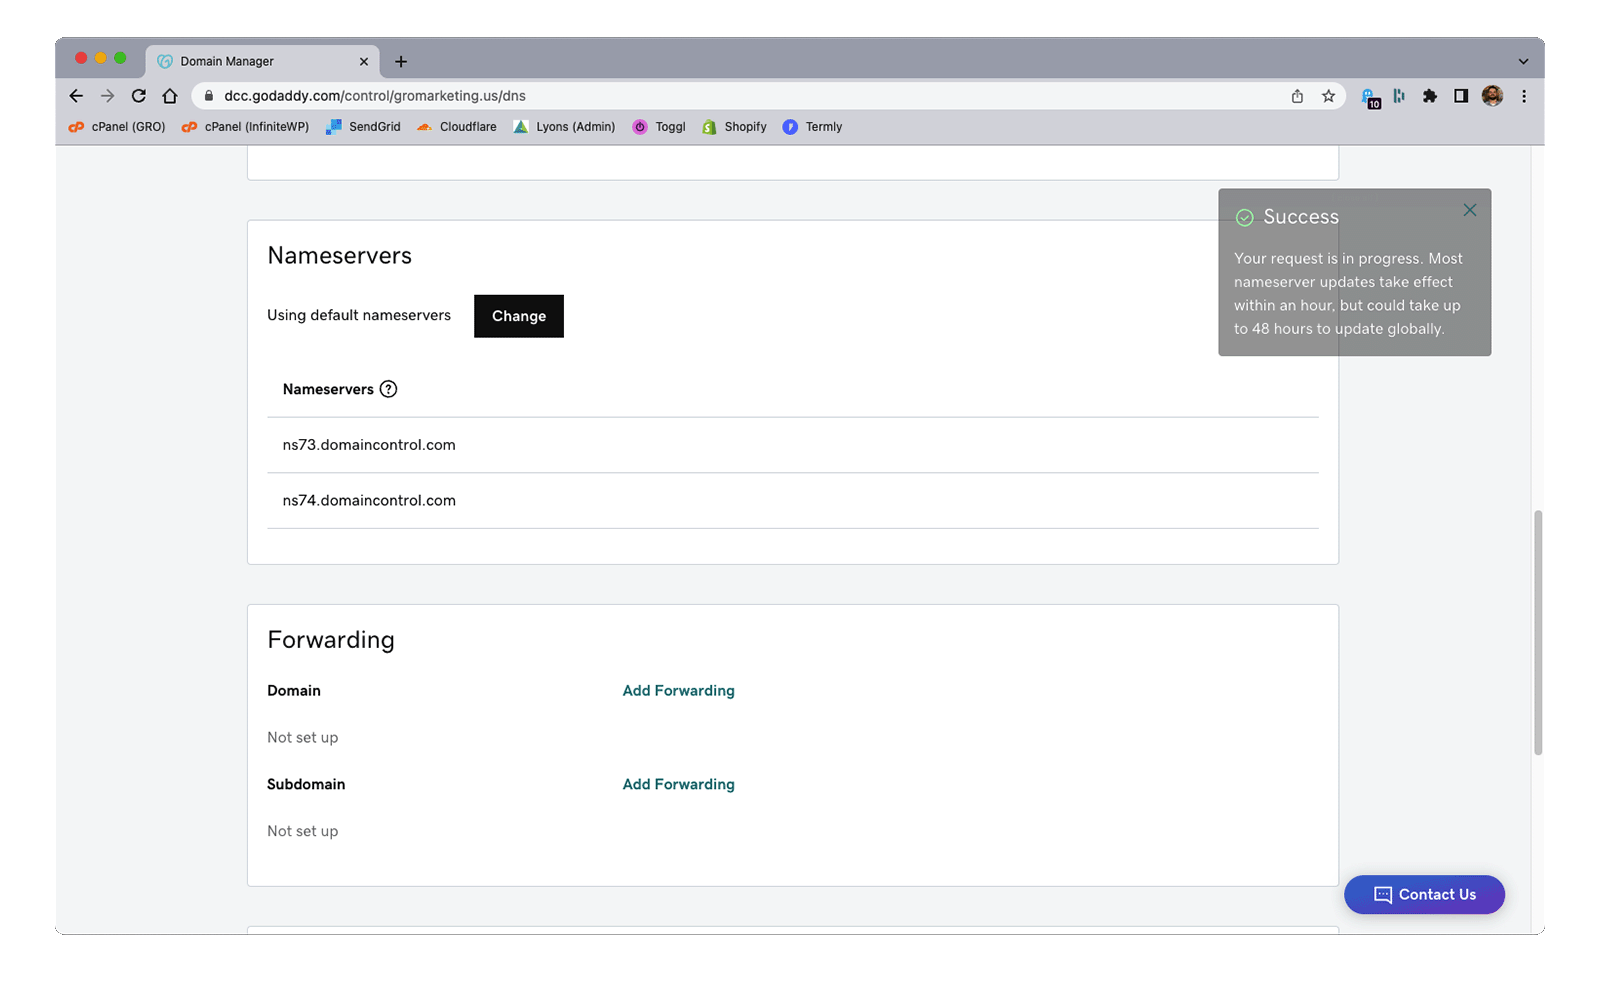
If everything was done correctly in the steps above, there should be no outward-facing changes or redirection from the current website, as the primary A record hasn’t yet been pointed to GRO’s IP address. Once the new nameservers take effect, there will be a banner in Cloudflare saying “Great news! Cloudflare is now protecting your site.”
Step 3 - Add Domain to cPanel
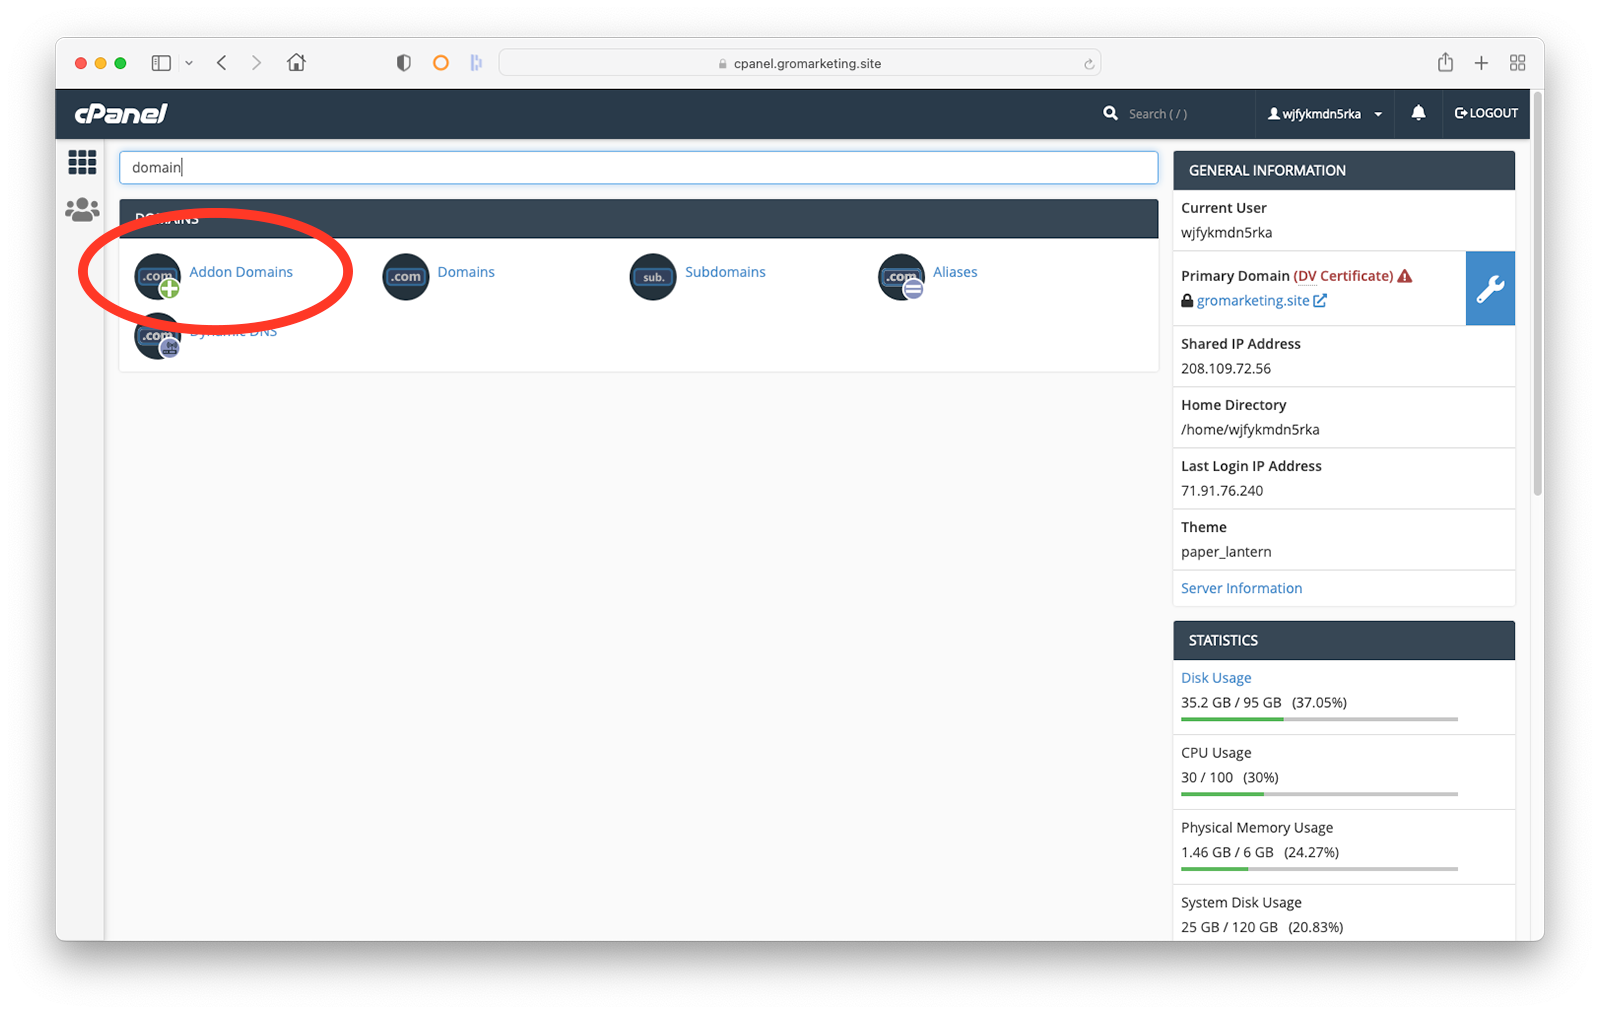
- Visit cpanel.help.gromarketing.site and Sign in
- Click Addon Domains
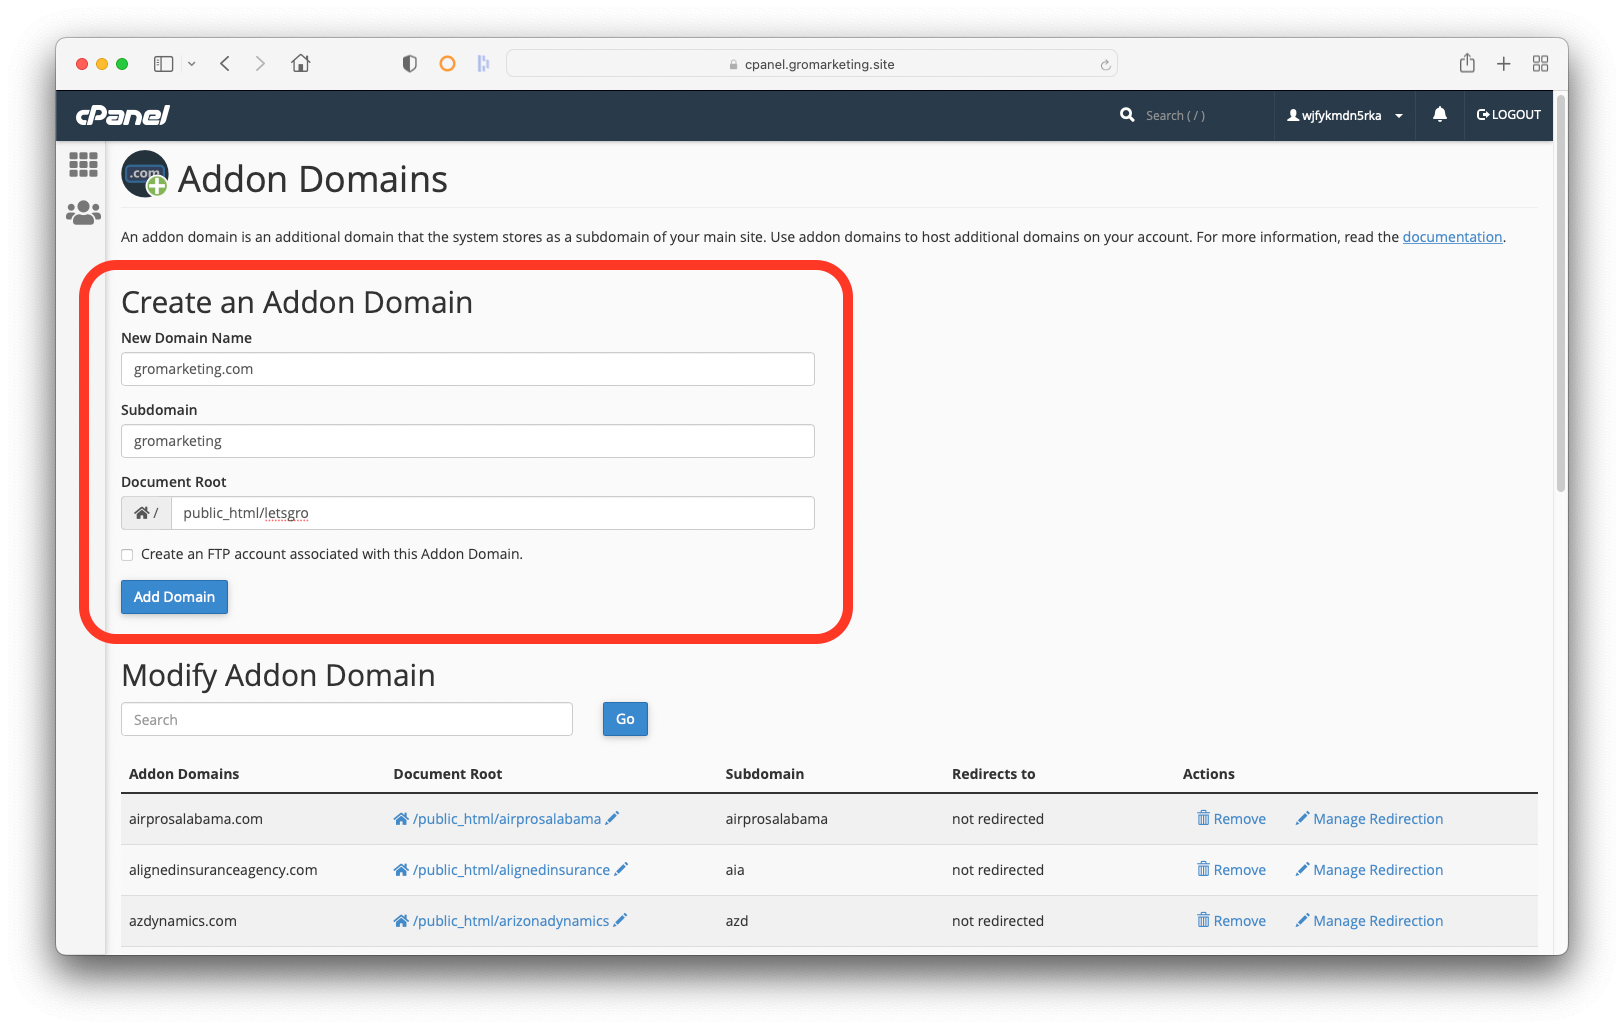
- Add the New Domain Name, create a Subdomain and be sure to point the Document Root at the dev site folder. Do not create an FTP account.
- Click Add Domain
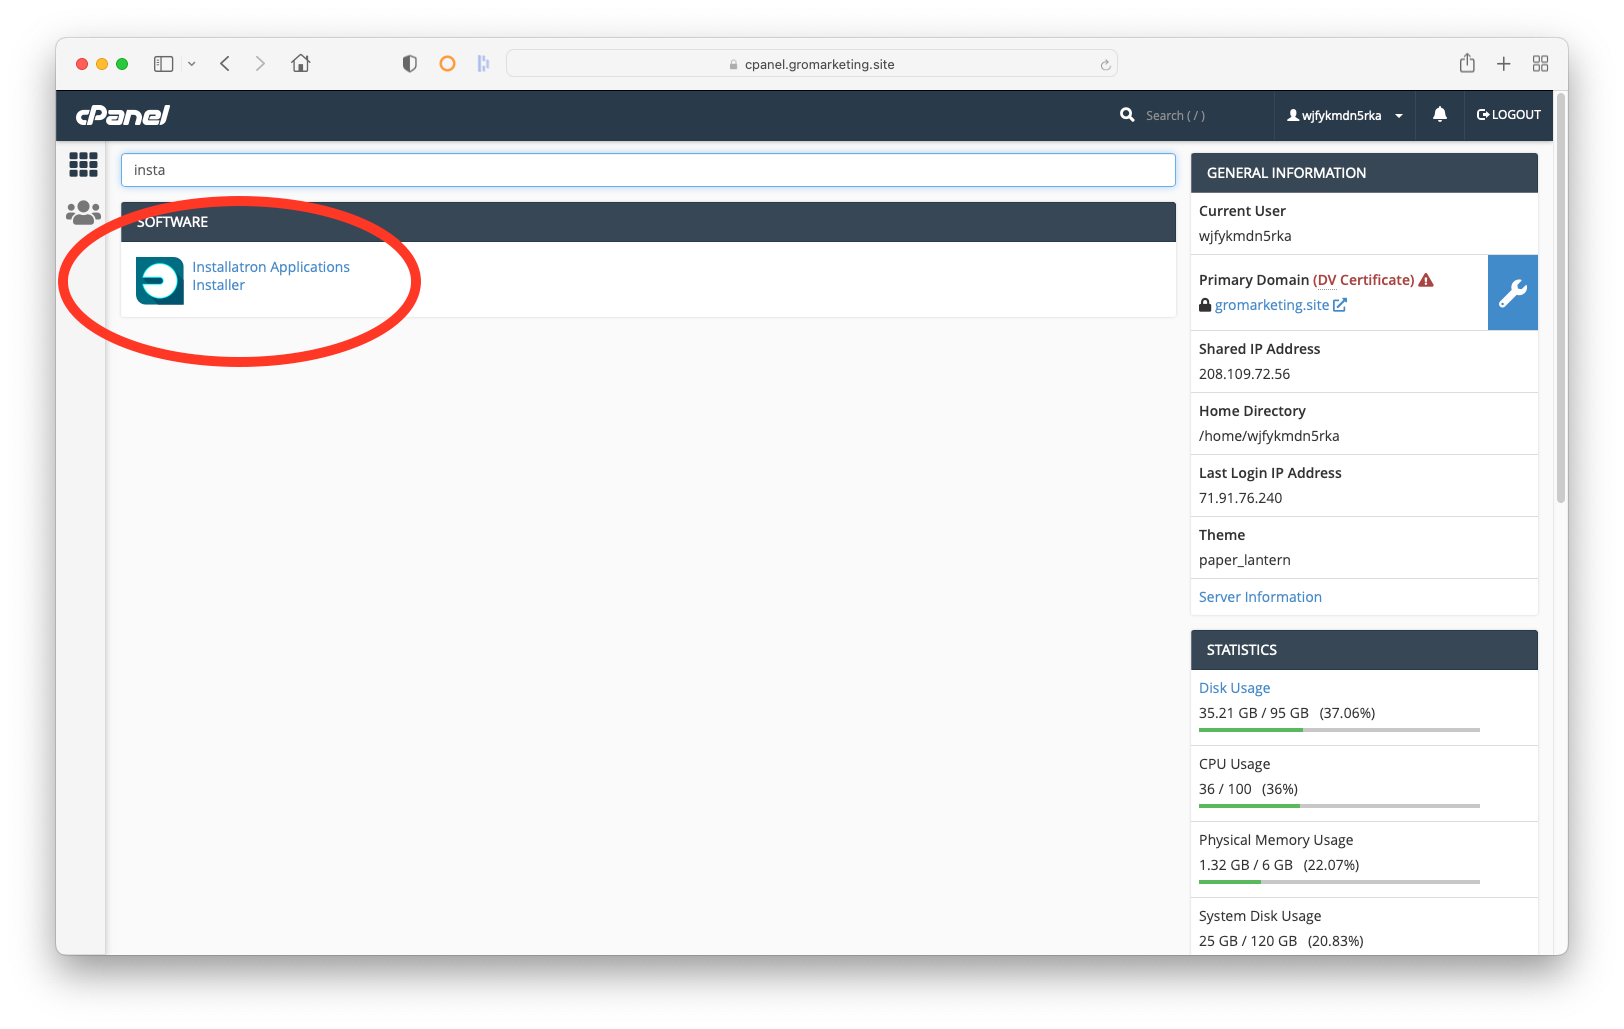
Step 4 - Update Installatron Domain
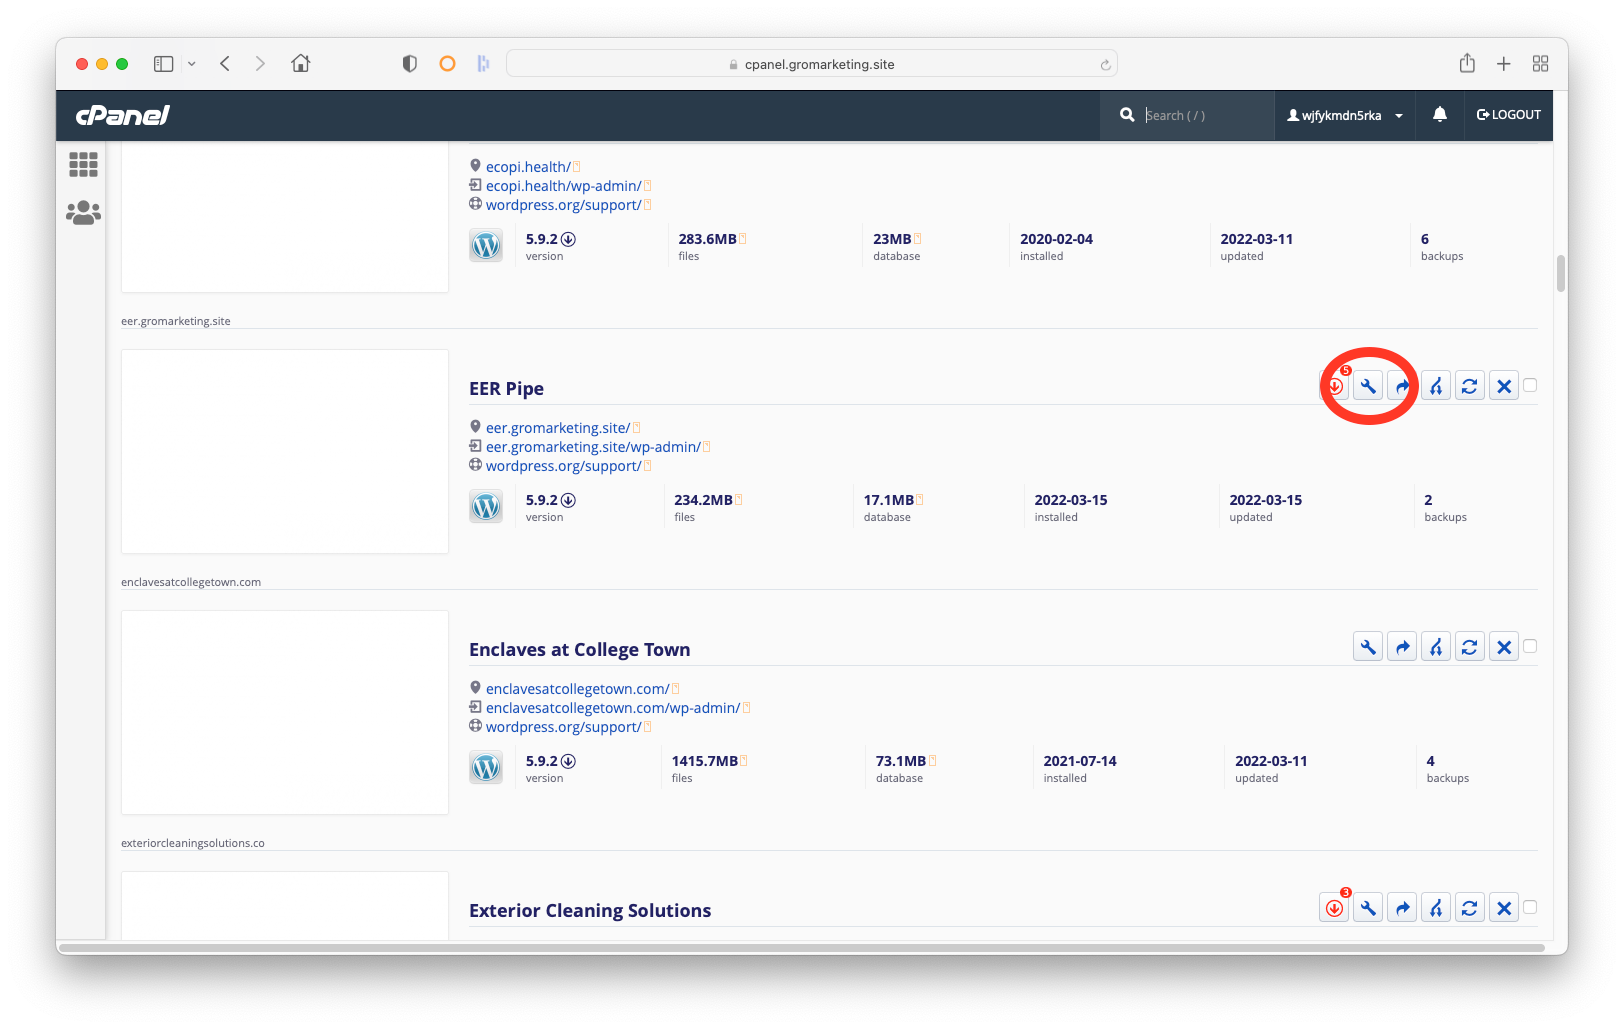
- From the cPanel dashboard, select Installatron
- Locate the dev site, then click the wrench icon to edit settings
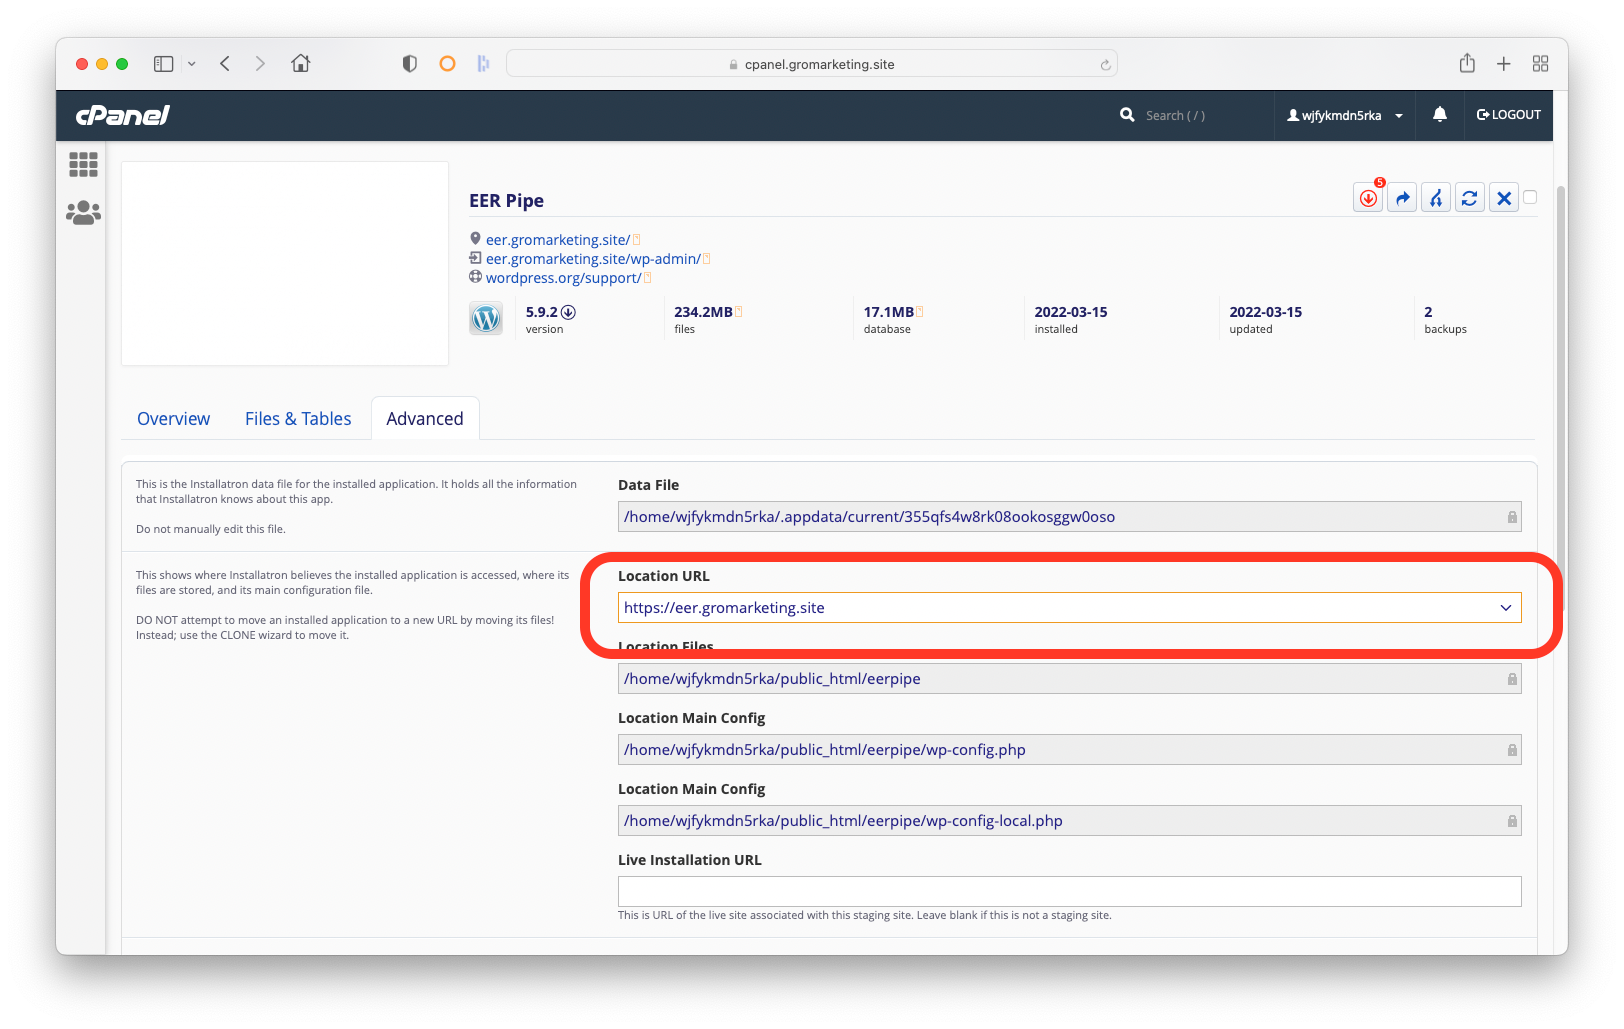
- Click the Advanced tab, then look for the Location URL field
- Replace the dev URL with the live domain
- Scroll to the bottom of the page and click the Save All button
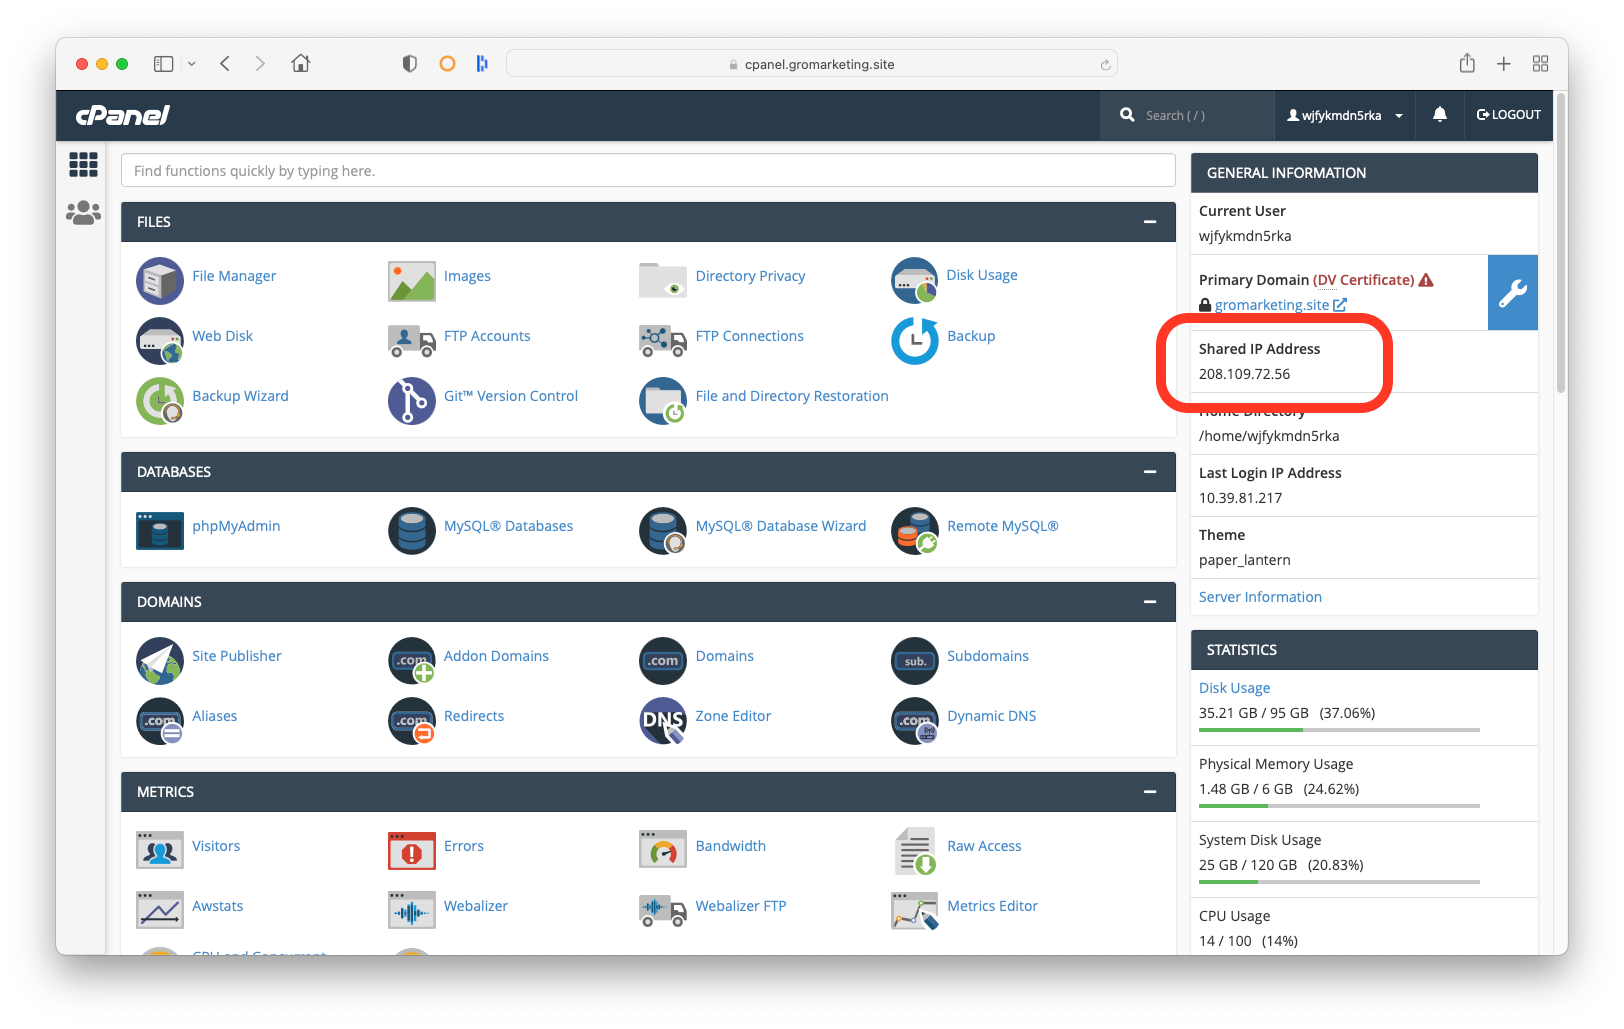
Step 5 - Update A Record IP Address (Cloudflare)
- Before leaving cPanel, copy the Shared IP Address from the dashboard
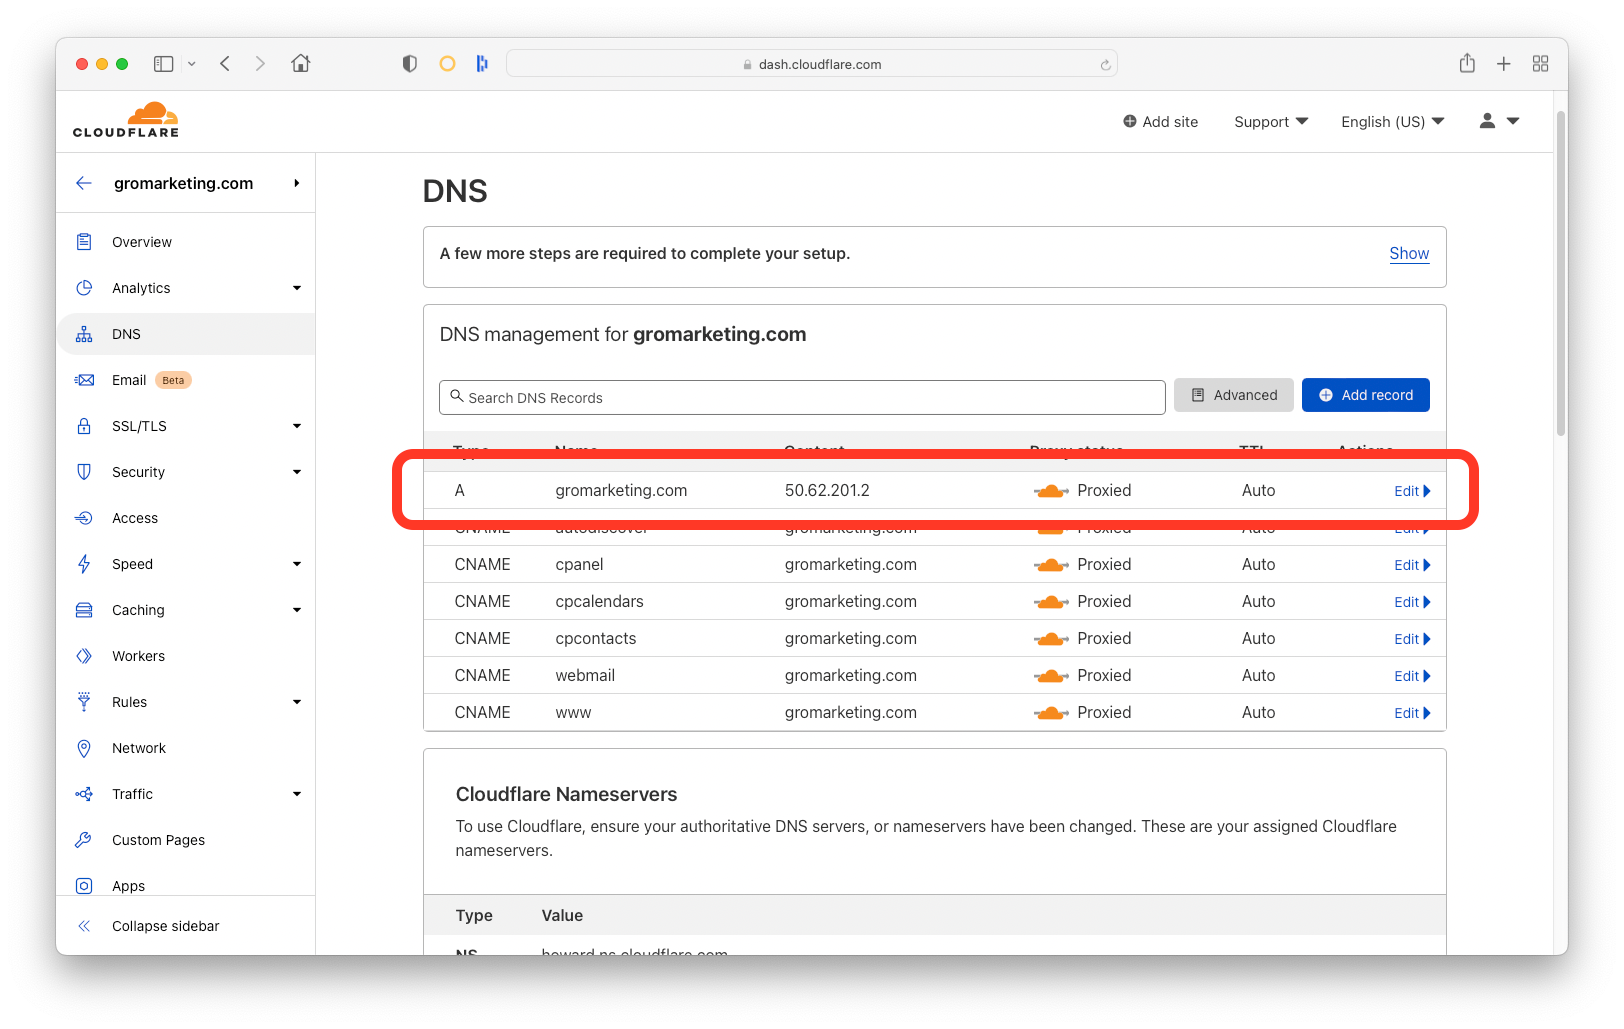
- From Cloudflare, locate your live domain and click the DNS tab
- Locate the A record associated with the domain (this should already contain an IP address)
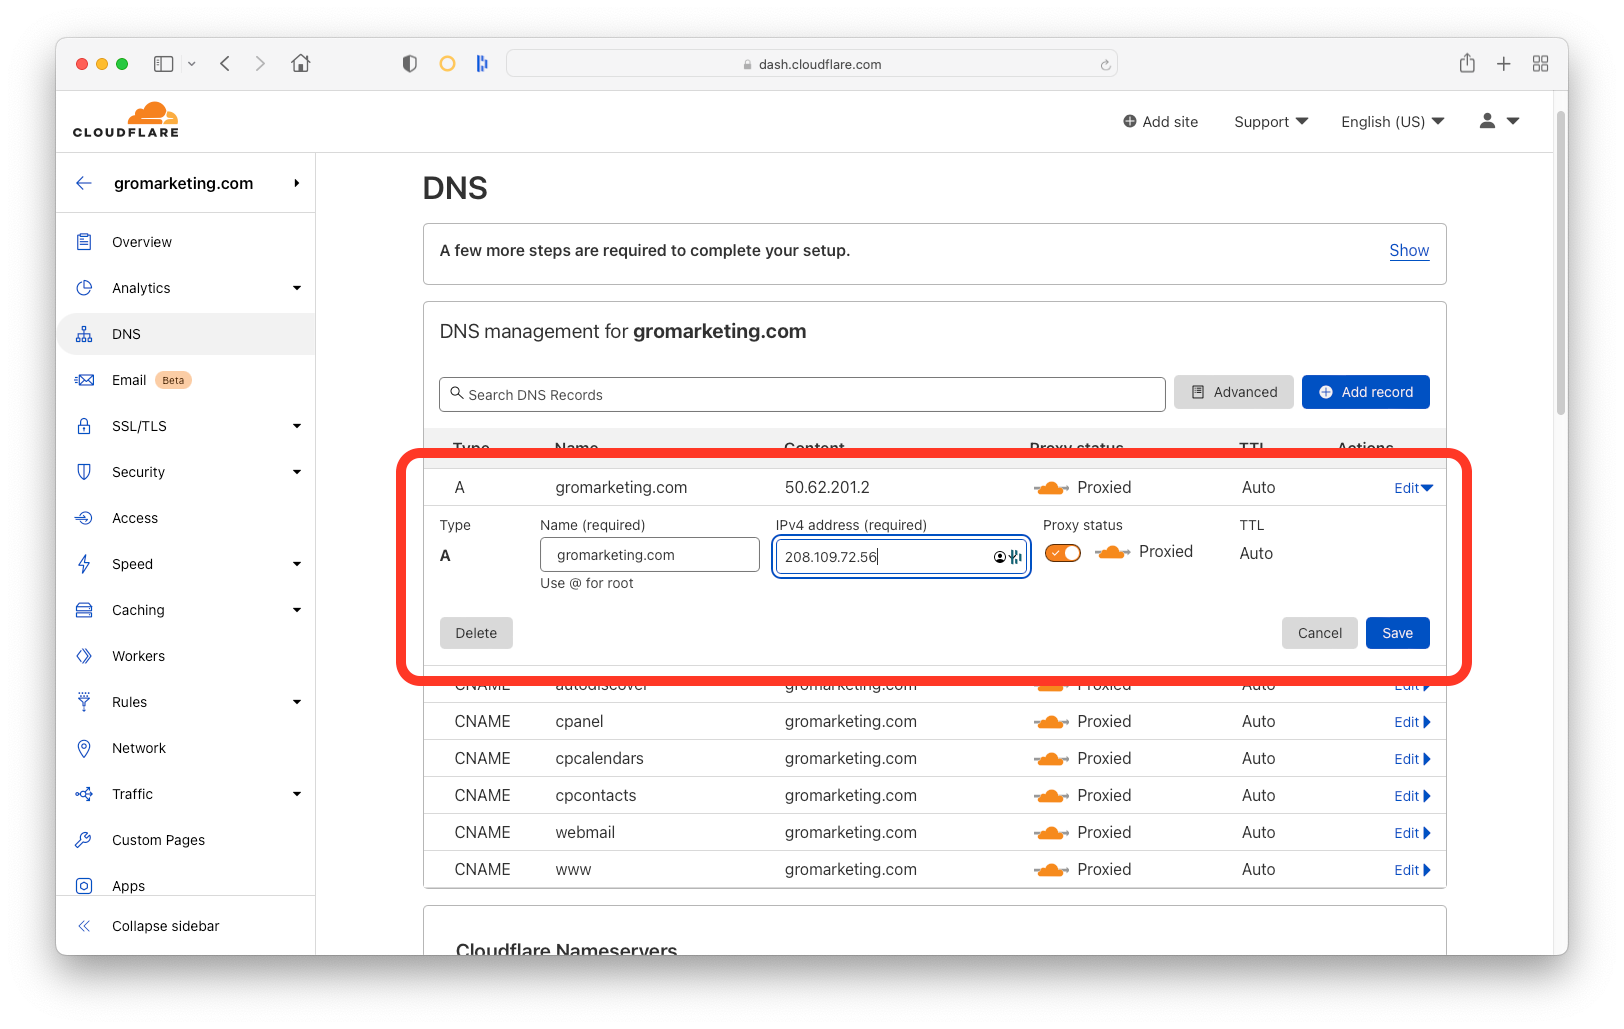
- Click Edit and paste (overwrite) the IP address copied from cPanel
- Click the Save button
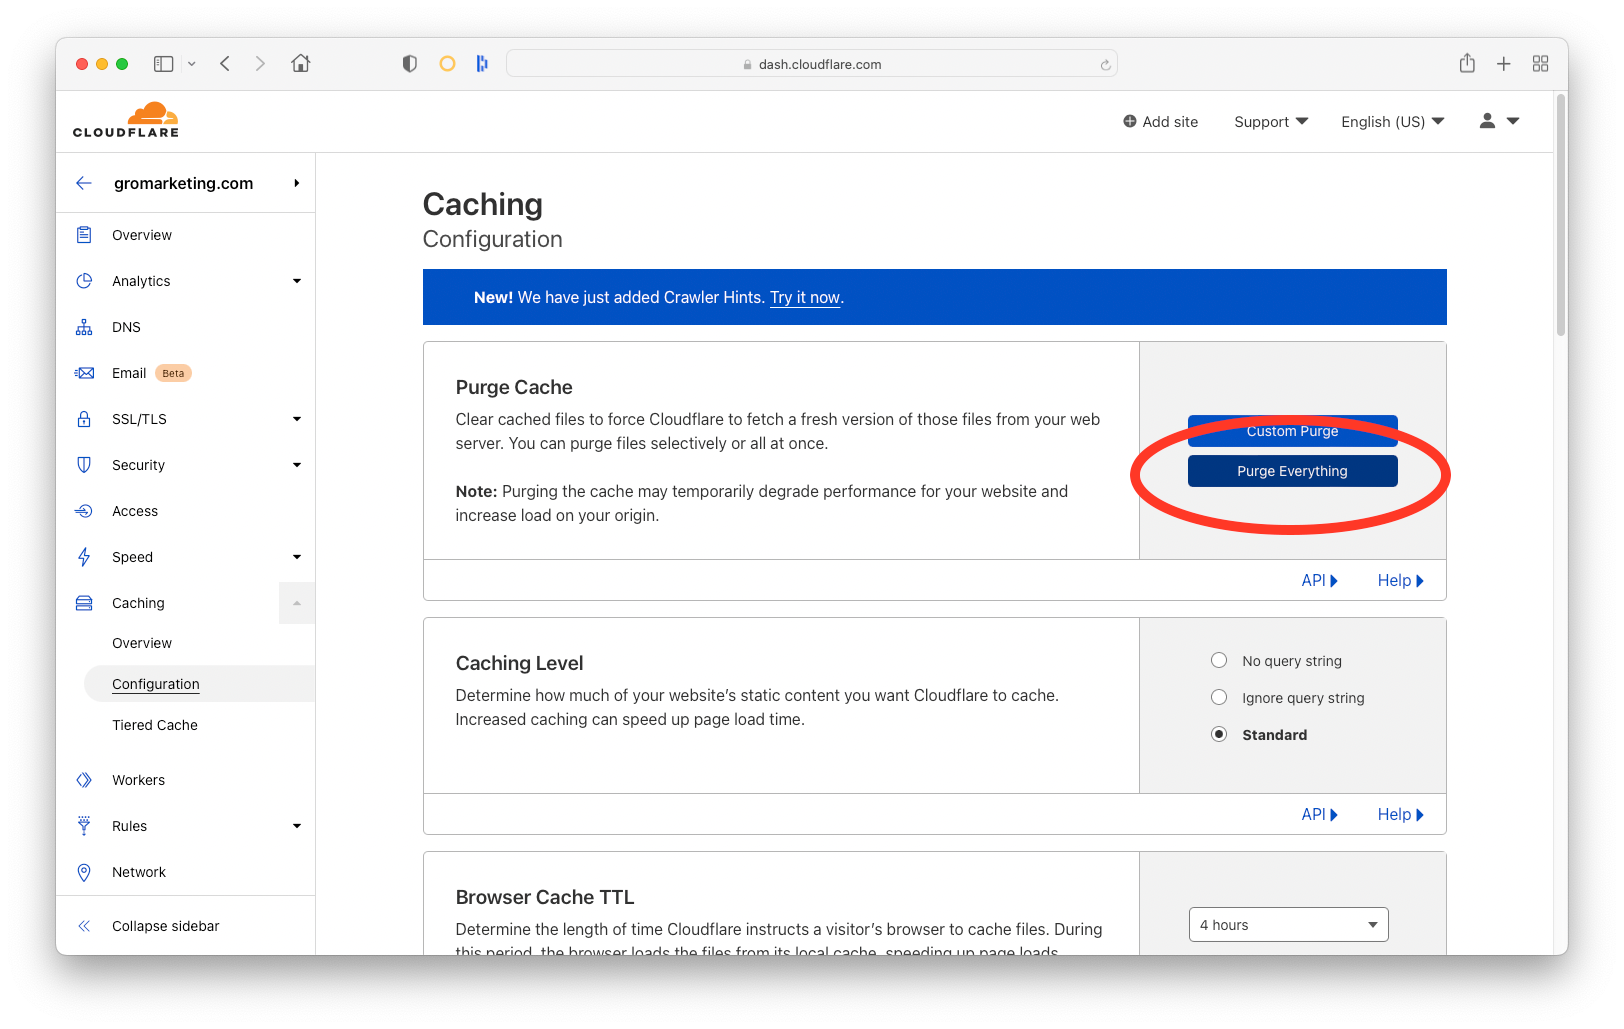
- Lastly, under Caching > Configuration, click Purge Everything