How to Go Live on the Same Server
Once a dev site is 100% complete and ready to launch (go live), there are 5 critical steps to follow. This involves domain access, DNS record changes, and eventually pointing the live domain to the server where the new site is hosted.
* NOTE: Editing domain DNS and records should be handled very delicately. Incorrect DNS adjustments can result in websites crashing, email disappearing, or other network problems.
Operating Spaces

Step 1 - Add Domain to Cloudflare
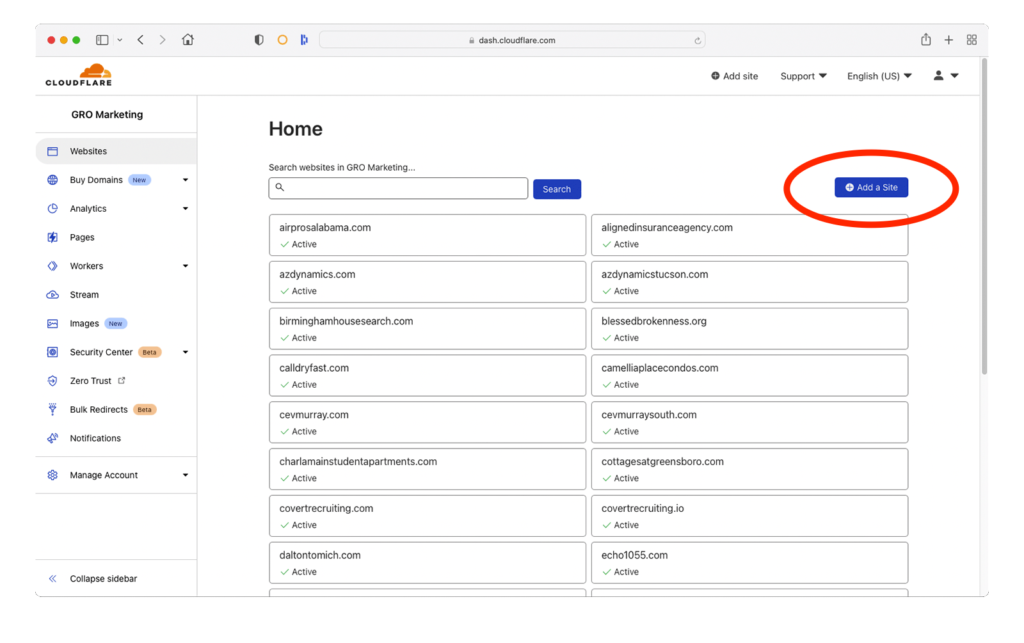
- Open Cloudflare and Log in
- Click the Add a Site button
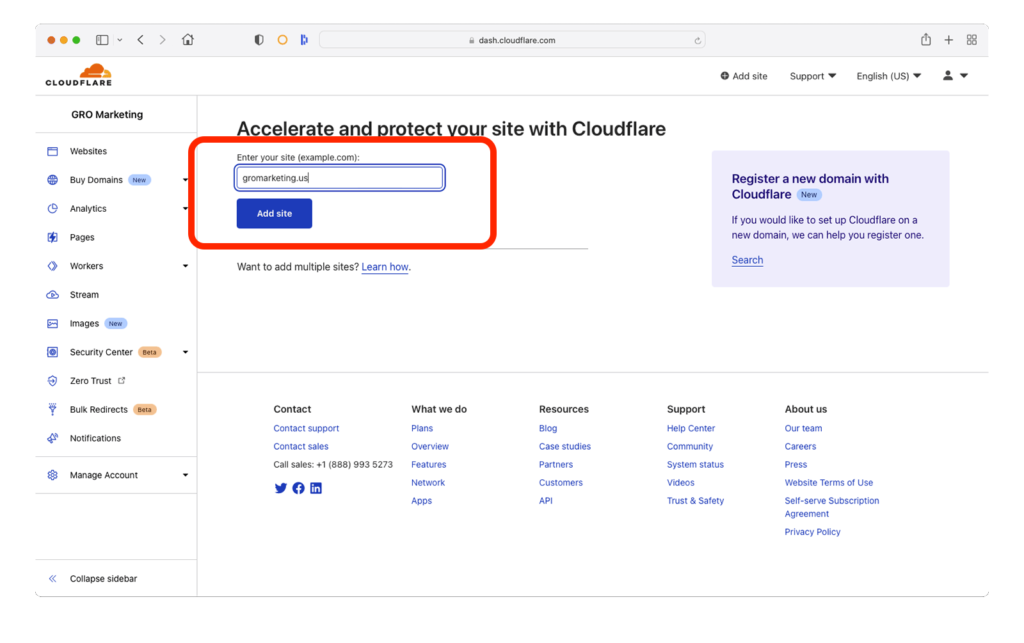
- Type in the live domain and click Add site
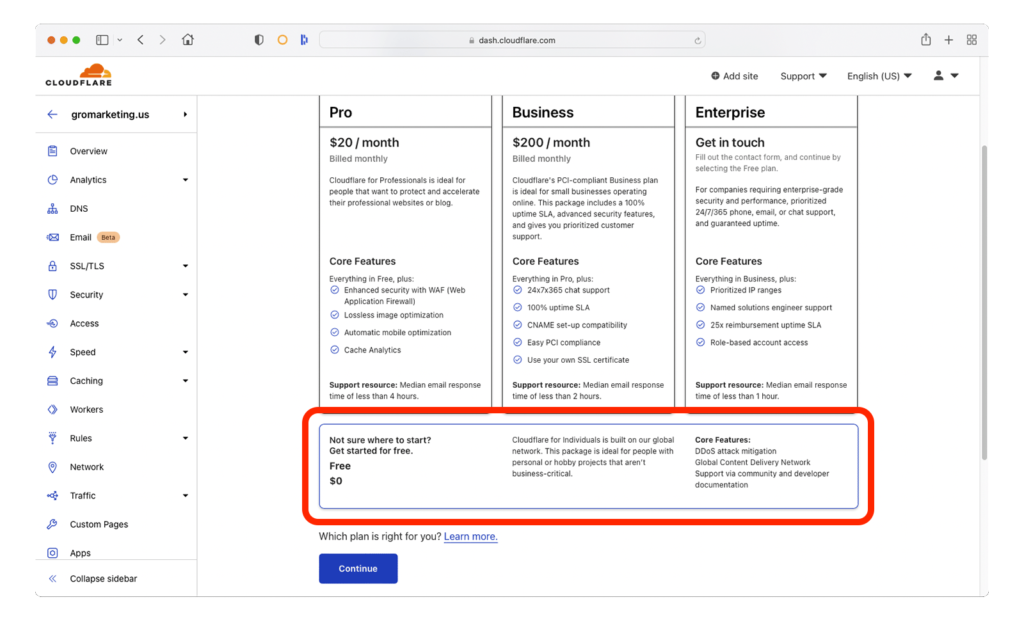
- Select the Free $0 option at the bottom and click Continue
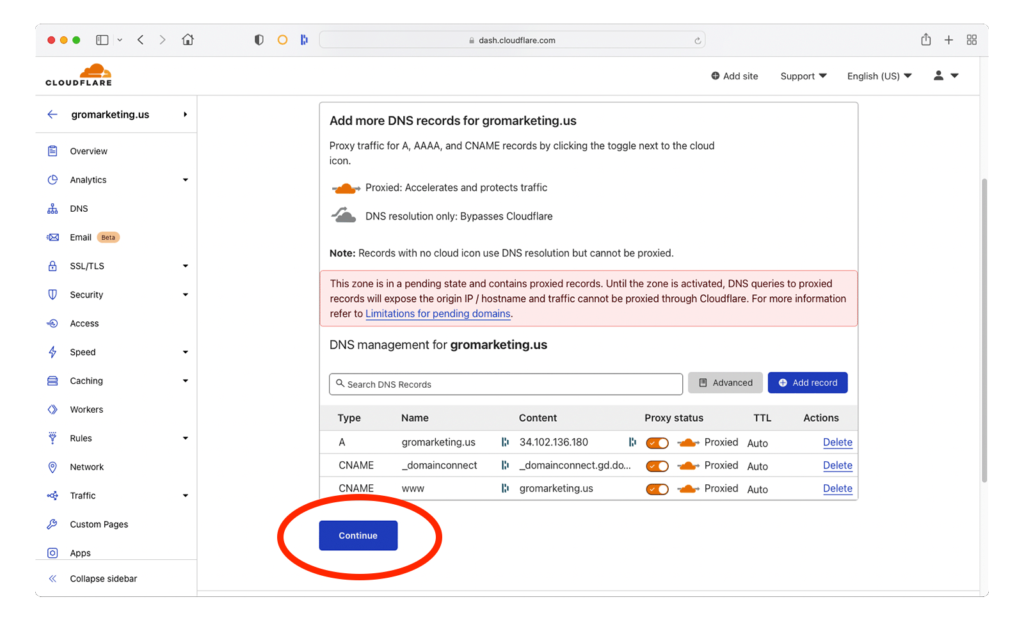
- After existing DNS records populate, click the Continue button
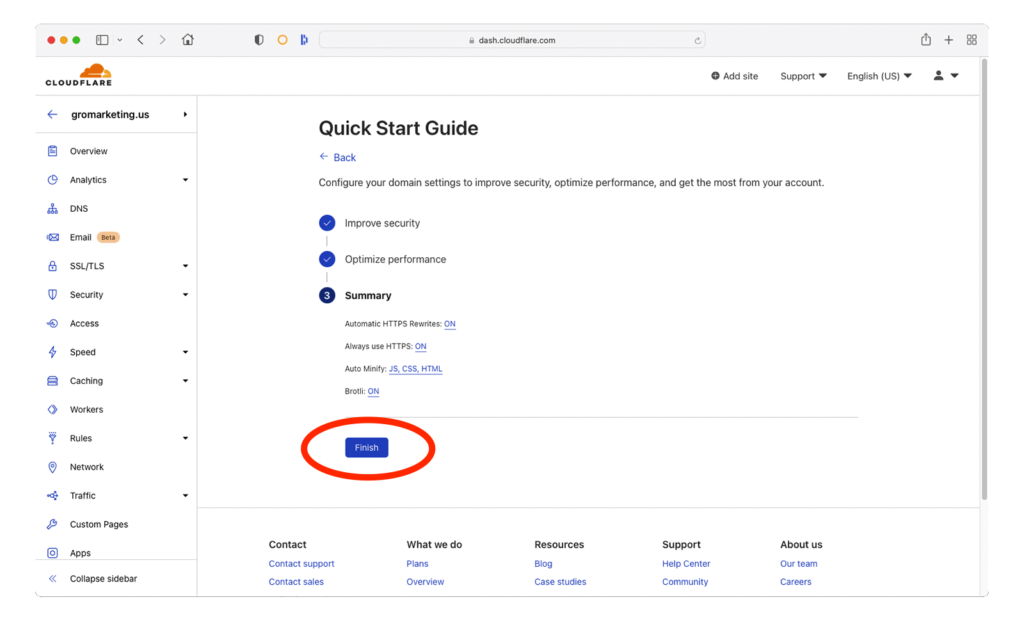
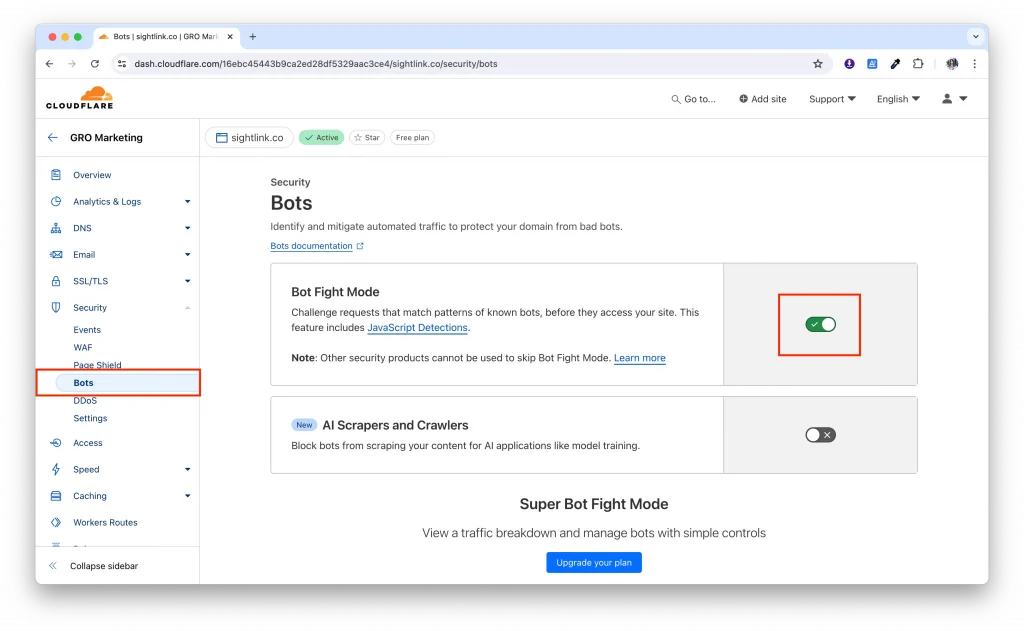
- Check ALL OPTIONS on the Quick Start Guide page and click Finish
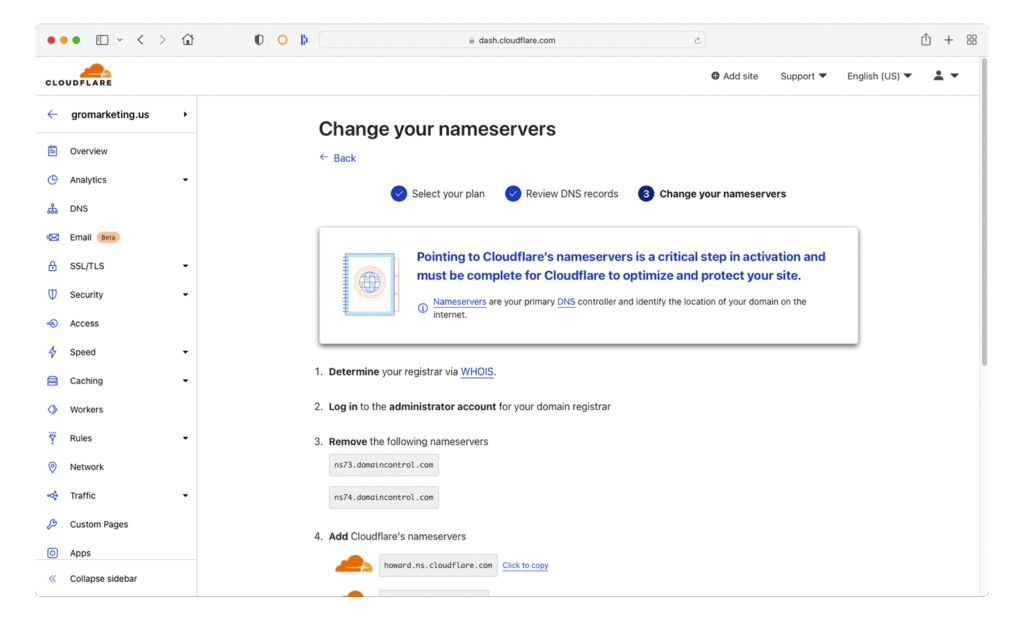
Step 2 - Point Nameservers to Cloudflare
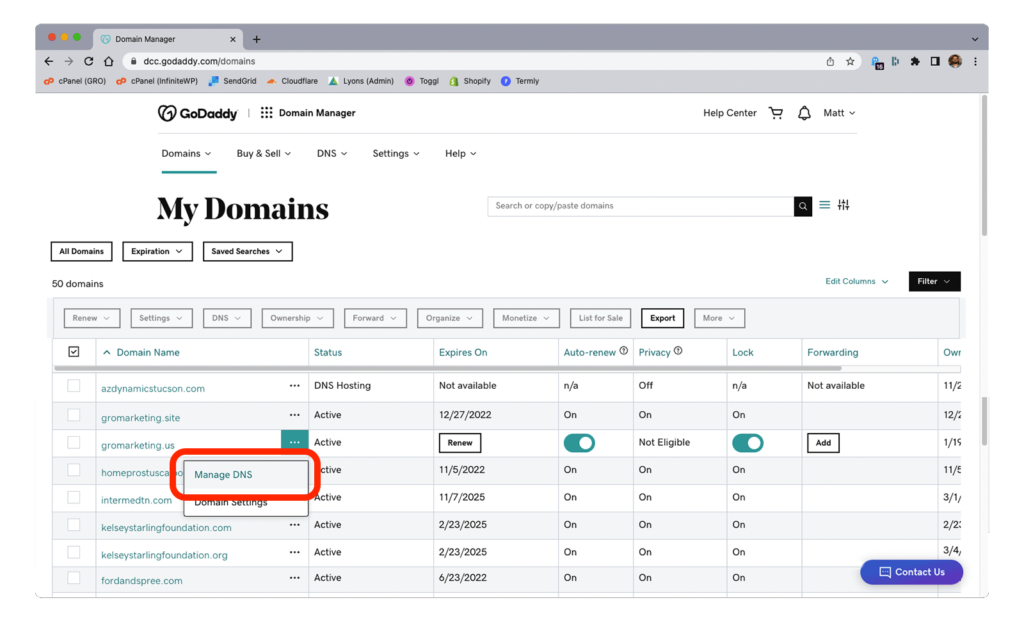
- Login to domain registrar (GoDaddy, Bluehost, Network Solutions, etc)
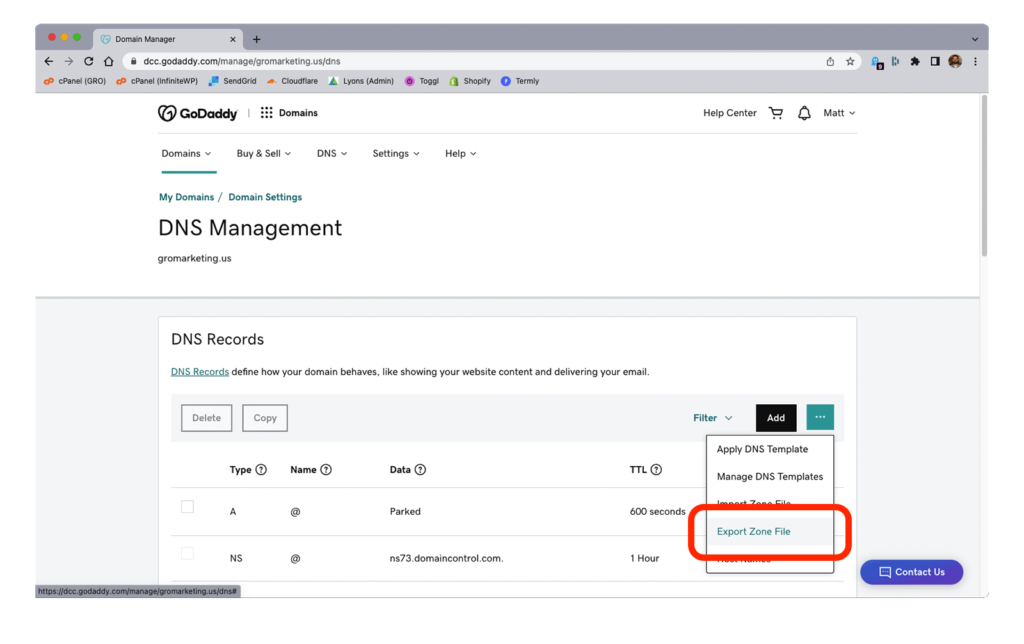
- Backup the existing DNS Zone file (export as TXT / upload to Monday.com task)
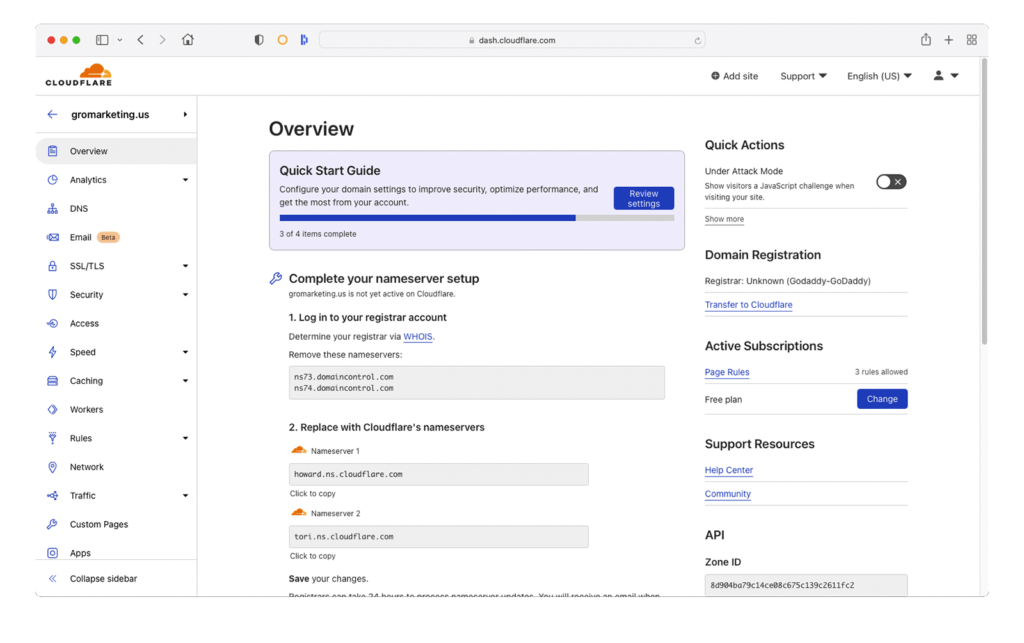
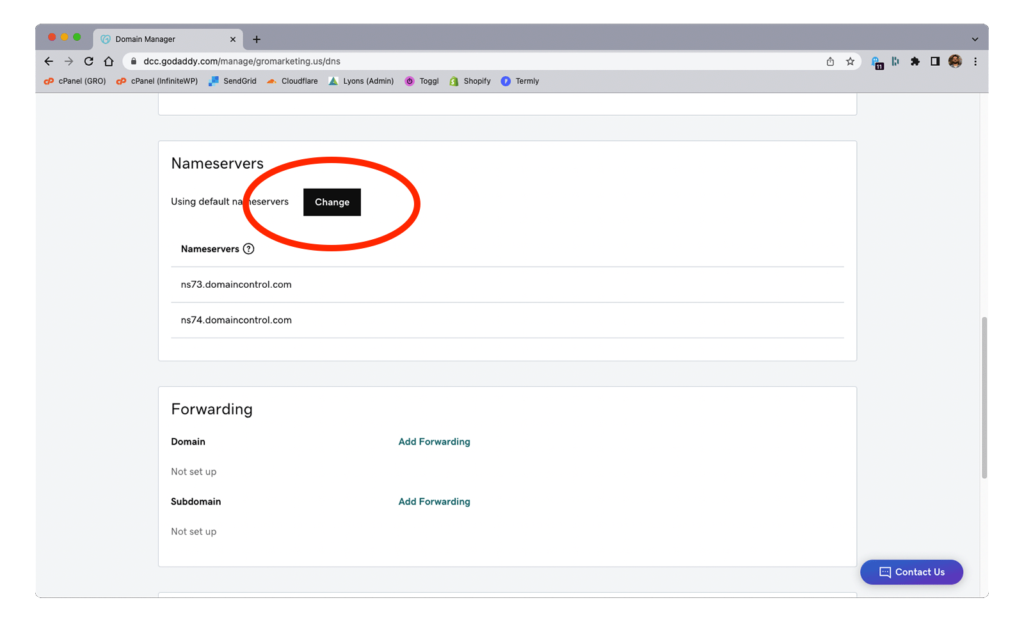
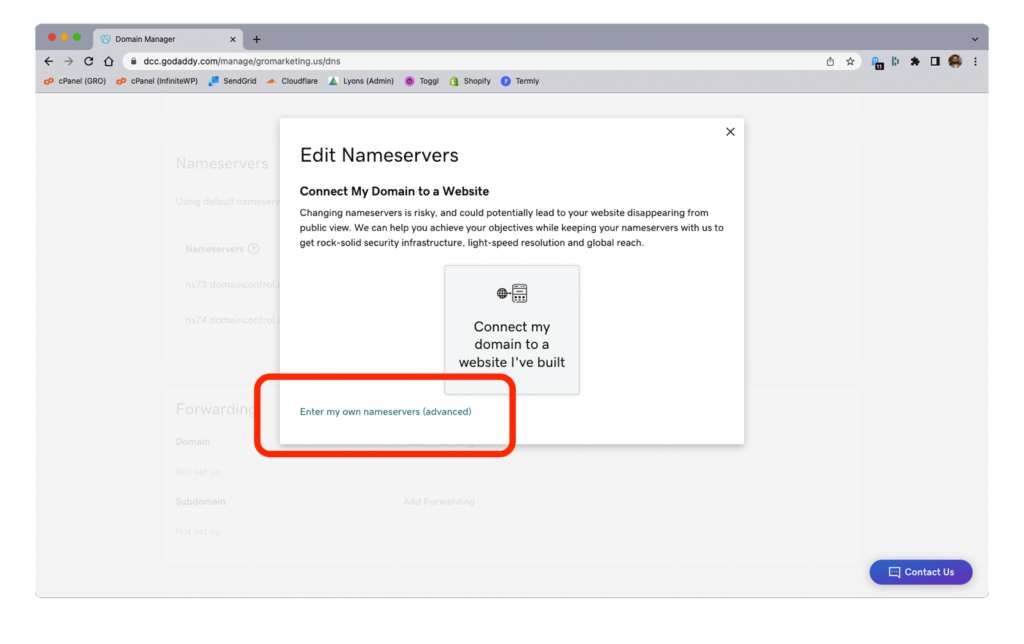
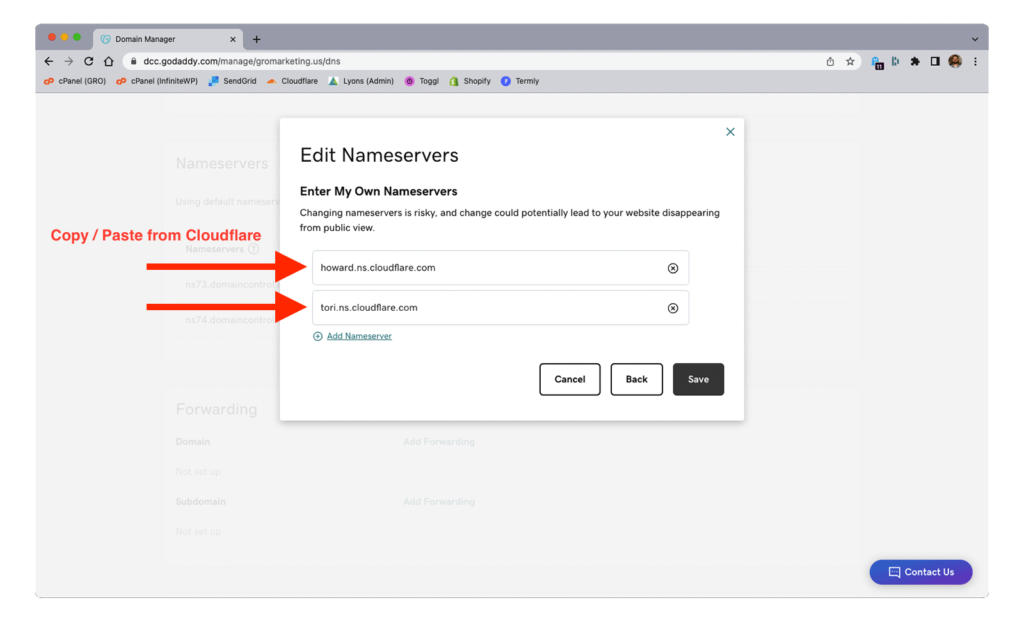
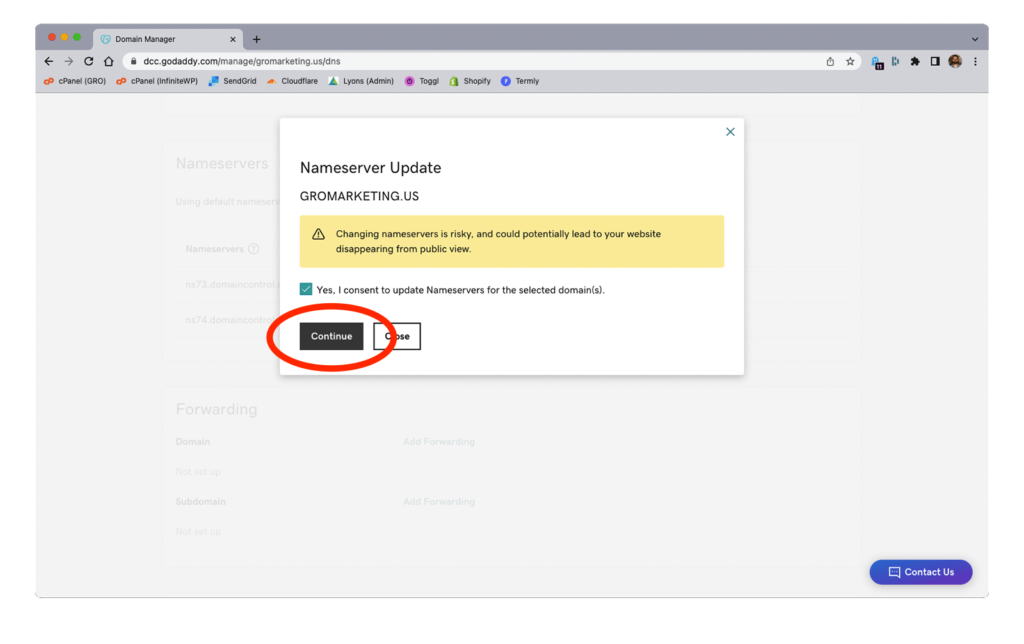
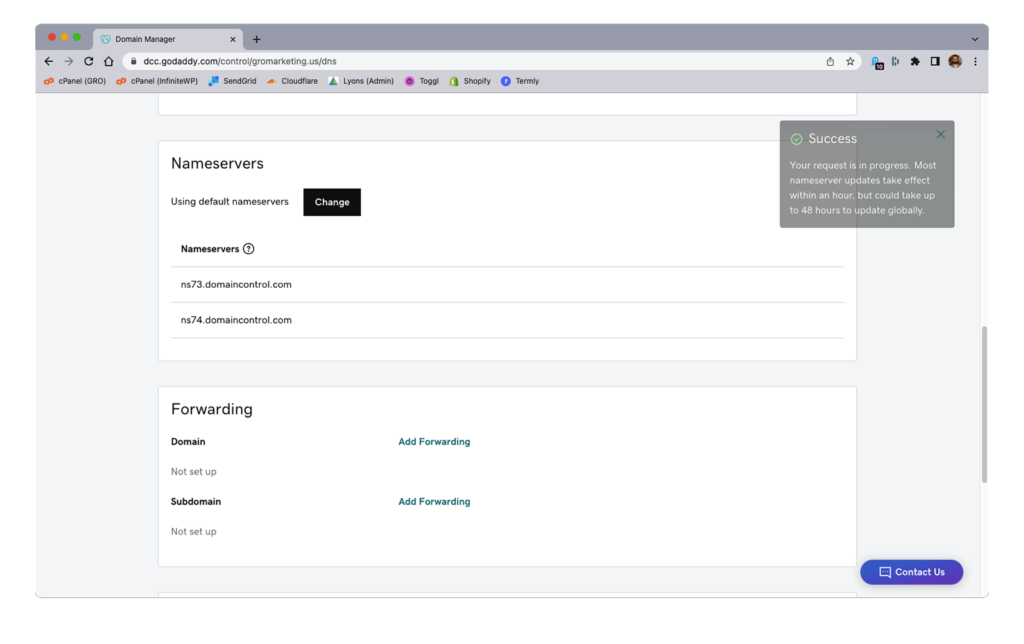
- Change the nameservers (copy / paste from Cloudflare)
- Save. It could take up to 48 hours to process, but it's normally much faster.
If everything was done correctly in the steps above, there should be no outward-facing changes or redirection from the current website, as the primary A record hasn’t yet been pointed to GRO’s IP address. Once the new nameservers take effect, there will be a banner in Cloudflare saying “Great news! Cloudflare is now protecting your site.”
Step 4 - Detach
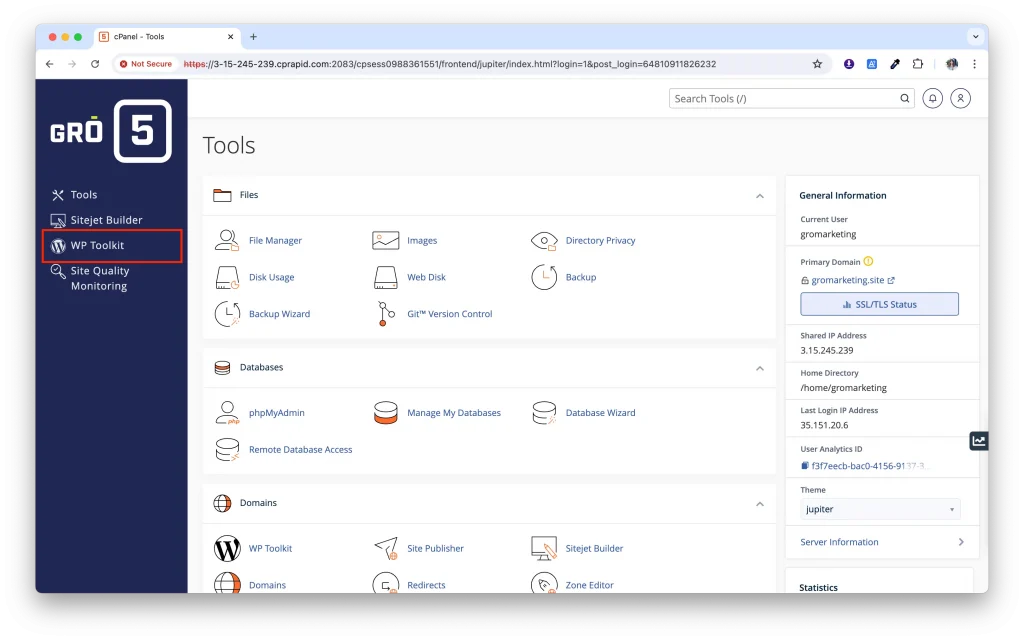
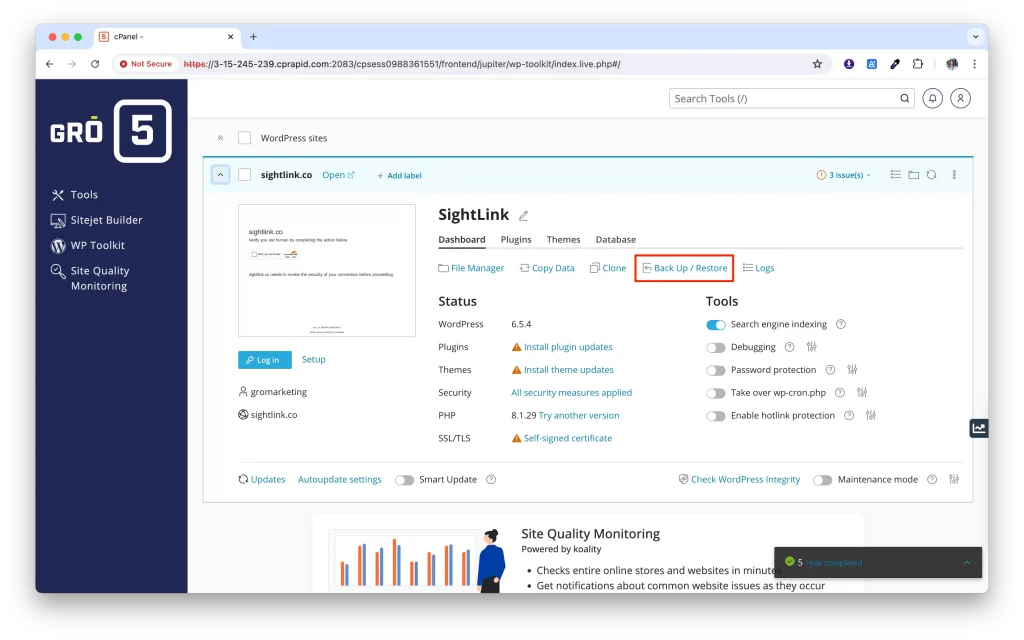
- Go to cPanel > WP Toolkit
- Navigate to the dev site you’re pushing live.
- Run a backup before moving forward.
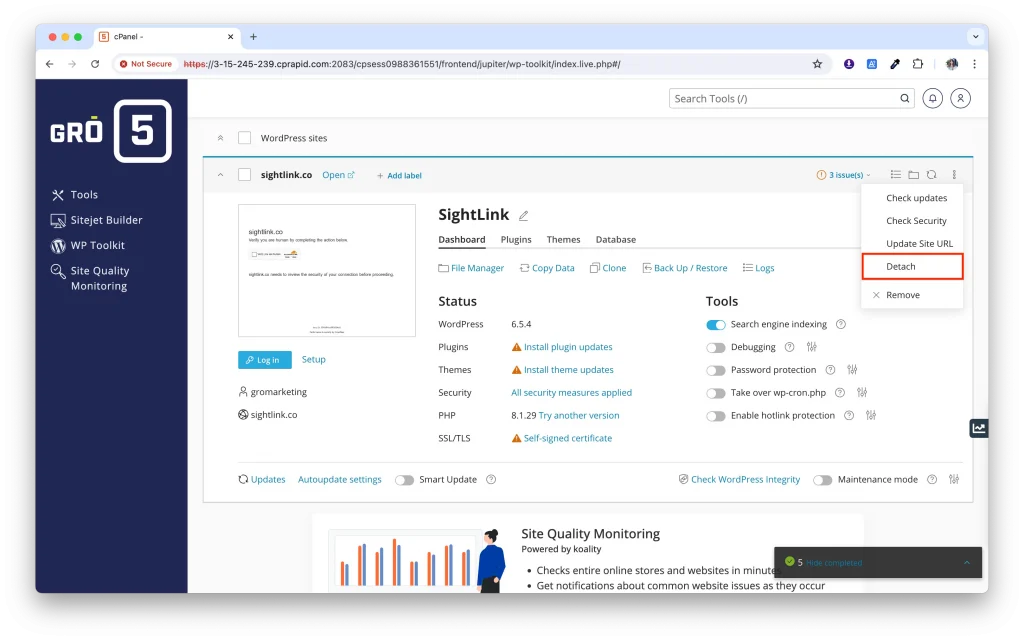
- After the backup is complete, click the three-dot icon to the right.
- Detach. This basically disconnects the site from being associated with WP Toolkit.
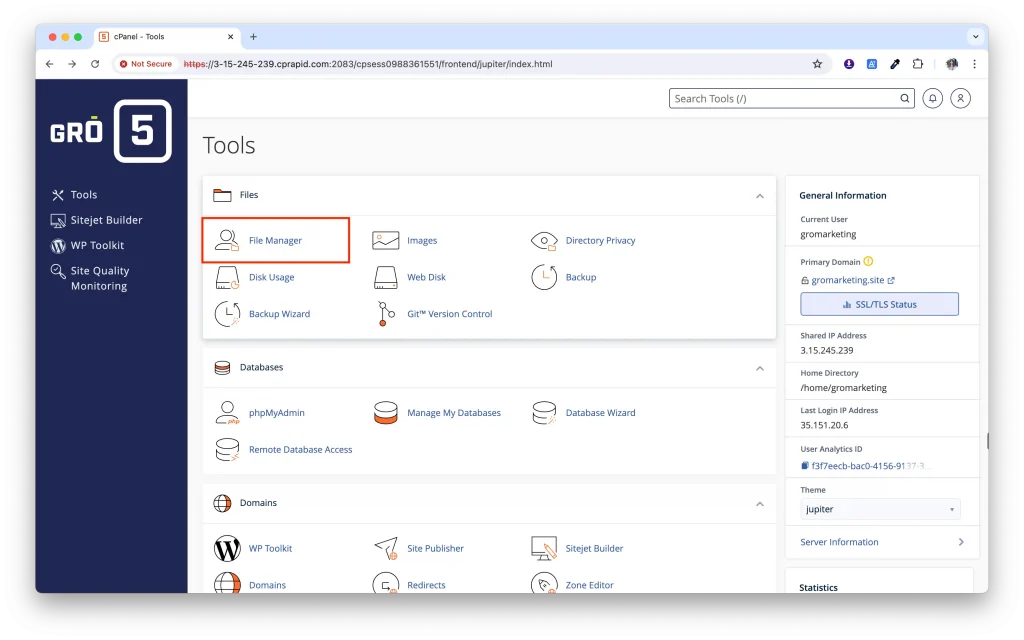
- Go to Tools > File Manager.
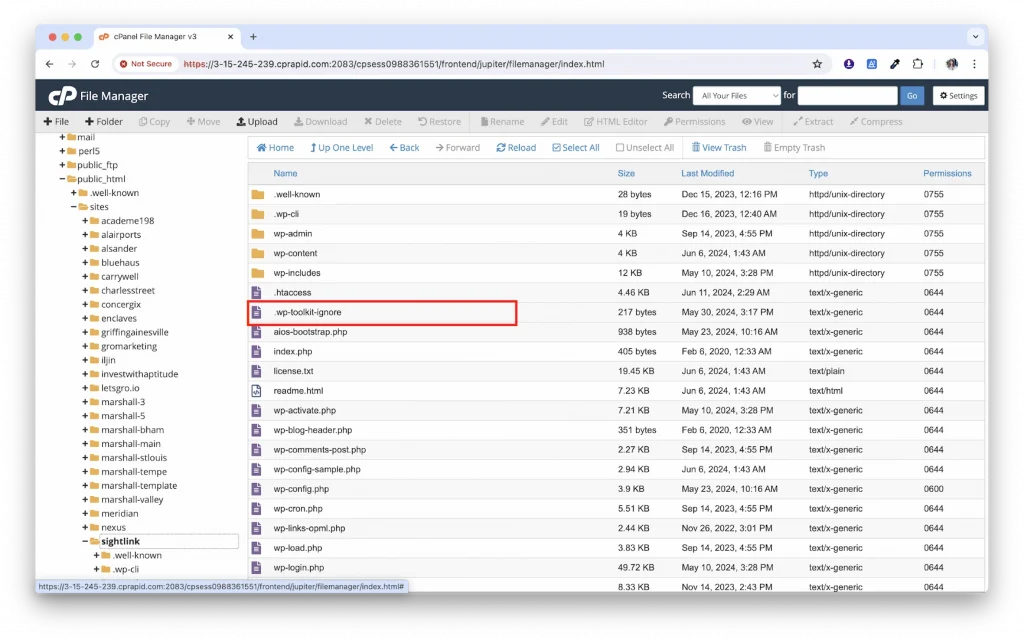
- Public-html > sites > dev site folder
- Locate the .wp-toolkit-ignore file and trash the file.
Step 7 - Import NEW SQL File
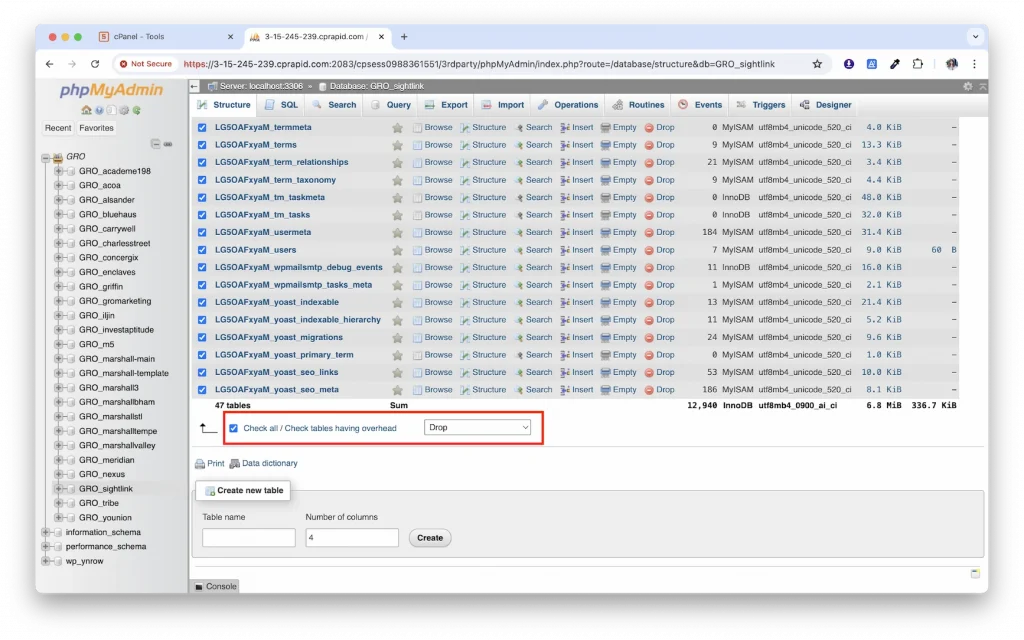
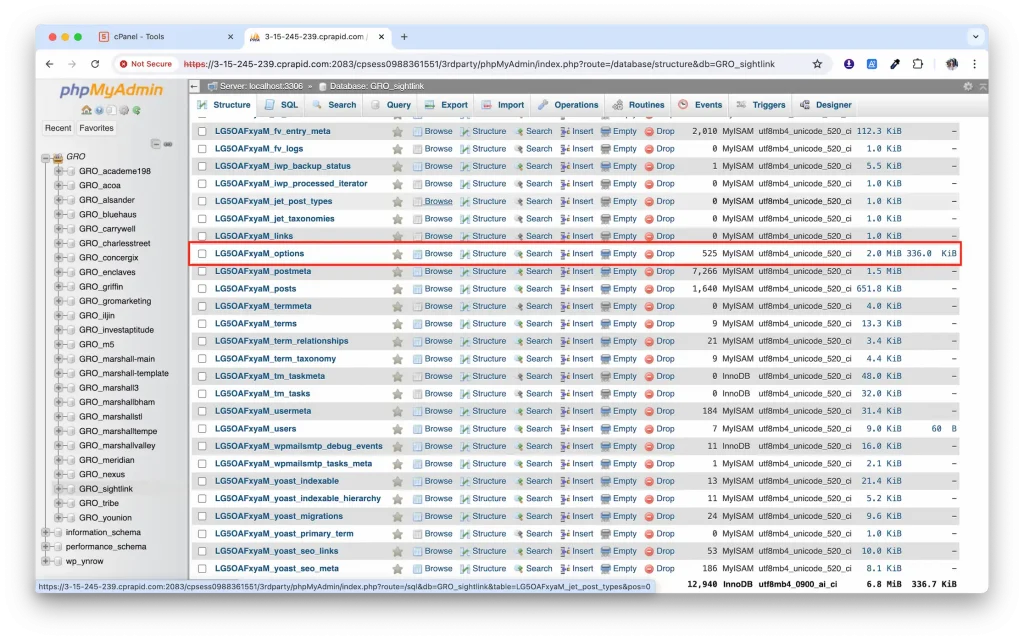
- Go back to phpMyAdmin > dev folder > Structure tab. Scroll down.
- Select Check all / Check tables having overhead
- With selected: Drop
- Select Yes.
- Command + Shift + R to refresh.
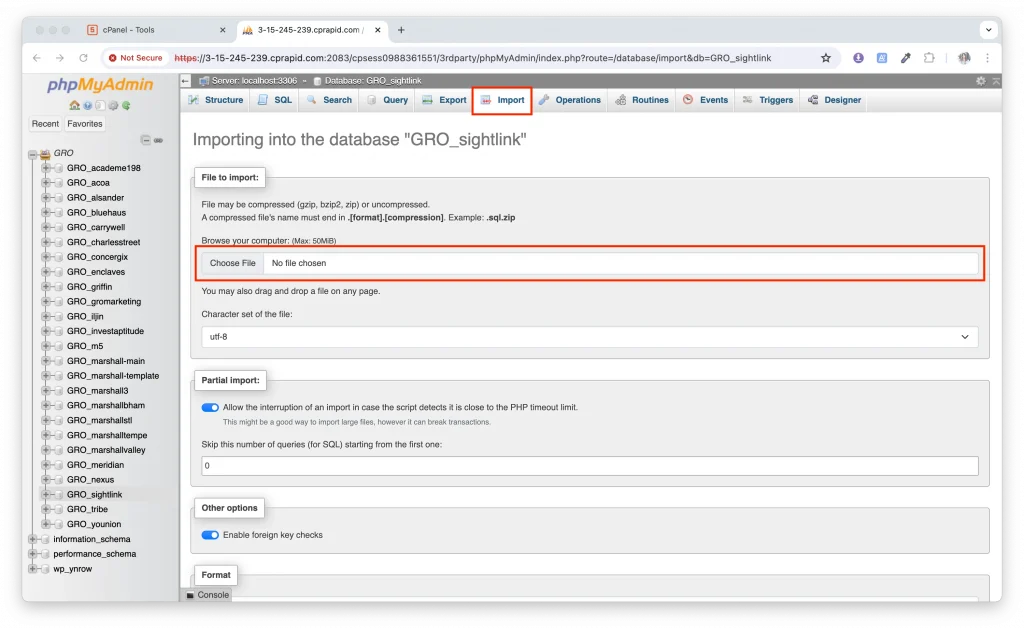
- Click into the dev site folder
- Click the Import tab
- Choose file > upload the new compressed SQL file you created from find and replace.
- Import. A success message should appear once it is uploaded.
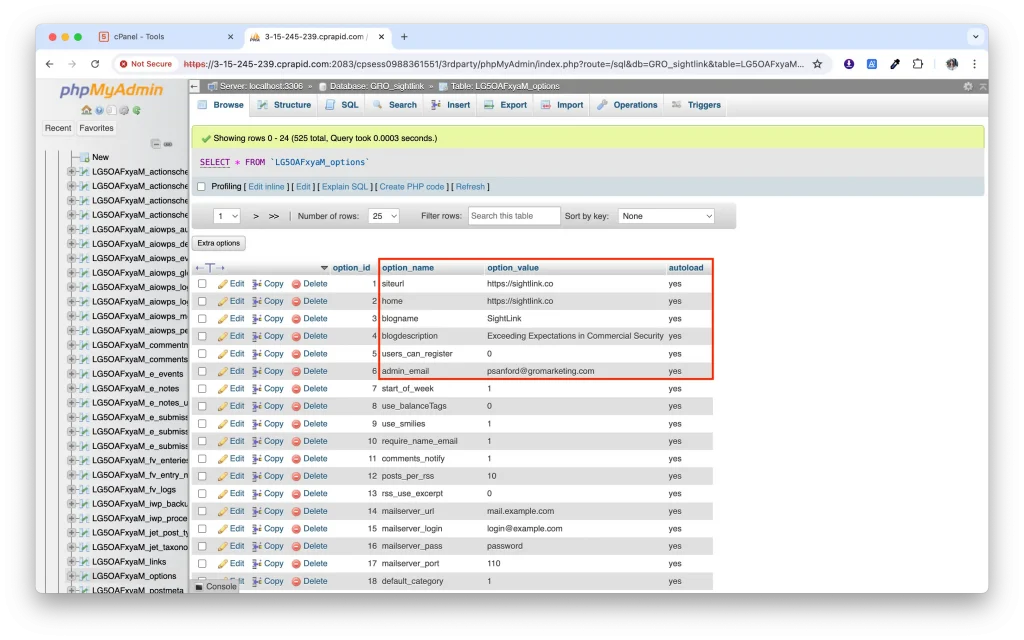
- On the left panel of phpMyAdmin, scroll down, and select xxxx_options table
- Verify live site information of site url and home, then close.
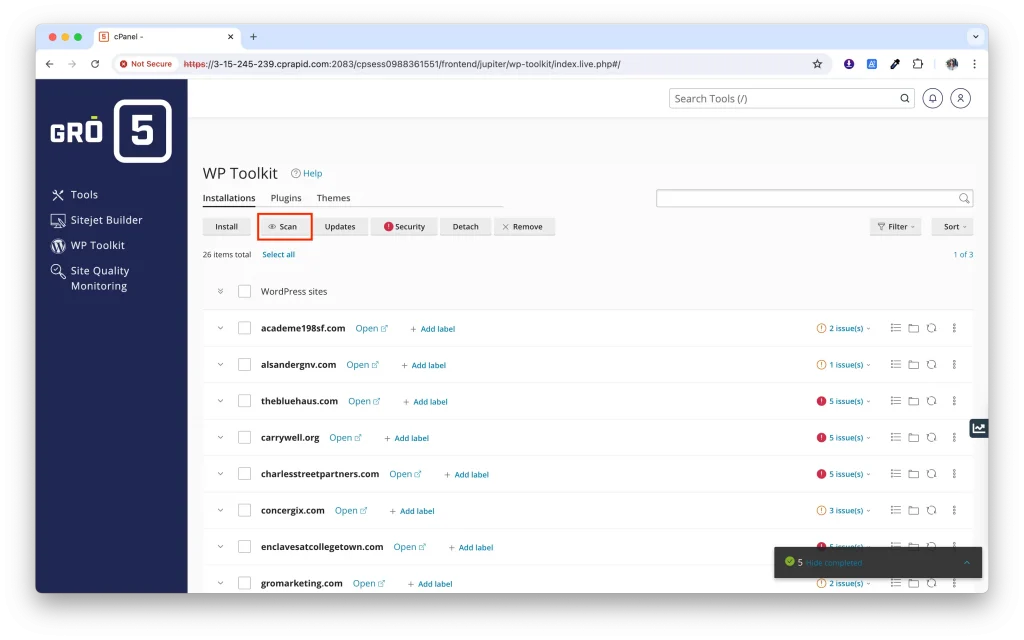
- Go back to WP Toolkit
- Click Scan. Confirm the live site is listed.
Step 8 - Update A Record IP Address
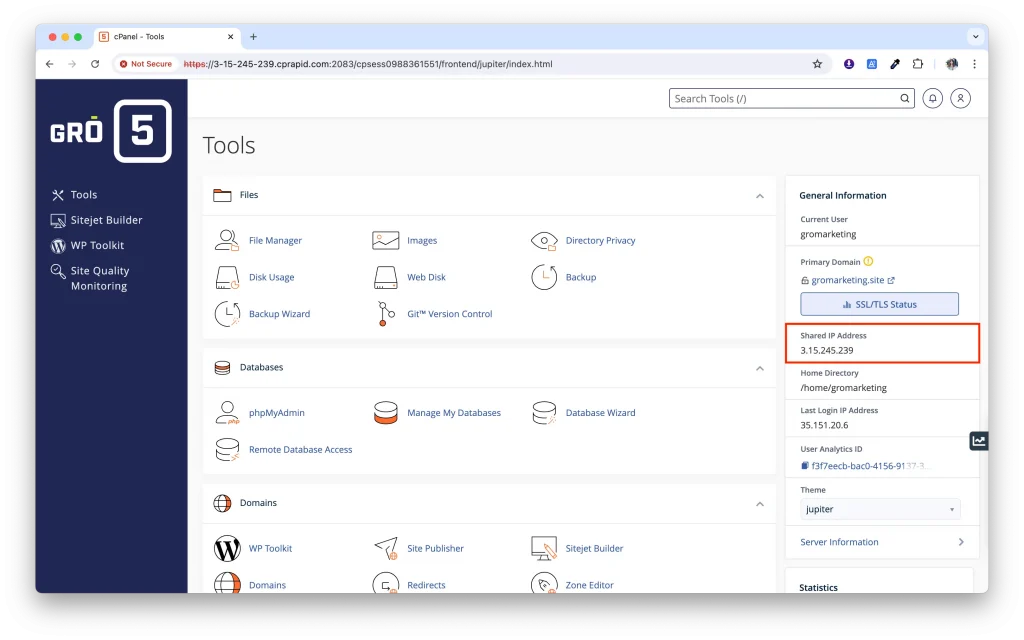
- Before leaving cPanel, copy the Shared IP Address from the dashboard
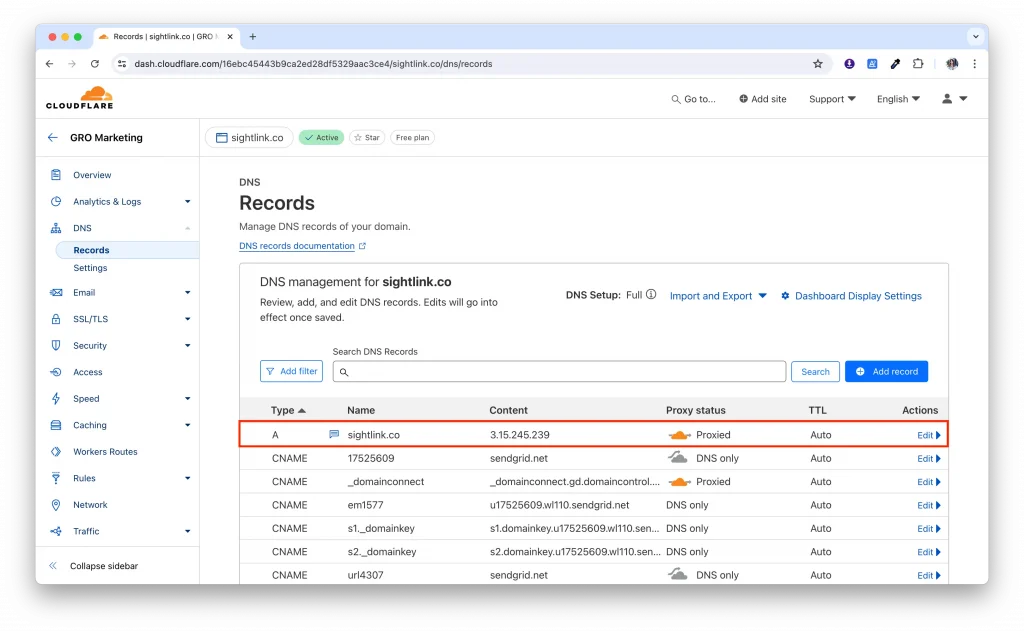
- From Cloudflare, locate your live domain and click the DNS tab
- Locate the A record associated with the domain (this should already contain an IP address)
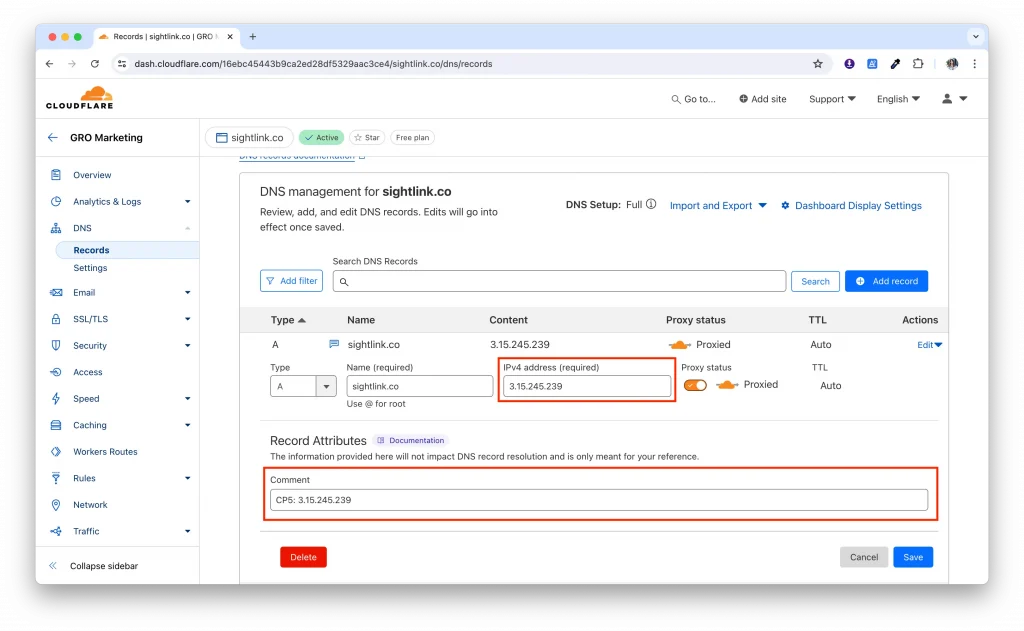
- Add a comment with the old IP and new IP.
- Click Edit and paste (overwrite) the IP address copied from cPanel
- Click the Save button
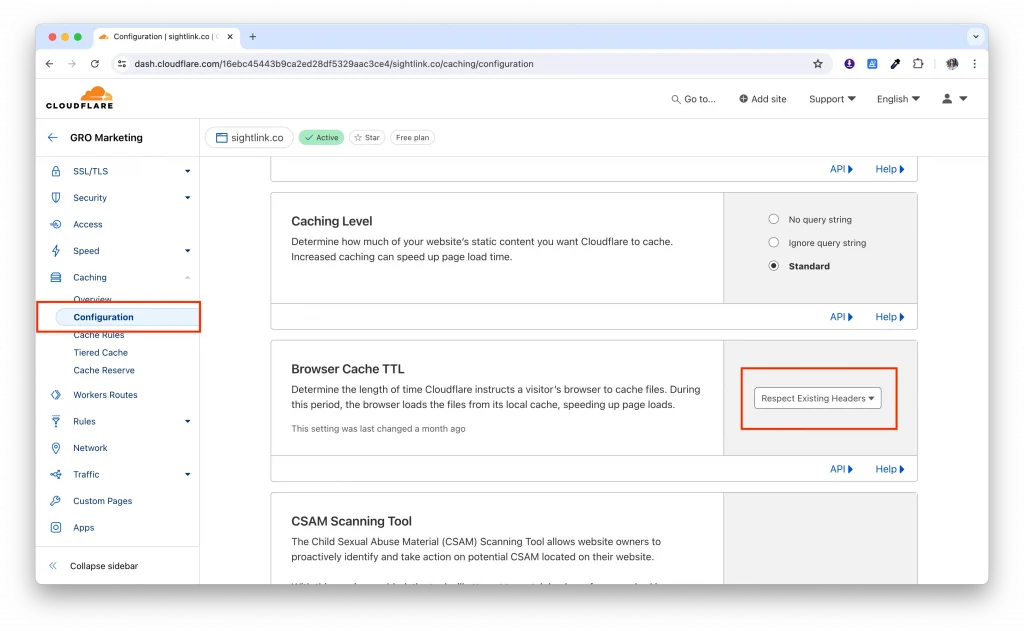
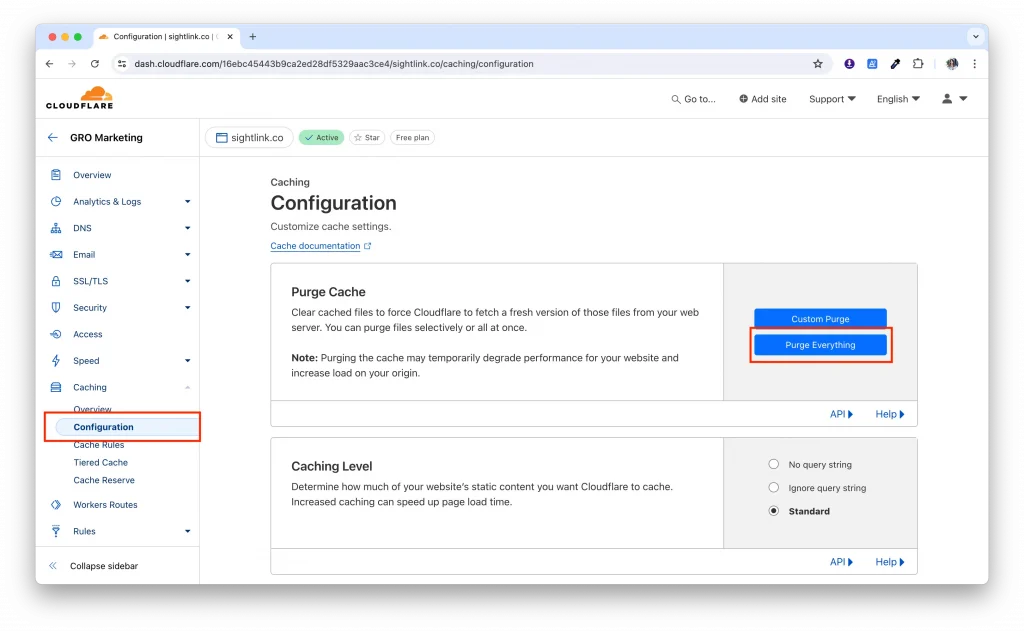
- Under Caching > Configuration, click Purge Everything
- Delete old dev DNS record from Cloudflare under gromarketing.site (i.e. xyz.gromarketing.site)
After the site launch, it’s imperative to follow the Post-Launch Checklist.
